Sitecore Experience Commerce: Adding Custom Properties to Search in BizFx

Reading Time: 8 minutes

In this article, we will review how we can extend the search components in Business Tools (BizFx) to support search functionality using custom properties for its results.

This article will not consider locale-support.

Introduction

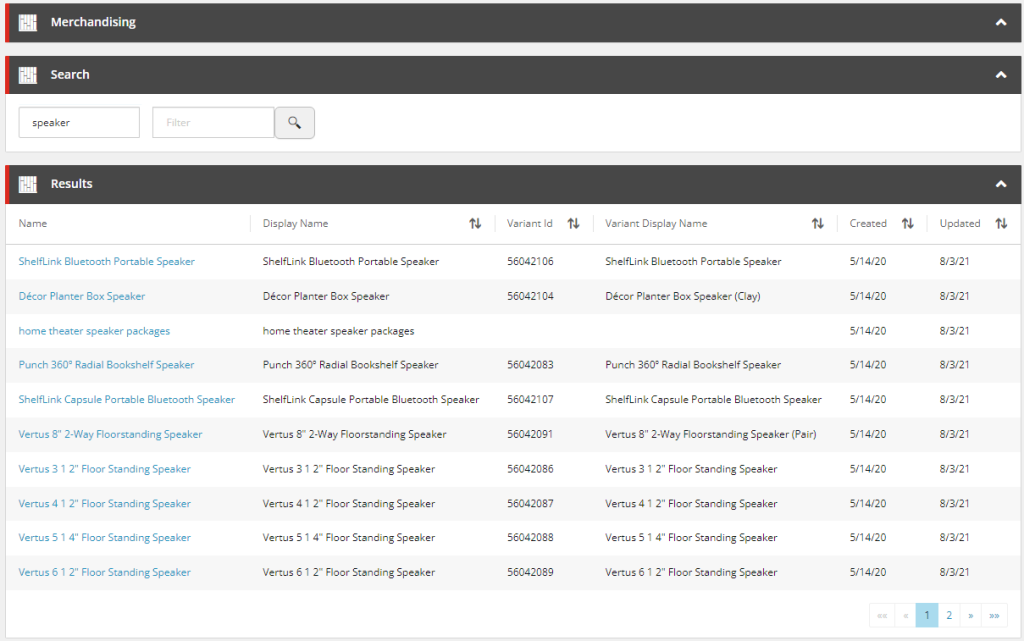
As the search functionality in BizFx is fairly primitive, from a business user perspective, and a common request is to provide customisation guidance for the search functionality in the Business Tools, we will use the Search component from the Merchandising dashboard for our example in extending the search functionality.

Figure 1: Search component in the Merchandising Dashboard.

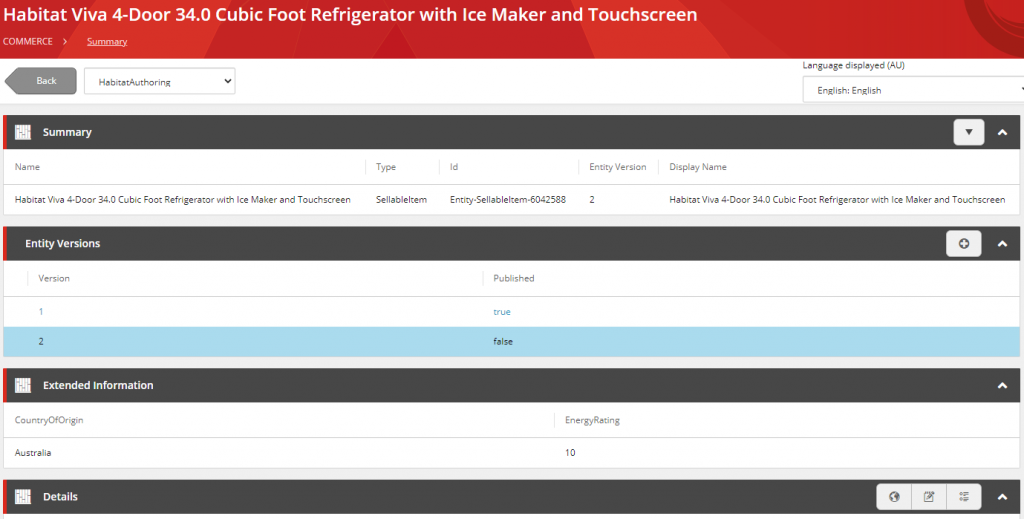
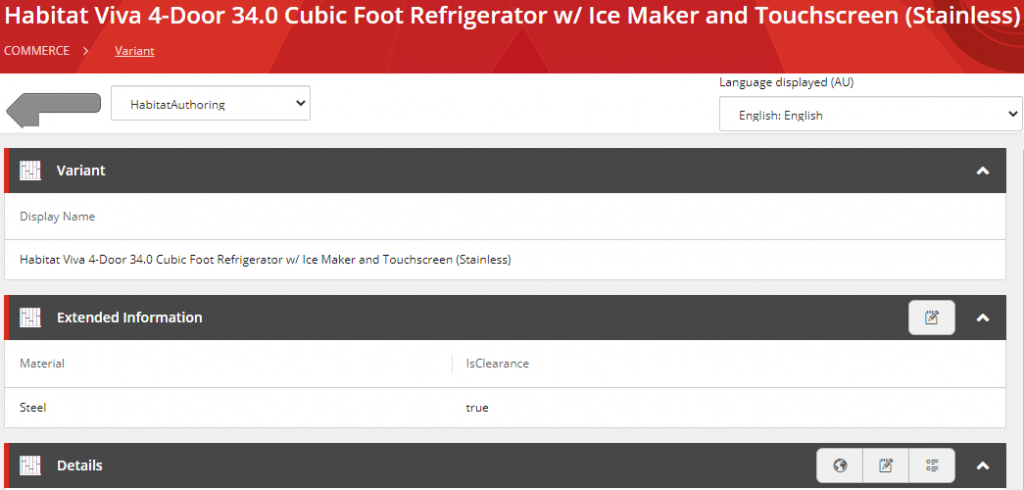
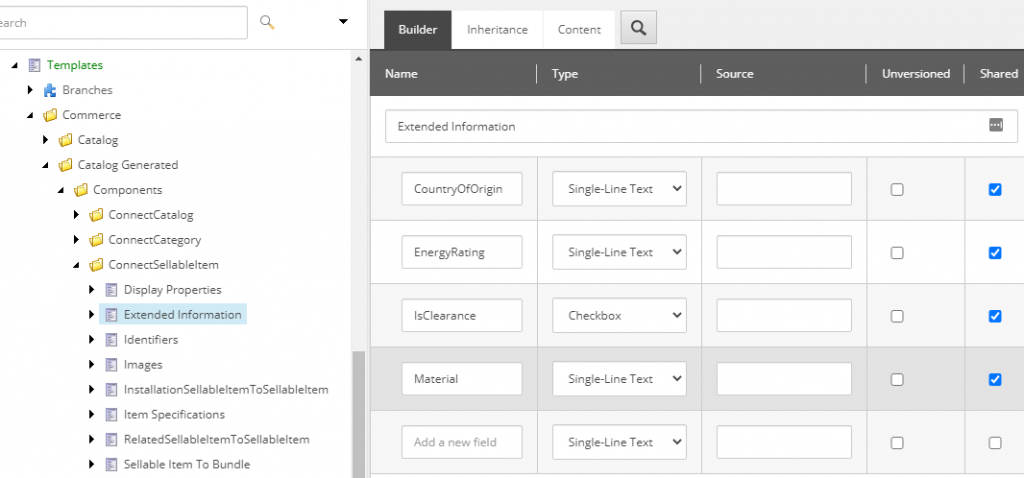
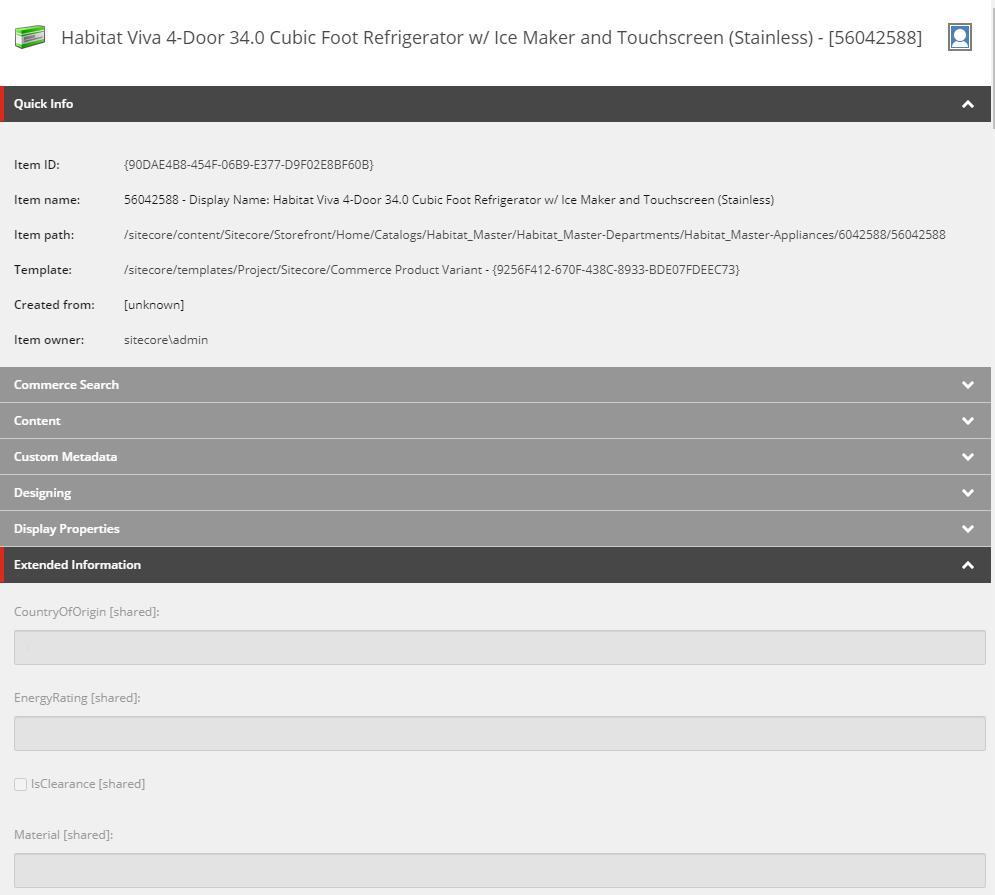
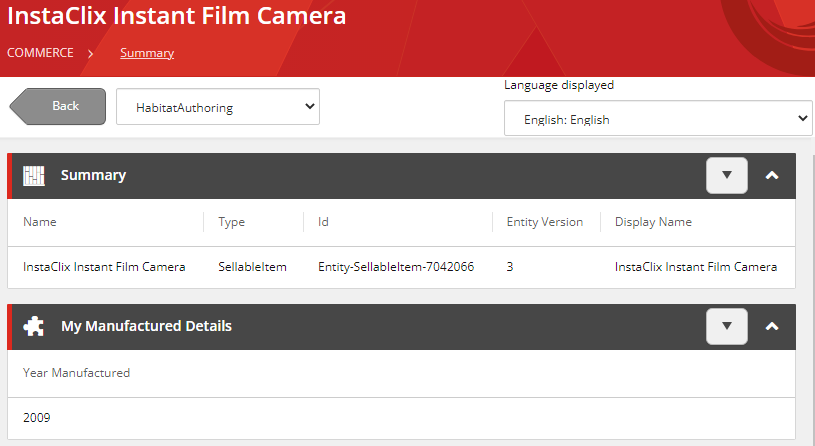
This implementation will assume the sellable items that have custom properties added via composer templates, however you will be able to adapt the solution where properties have been added programatically with components or policies.

Figure 2: A sellable item extended with a composer template.

Implementation and Configuration

Updating the Solr Schema

We first need to add our custom property to the managed schema of our Solr cores related to our search scopes. These schemas are found in the file system where Solr is deployed, under server/solr/<search scope>/conf/managed-schema.

The commerce engine uses switch on rebuild so we need to update the managed schema for both CatalogItemsScope and CatalogItemsScope-Rebuild for this instance.

    <!-- CommerceEngine Catalog -->
    <field name="displayname" type="string" indexed="true" stored="true"/>
    <field name="datecreated" type="pdate" indexed="true" stored="true"/>
    <field name="dateupdated" type="pdate" indexed="true" stored="true"/>
    <field name="artifactstoreid" type="string" indexed="true" stored="true"/>
    <field name="parentcataloglist" type="string" indexed="true" stored="true" multivalued="true"/>
    <field name="variantid" type="string" indexed="true" stored="true"/>
    <field name="variantdisplayname" type="string" indexed="true" stored="true"/>
    <field name="inventorysetids" type="string" indexed="true" stored="true"/>
    <field name="productid" type="string" indexed="true" stored="true"/>
    <field name="name" type="string" indexed="true" stored="true"/>
    <field name="yearmanufactured" type="string" indexed="true" stored="true"/>

The managed-schema that would be created with the XC instance will be organised to easily identify the commerce entity fields. While fields can be added via Solr, the managed-schema will be regenerated in a less XC friendly manner and make long-term mainentance more difficult.

With our Solr schema updated, if we are working locally, we will need to restart the Solr service, otherwise you will need to manage the deployment of the schema to your deployment environments.

Populating the Index’ Custom Fields

The commerce indexes are created and updated by both the FullIndexMinion and the IncrementalIndexMinion. It is within these minions that we can inject our custom code to populate the new custom fields with our commerce entity properties.

We’ll create a new pipeline block, called InitializeExtendedSellableItemIndexingViewBlock, which we can see the Run() method in the following snippet. We perform the necessary validation and copy our entity properties to custom index fields.

public override EntityView Run(EntityView arg, CommercePipelineExecutionContext context)
{
    // 1. Validation
    Condition.Requires(arg, nameof(arg)).IsNotNull();
    Condition.Requires(context, nameof(context)).IsNotNull();

    var argument = context.CommerceContext.GetObjects<SearchIndexMinionArgument>().FirstOrDefault();
    if (string.IsNullOrEmpty(argument?.Policy?.Name))
    {
        return arg;
    }

    // 2. Prepare Entities
    var entityItems = argument.Entities?.OfType<SellableItem>().ToList();
    if (entityItems == null || !entityItems.Any())
    {
        return arg;
    }

    // 3. Prepare custom properties
    var scopeIndexablePropertiesPolicy = IndexablePropertiesPolicy.GetPolicyByScope(context.CommerceContext, context.CommerceContext.Environment, argument.Policy.Name);
    if (scopeIndexablePropertiesPolicy?.ComposerProperties == null || !scopeIndexablePropertiesPolicy.ComposerProperties.Any())
    {
        return arg;
    }

    var searchViewNames = context.GetPolicy<KnownSearchViewsPolicy>();
    var childViews = arg.ChildViews.OfType<EntityView>().ToList();

    // 4. Iterate over each entity
    foreach (var si in argument.Entities.OfType<SellableItem>())
    {
        // 5. Get existing document entity view
        var documentView = childViews.First(v => v.EntityId.EqualsOrdinalIgnoreCase(si.Id)
            && v.Name.EqualsOrdinalIgnoreCase(searchViewNames.Document));

        // 6. Add custom fields
        AddComposerFields(si, documentView, scopeIndexablePropertiesPolicy);
    }

    return arg;
}

The highlighted section, 3. Prepare custom properties, is used for our AddComposerFields() method.

To add properties to the Solr document, we only need to register the field name and value to a new ViewProperty of the document EntityView and the platform will later translate and push this data into Solr. This would typically look like the following.

documentView.Properties.Add(new ViewProperty
{
    Name = "<Insert Field Name Here>",
    RawValue = "<Insert Field Value Here>"
});

In our AddComposerFields() implementation, we leverage our custom policy to identify and process fields from the composer templates.

protected void AddComposerFields(
    SellableItem si,
    EntityView documentView,
    IndexablePropertiesPolicy scopeIndexablePropertiesPolicy)
{
    // 1. Iterate over each composer template configuration
    foreach (var composerView in scopeIndexablePropertiesPolicy.ComposerProperties)
    {
        // 2. Get property value
        var composerEntityView = si.GetComposerViewFromName(composerView.Key);

        if (composerEntityView == null)
        {
            continue;
        }

        // 3. Iterate over each custom property to index
        foreach (var property in composerView.Value)
        {
            var value = composerEntityView.GetPropertyValue(property.PropertyName);

            if (value == null)
            {
                continue;
            }

            // 4. Add property to index document
            documentView.Properties.Add(new ViewProperty
            {
                Name = property.IndexFieldName,
                RawValue = value
            });
        }
    }
}

The implementation is made flexible by avoiding hard-coding any composer template or property names and instead using the custom IndexablePropertiesPolicy, which we append our configured policy to the SolrSearchPolicySet. In ComposerProperties we add our composer template name, e.g. "ManufacturedDetails", and then an array of composer property models, where the PropertyName represents the composer template property name and the IndexFieldName represents the Solr core field name.

{
  "$type": "Ajsuth.Sample.Catalog.Search.Engine.Policies.IndexablePropertiesPolicy, Ajsuth.Sample.Catalog.Search.Engine",
  "SearchScopeName": "CatalogItemsScope",
  "ComposerProperties": {
    "ManufacturedDetails": [
      {
        "PropertyName": "YearManfactured",
        "IndexFieldName": "yearmanufactured"
      }
    ]
  }
}

We register our pipeline block to both the full and incremental index minion pipelines.

.ConfigurePipeline<IIncrementalIndexMinionPipeline>(pipeline => pipeline
    .Add<Pipelines.Blocks.InitializeExtendedSellableItemIndexingViewBlock>()
        .After<InitializeSellableItemIndexingViewBlock>()
)

.ConfigurePipeline<IFullIndexMinionPipeline>(pipeline =>pipeline
    .Add<Pipelines.Blocks.InitializeExtendedSellableItemIndexingViewBlock>()
        .After<InitializeSellableItemIndexingViewBlock>()
)

By adding our InitializeExtendedSellableItemIndexingViewBlock after the InitializeSellableItemIndexingViewBlock rather than directly replacing and overriding the initial platform pipeline block, we may suffer a minor performance impact as we will need to interate over our entities another time, however we won’t have to copy platform code into our pipeline block, which will ultimately keep our code as clean as possible while preventing complexity for during upgrades.

We then follow our deployment process for our changes:

  1. Deploy our Solr managed-schemas and restart the Solr service to ingest the updated schemas.
  2. Deploying our Commerce Engine code to all instances.
  3. Bootstrap the Commerce Engine to ingest our IndexablePropertiesPolicy configuration.
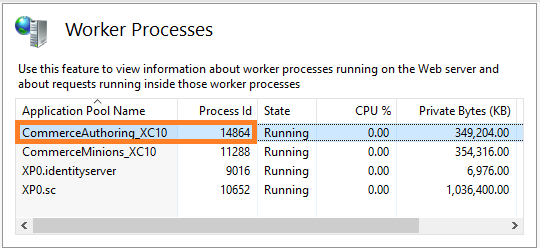
  4. Restart the minions Commerce Engine instance to consume the updated policy set.
  5. Executing the Run FullIndex Minion – Catalog Items request from postman.
  6. Verify our Solr core now how our custom field indexed.
Figure 3: yearmanufactured property added to Solr core.

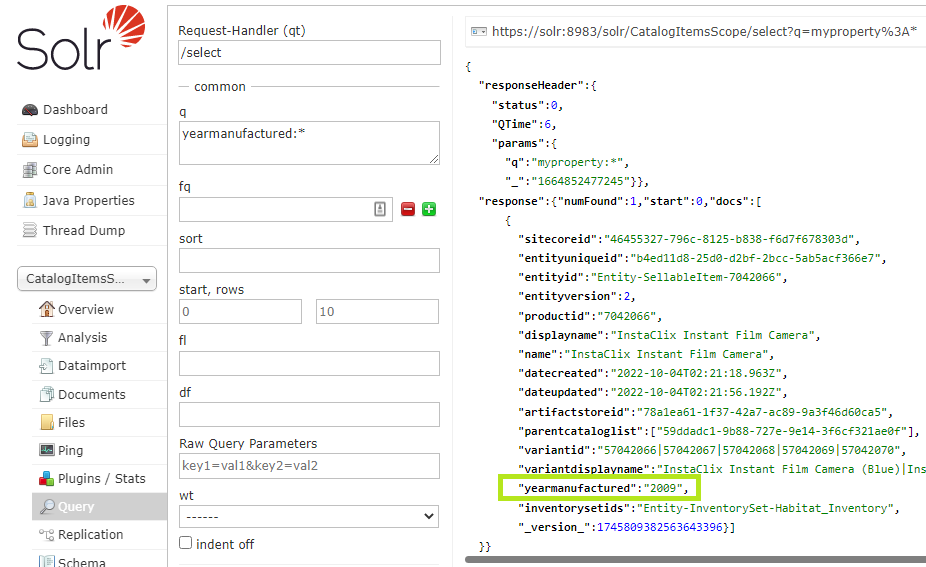
If you aren’t seeing the custom field for any indexed document check the *-Rebuild core as that may the current active core.

Searching Against Custom Fields in the Search Component

With the custom properties added to the indexes, we finally need to update the search component to include the new property as part of the search query.

Figure 4: Search does not query against the custom yearmanufactured field by default.

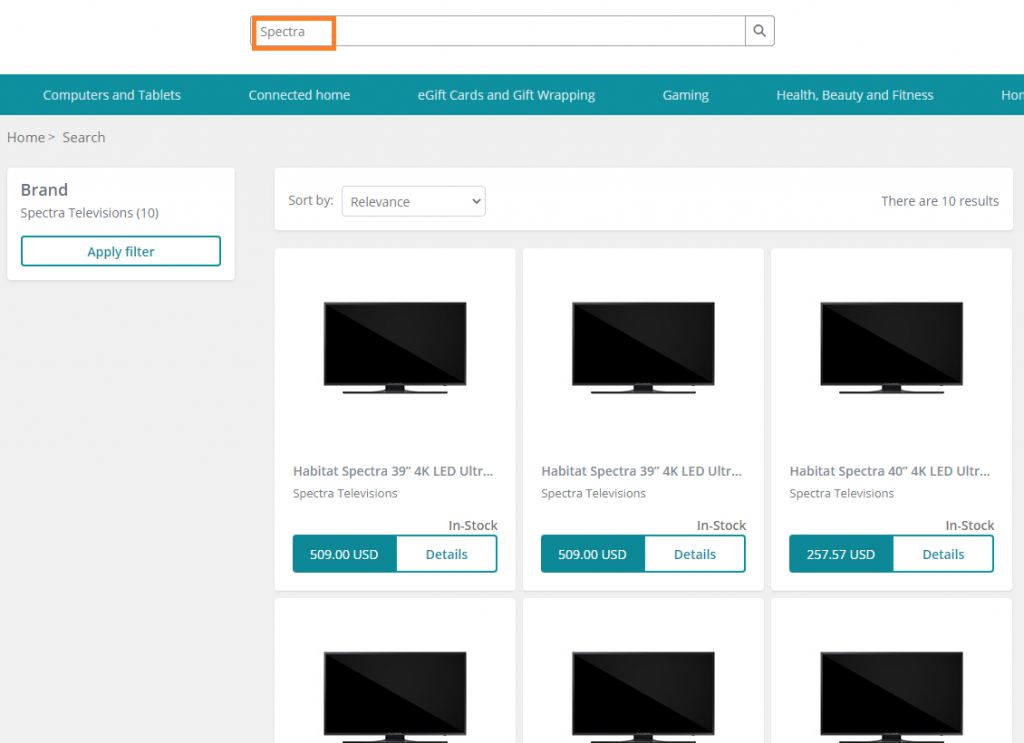
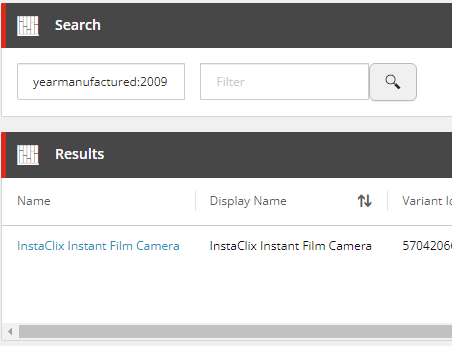
Using Solr Query Syntax

With no further customisation or configuration, we could use the Solr query syntax to apply to set the Search Term with the specific field query, e.g. yearmanufactured:2009, as the search component will process this as a raw query.

Figure 5: Search can query against the custom yearmanufactured field using Solr query syntax.

Including the Custom Field for SearchScope Queries

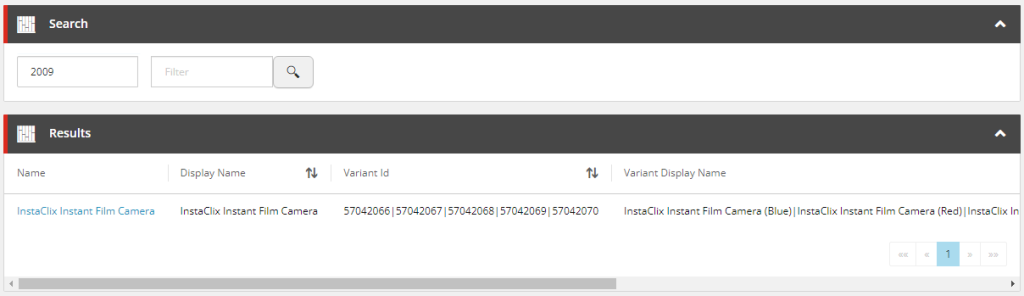
The search component queries against the Search Term properties appended to the _text_ field in Solr. If we wanted to add a custom field to default search query, then we can update the managed-schema of the Solr cores to include it. Below lists all of the fields that are used for the search queries as well as our custom field.

<copyField source="displayname" dest="_text_"/>
<copyField source="variantid" dest="_text_"/>
<copyField source="variantdisplayname" dest="_text_"/>
<copyField source="productid" dest="_text_"/>
<copyField  source="name" dest="_text_"/>
<copyField source="yearmanufactured" dest="_text_"/>

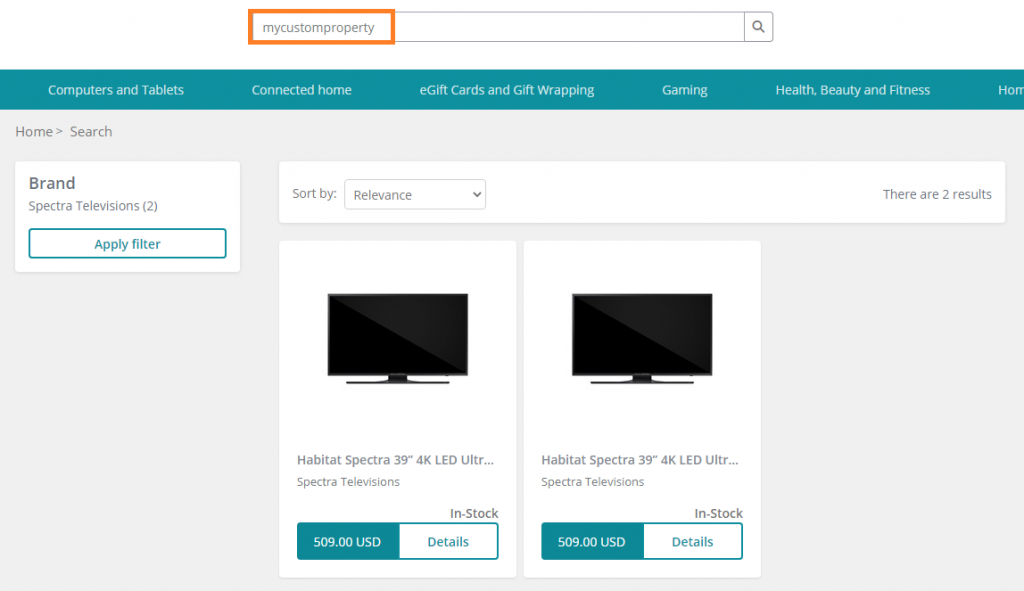
After deploying and restarting the Solr service, search component queries from the Business Tools will now query the custom fields as well in the default search.

Figure 6: Search queries against the custom yearmanufactured field by default with updated managed-schema.

Customising the Search Results

The last piece of the puzzle is to add our custom indexed fields to the Results entity view as seen below.

The Results entity view is populated with indexed commerce entity data and not raw commerce entity data.

First, we want to update the IndexablePolicy in the SearchPolicySet for our given search scope, with our custom field.

{
"$type": "Sitecore.Commerce.Plugin.Search.IndexablePolicy, Sitecore.Commerce.Plugin.Search",
"SearchScopeName": "CatalogItemsScope",
"Properties": {
  ...,
  "YearManufactured": {
    "TypeName": "System.String",
    "IsKey": false,
    "IsSearchable": true,
    "IsFilterable": true,
    "IsSortable": true,
    "IsFacetable": false,
    "IsRetrievable": true
  }
}

For our implementation purposes, we only need to be concerned about the IsRetrievable and IsSortable properties of the IndexableSettings object. The IsRetrievable property will allow us to provide a fallback property with an empty value, while the IsSortable property will configured the column to be sortable. Both follow the platform implementation pattern.

Next, I would like to tell you that we could extend the Results entity view simply by extending pipelines with additional pipeline blocks, but we will need to copy and replace the original pipeline blocks for the most consistent approach across commerce indexes. There is a ProcessDocumentSearchResultsBlock within the commerce plugins that will relate to the search scope, which we would copy into our solution. In this instance, we copy the pipeline block from the Sitecore.Commerce.Plugin.Catalog.dll.

Without re-writing the platform code, we will have to face a bit more rigid manual coding over a more automated, iterative approach to the IndexableSettings of our IndexablePolicy. The key area of the pipeline block we need to focus on is shown on line 5, where the results view properties are cleared. We need to copy our custom field from the properties before hand (1. Copy the field view property) and then repopulate the results view afterwards (3. Add desired indexed fields back into results view), which effectively strips the results view or the other indexed fields that we don’t want to render.

// 1. Copy the field view property 
var yearmanufactured = child.Properties.FirstOrDefault(p => p.Name.EqualsOrdinalIgnoreCase("YearManufactured"));

// 2. Clear the results view properties
child.Properties.Clear();

if (name != null)
{
    name.UiType = ViewsConstants.EntityLinkUiType;
}

// 3. Add desired indexed fields back into results view
child.AddViewPropertyToEntityViewOrDefault(name, retrievableProperties, CoreConstants.Name, typeof(string).FullName);
child.AddViewPropertyToEntityViewOrDefault(displayName, retrievableProperties, CoreConstants.DisplayName, typeof(string).FullName);
child.AddViewPropertyToEntityViewOrDefault(variantId, retrievableProperties, CatalogConstants.VariantId, typeof(string).FullName);
child.AddViewPropertyToEntityViewOrDefault(variantDisplayName, retrievableProperties, CatalogConstants.VariantDisplayName, typeof(string).FullName);
child.AddViewPropertyToEntityViewOrDefault(createdDate, retrievableProperties, CoreConstants.DateCreated, typeof(DateTimeOffset).FullName);
child.AddViewPropertyToEntityViewOrDefault(updatedDate, retrievableProperties, CoreConstants.DateUpdated, typeof(DateTimeOffset).FullName);
child.AddViewPropertyToEntityViewOrDefault(yearmanufactured, retrievableProperties, "YearManufactured", typeof(string).FullName);

We replace the platform pipeline block in SearchPipeline in our pipeline registrations.

.ConfigurePipeline<ISearchPipeline>(pipeline => pipeline
    .Replace<Sitecore.Commerce.Plugin.Catalog.ProcessDocumentSearchResultBlock, Pipelines.Blocks.ProcessDocumentSearchResultBlock>()
)

The platform pipeline block we are overriding is fully qualified here to to explicitly replace the correct pipeline block.

All that is left is to deploy the code, which is short looks requires:

  • Deploying our Commerce Engine code to all instances.
  • Bootstrap the Commerce Engine to ingest our updated IndexablePolicy configuration.
  • Restart the authoring Commerce Engine instance to consume the updated policy set.

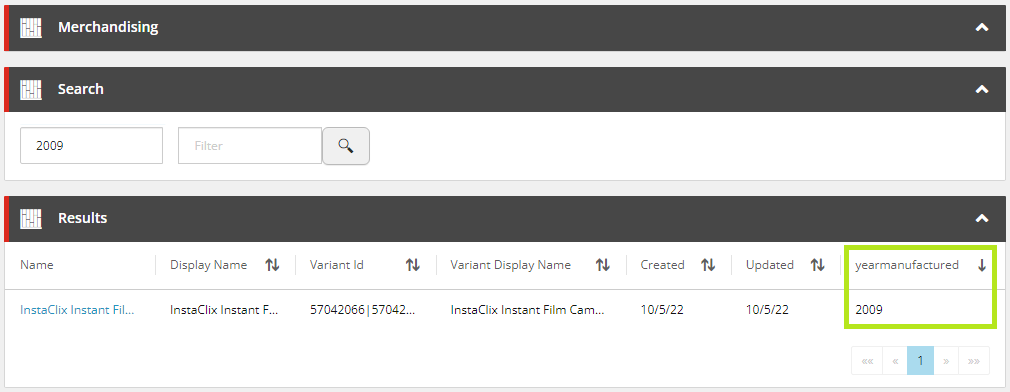
Performing our search now, we will see that we have our custom field appended to the end of the Results entity view, which can be used to sort the results.

Figure 7: The Results entity view is customised with the yearmanufactured indexed field.

Summary

While the search component of BizFx was not developed with the intention of being configurable, we have identified a few ways to customise the search component, which will hopefully cover most business user scenarios and saves us from having to implement our own search component from scratch.

References

Sitecore Experience Commerce: Extending CatalogItemBase Entities with Components

Reading Time: 11 minutes

In this article, we will review how to extend the schema of catalog, category, and sellable item (including its variants), entities by programatically creating and assigning components to them, render the components to their respective entity page in the BizFx, and allow the CommerceConnect dataprovider to consume the component data when syncing the catalog items to Sitecore.

The usage of the term ‘catalog items‘ throughout this article is a collective term referring to catalog, category and sellable item commerce entities as well as variants, a.k.a. item variation components.

Implementation Details

Components can be used as a programmatic alternative to composer templates to extend catalog items. Components can be more powerful than composer templates as developers have more control over the implementation of custom components, although the trade off requires additional development effort. Some additional highlights of differences between composer templates and components are listed below.

  • Composer templates cannot be utilised to extend variants, only the sellable items themselves, therefore components are required to extend variants.
  • Components do not require developers to create a migration plan to move composer templates between deployment environments.
  • Composer templates are restricted to a specific set of data types for custom properties, while components can utilise a larger set of data types and UI Types for improved business user experience.
  • Components require get view blocks, populate view action blocks, and do action blocks to allow business users to view and edit component properties within the Commerce Tools, whereas the composer templates requires configuration, which can be completed controlled by a business user.

Creating New Components

We first create our components that will extend our catalog items and add our custom properties.

For extending our catalog items, only samples for sellable items and variants will be provided, however to extend categories and catalogs, this would be achieved by following the sellable item samples and substituting sellable item references with that of category or catalog references.

public class SellableItemExtensionComponent : Component
{
    public string CountryOfOrigin { get; set; } = "Australia";
    public int EnergyRating { get; set; } = 10;
}
public class VariationExtensionComponent : Component
{
    public string Material { get; set; } = "Steel";
    public bool IsClearance{ get; set; } = true;
}

Default values for properties are usually omitted in implementations, however values have been assigned here to demonstrate reading these values for the get view blocks in the next step.

Rendering Components in BizFx Using Get View Blocks

To render the properties in the Commerce Tools, we add entity views to the appropriate Merchandising pages using get view blocks and registering them to IGetEntityViewPipeline.

Important: Ensure component property names match view property names.
When translating components to entity views, it is not only good practice to assign the name of the view property with the corresponding name of component property, but it is crucial for Commerce Connect data provider to populate the values of the Sitecore catalog items. The data provider effectively maps properties by matching names if the Sitecore catalog item field names to the commerce entity properties from its representation within a JToken.

public class GetSellableItemExtensionViewBlock : SyncPipelineBlock<EntityView, EntityView, CommercePipelineExecutionContext>
{
    public override EntityView Run(EntityView entityView, CommercePipelineExecutionContext context)
    {
        // Ensure parameters are provided
        Condition.Requires(entityView, nameof(entityView)).IsNotNull();
        Condition.Requires(context, nameof(context)).IsNotNull();

        var viewsPolicy = context.GetPolicy<KnownCatalogViewsPolicy>();
        var request = context.CommerceContext.GetObject<EntityViewArgument>();

        // Validate that the page entity is a sellable item
        // Validate the view name matches the requested page
        if (!(request?.Entity is SellableItem) ||
            !request.ViewName.EqualsOrdinalIgnoreCase(viewsPolicy.Master))
        {
            return entityView;
        }

        var sellableItem = request.Entity as SellableItem;
        var extensionComponent = sellableItem.GetComponent<SellableItemExtensionComponent>();

        // Create an entity view to hold the component properties
        var propertiesEntityView = new EntityView
        {
            DisplayName = "Extended Information",
            Name = "Extended Information",
            EntityId = entityView.EntityId,
            EntityVersion = entityView.EntityVersion,
            ItemId = entityView.ItemId
        };

        // Add the entity view as a child of the page entity view
        entityView.ChildViews.Add(propertiesEntityView);

        // Add the component properties to the entity view
        propertiesEntityView.Properties = new List<ViewProperty>
        {
            CreateViewProperty(nameof(extensionComponent.CountryOfOrigin), extensionComponent.CountryOfOrigin),
            CreateViewProperty(nameof(extensionComponent.EnergyRating), extensionComponent.EnergyRating)
        };

        return entityView;
    }

    /// Helper method to simplify ViewProperty creation
    private ViewProperty CreateViewProperty(string name, object value, string uiType = "")
    {
        return new ViewProperty
        {
            Name = name,
            RawValue = value,
            UiType = uiType
        };
    }
}
public class GetVariationExtensionViewBlock : SyncPipelineBlock<EntityView, EntityView, CommercePipelineExecutionContext>
{
    public override EntityView Run(EntityView entityView, CommercePipelineExecutionContext context)
    {
        // Ensure parameters are provided
        Condition.Requires(entityView, nameof(entityView)).IsNotNull();
        Condition.Requires(context, nameof(context)).IsNotNull();

        var viewsPolicy = context.GetPolicy<KnownCatalogViewsPolicy>();
        var request = context.CommerceContext.GetObject<EntityViewArgument>();

        // Validate that the page entity is a sellable item
        // Validate the view name matches the requested page
        if (!(request?.Entity is SellableItem) ||
            !request.ViewName.EqualsOrdinalIgnoreCase(viewsPolicy.Variant))
        {
            return entityView;
        }

        var sellableItem = request.Entity as SellableItem;
        // Get the component from the sellable items variant (ItemId) and do not inherit from the sellable item if not present on the variant
        var extensionComponent = sellableItem.GetComponent<VariationExtensionComponent>(entityView.ItemId, false);

        // Create an entity view to hold the component properties
        var propertiesEntityView = new EntityView
        {
            DisplayName = "Extended Information",
            Name = "Extended Information",
            EntityId = entityView.EntityId,
            EntityVersion = entityView.EntityVersion,
            ItemId = entityView.ItemId
        };

        entityView.ChildViews.Add(propertiesEntityView);

        // Add the entity view as a child of the page entity view
        propertiesEntityView.Properties = new List<ViewProperty>
        {
            CreateViewProperty(nameof(extensionComponent.Material), extensionComponent.Material),
            CreateViewProperty(nameof(extensionComponent.IsClearance), extensionComponent.IsClearance)
        };

        return entityView;
    }

    /// Helper method to simplify ViewProperty creation
    private ViewProperty CreateViewProperty(string name, object value, string uiType = "")
    {
        return new ViewProperty
        {
            Name = name,
            RawValue = value,
            UiType = uiType
        };
    }
}

The get view blocks are registered to IGetEntityViewPipeline in the pipeline configuration.

public class ConfigureSitecore : IConfigureSitecore
{
    public void ConfigureServices(IServiceCollection services)
    {
        var assembly = Assembly.GetExecutingAssembly();

        services.RegisterAllPipelineBlocks(assembly);
        services.RegisterAllCommands(assembly);
        services.Sitecore().Rules(config => config.Registry(registry => registry.RegisterAssembly(assembly)));
        services.Sitecore().Pipelines(pipelines => pipelines

            .ConfigurePipeline<IGetEntityViewPipeline>(pipeline => pipeline
                .Add<Pipelines.Blocks.GetSellableItemExtensionViewBlock>().After<PopulateEntityVersionBlock>()
                .Add<Pipelines.Blocks.GetVariationExtensionViewBlock>().After<PopulateEntityVersionBlock>()
            )

        );
    }
}

Upon deployment, we can see the new entity views appear on the Sellable Item and Variant pages with our default values.

SellableItemExtensionComponent rendered as Extended Information on the Sellable Item Details Page.
VariationExtensionComponent rendered as Extended Information on the Variant Details Page.

View property display names can be managed via Commerce terms under the Commerce Control Panel in the Sitecore Content Editor, allowing language specific user-friendly names to be configured for the property names rendered in the entity views.

Registering Components for Sitecore Catalog Item Templates

With components translated to entity views and rendered on our Merchandising pages, we need to register our component properties so that the Commerce Connect data provider can updating the commerce data templates in Sitecore.

In the screenshot below, registered components can be seen under /sitecore/templates/Commerce/Catalog Generated/Components/ConnectSellableItem, which are registered by the data provider to the ConnectSellableItem template.

Both sellable items and variants share the same template. This means that properties registered to a sellable item will appear on the variant and vice versa.

To register our components, we simply need to include an additional view name in the validation section of our get view blocks. This view name would be either ConnectCatalog, ConnectCategory, or ConnectSellableItem, depending of the entity context.

if (!(request?.Entity is SellableItem) ||
    (!request.ViewName.EqualsOrdinalIgnoreCase(viewsPolicy.Master) &&
    !request.ViewName.EqualsOrdinalIgnoreCase(viewsPolicy.ConnectSellableItem)))
{
    return entityView;
}
if (!(request?.Entity is SellableItem) ||
    (!request.ViewName.EqualsOrdinalIgnoreCase(viewsPolicy.Variant) &&
    !request.ViewName.EqualsOrdinalIgnoreCase(viewsPolicy.ConnectSellableItem)))
{
    return entityView;
}

We should now see our components registered as templates in Sitecore.

Once the changes have been deployed, if the changes are not reflected in Sitecore, run the Update Data Templates command from the Commerce ribbon menu.

As we have created the entity view with the name ‘Extended Information’ for both sellable items and variants, properties are merged into a single template.

Populating Component Property Values on Sitecore Items

Our templates have been generated in Sitecore, however if we look at a sellable item or variant Sitecore item, we will find that the values have not been populated. This is because the data provider uses different Commerce Engine APIs to generate the templates and populate the Sitecore catalog item property values.

In our get view block examples, GetComponent<SellableItemExtensionComponent>() is creating a new component, but is not persisted to the sellable item and its variants. The data provider populates Sitecore items from each instance of the commerce entity, rather than our entity view representation of the commerce entity, which is why no values are populated at this time.

Important: Ensure component properties are unique across the commerce entity.
The data provider essentially flattens the commerce entity when populating the Sitecore catalog items. This means that if a property with the same name exists multiple times across the commerce entity and its nested component properties, the data provider will use the first instance to populate the Sitecore catalog items.

Sitecore Content Editor: Extended Information values have not been populated

In order for us to populate the values, we need to take a step back to populate and persist property values to the catalog items in the Commerce Engine.

First, we will register populate view actions blocks, containing an edit action, to the Extended Information entity views in the Merchandising pages.

public class PopulateSellableItemExtensionViewActionsBlock : SyncPipelineBlock<EntityView, EntityView, CommercePipelineExecutionContext>
{
    public override EntityView Run(EntityView entityView, CommercePipelineExecutionContext context)
    {
        // Ensure parameters are provided
        Condition.Requires(entityView, nameof(entityView)).IsNotNull();

        var viewsPolicy = context.GetPolicy<KnownCatalogViewsPolicy>();
        var request = context.CommerceContext.GetObject<EntityViewArgument>();

        // Validate the context of the request, i.e. entity, view name, and action name
        if (!(request?.Entity is SellableItem) ||
            !request.ViewName.EqualsOrdinalIgnoreCase(viewsPolicy.Master) ||
            !entityView.Name.EqualsOrdinalIgnoreCase("Extended Information") ||
            !string.IsNullOrEmpty(request.ForAction))
        {
            return entityView;
        }

        // Add action to entity view
        var actionPolicy = entityView.GetPolicy<ActionsPolicy>();
        actionPolicy.Actions.Add(
            new EntityActionView
            {
                Name = "EditExtensionProperties",
                DisplayName = "Edit Extension Properties",
                Description = "Edit Extension Properties",
                IsEnabled = true,
                EntityView = "ExtensionProperties",
                Icon = "edit"
            });
                

        return entityView;
    }
}
public class PopulateVariationExtensionViewActionsBlock : SyncPipelineBlock<EntityView, EntityView, CommercePipelineExecutionContext>
{
    /// <summary>Executes the pipeline block's code logic.</summary>
    /// <param name="entityView">The entity view.</param>
    /// <param name="context">The context.</param>
    /// <returns>The <see cref="EntityView"/>.</returns>
    public override EntityView Run(EntityView entityView, CommercePipelineExecutionContext context)
    {
        // Ensure parameters are provided
        Condition.Requires(entityView, nameof(entityView)).IsNotNull();

        var viewsPolicy = context.GetPolicy<KnownCatalogViewsPolicy>();
        var request = context.CommerceContext.GetObject<EntityViewArgument>();

        // Validate the context of the request, i.e. entity, view name, and action name
        if (!(request?.Entity is SellableItem) ||
            !request.ViewName.EqualsOrdinalIgnoreCase(viewsPolicy.Variant) ||
            !entityView.Name.EqualsOrdinalIgnoreCase("Extended Information") ||
            !string.IsNullOrEmpty(request.ForAction))
        {
            return entityView;
        }

        // Add action to entity view
        var actionPolicy = entityView.GetPolicy<ActionsPolicy>();
        actionPolicy.Actions.Add(
            new EntityActionView
            {
                Name = "EditExtensionProperties",
                DisplayName = "Edit Extension Properties",
                Description = "Edit Extension Properties",
                IsEnabled = true,
                EntityView = "ExtensionProperties",
                Icon = "edit"
            });
                

        return entityView;
    }
}
services.Sitecore().Pipelines(pipelines => pipelines

    .ConfigurePipeline<IPopulateEntityViewActionsPipeline>(pipeline => pipeline
        .Add<Pipelines.Blocks.PopulateSellableItemExtensionViewActionsBlock>().After<InitializeEntityViewActionsBlock>()
        .Add<Pipelines.Blocks.PopulateVariationExtensionViewActionsBlock>().After<InitializeEntityViewActionsBlock>()
    )

);

The get view blocks created earlier are then amended and refactored to include support for the create/edit action, which will render the entity view in the modal.

public override EntityView Run(EntityView entityView, CommercePipelineExecutionContext context)
{
    // Ensure parameters are provided
    Condition.Requires(entityView, nameof(entityView)).IsNotNull();
    Condition.Requires(context, nameof(context)).IsNotNull();

    var viewsPolicy = context.GetPolicy<KnownCatalogViewsPolicy>();
    var request = context.CommerceContext.GetObject<EntityViewArgument>();

    // Determine the context of rendering the entity view, e.g. create/edit or view (page or via commerce context)
    var isViewAction = (request.ViewName.EqualsOrdinalIgnoreCase(viewsPolicy.Master) ||
        request.ViewName.EqualsOrdinalIgnoreCase(viewsPolicy.ConnectSellableItem)) &&
        string.IsNullOrWhiteSpace(request.ForAction);
    var isEditAction = request.ViewName.EqualsOrdinalIgnoreCase("ExtensionProperties") && request.ForAction.EqualsOrdinalIgnoreCase("EditExtensionProperties");

    // Validate the context of the request, i.e. entity, view name, and action name
    if (!(request?.Entity is SellableItem) ||
        (!isViewAction &&
        !isEditAction))
    {
        return entityView;
    }

    var sellableItem = request.Entity as SellableItem;
    var extensionComponent = sellableItem.GetComponent<SellableItemExtensionComponent>();

    var propertiesEntityView = entityView;
    if (isViewAction)
    {
        // Create an entity view to host the component properties
        propertiesEntityView = new EntityView
        {
            DisplayName = "Extended Information",
            Name = "Extended Information",
            EntityId = entityView.EntityId,
            EntityVersion = entityView.EntityVersion,
            ItemId = entityView.ItemId
        };

        // Add the entity view as a child of the current entity view
        entityView.ChildViews.Add(propertiesEntityView);
    }
            
    // Add the component properties to the entity view
    propertiesEntityView.Properties = new List<ViewProperty>
    {
        CreateViewProperty(nameof(extensionComponent.CountryOfOrigin), extensionComponent.CountryOfOrigin),
        CreateViewProperty(nameof(extensionComponent.EnergyRating), extensionComponent.EnergyRating)
    };

    return entityView;
}
public override EntityView Run(EntityView entityView, CommercePipelineExecutionContext context)
{
    // Ensure parameters are provided
    Condition.Requires(entityView, nameof(entityView)).IsNotNull();
    Condition.Requires(context, nameof(context)).IsNotNull();

    var viewsPolicy = context.GetPolicy<KnownCatalogViewsPolicy>();
    var request = context.CommerceContext.GetObject<EntityViewArgument>();

    // Determine the context of rendering the entity view, e.g. create/edit or view (page or via commerce context)
    var isViewAction = (request.ViewName.EqualsOrdinalIgnoreCase(viewsPolicy.Variant) ||
        request.ViewName.EqualsOrdinalIgnoreCase(viewsPolicy.ConnectSellableItem)) &&
        string.IsNullOrWhiteSpace(request.ForAction);
    var isEditAction = request.ViewName.EqualsOrdinalIgnoreCase("ExtensionProperties") && request.ForAction.EqualsOrdinalIgnoreCase("EditExtensionProperties");

    // Validate the context of the request, i.e. entity, view name, and action name
    if (!(request?.Entity is SellableItem) ||
        (!isViewAction &&
        !isEditAction))
    {
        return entityView;
    }

    var sellableItem = request.Entity as SellableItem;
    // Get the component from the sellable items variant (ItemId) and do not inherit from the sellable item if not present on the variant
    var extensionComponent = sellableItem.GetComponent<VariationExtensionComponent>(entityView.ItemId, false);

    var propertiesEntityView = entityView;
    if (isViewAction)
    {
        // Create an entity view to hold the component properties
        propertiesEntityView = new EntityView
        {
            DisplayName = "Extended Information",
            Name = "Extended Information",
            EntityId = entityView.EntityId,
            EntityVersion = entityView.EntityVersion,
            ItemId = entityView.ItemId
        };

        // Add the entity view as a child of the current entity view
        entityView.ChildViews.Add(propertiesEntityView);
    }

    // Add the component properties to the entity view
    propertiesEntityView.Properties = new List<ViewProperty>
    {
        CreateViewProperty(nameof(extensionComponent.Material), extensionComponent.Material),
        CreateViewProperty(nameof(extensionComponent.ReleaseDate), extensionComponent.ReleaseDate, "FullDateTime")
    };

    return entityView;
}

The default values from the components are also removed to provide a true representation of the catalog item property values that are persisted to the database.

public class SellableItemExtensionComponent : Component
{
    public string CountryOfOrigin { get; set; }
    public int EnergyRating { get; set; }
}
public class VariationExtensionComponent : Component
{
    public string Material { get; set; }
    public bool isClearance { get; set; }
}

To persist the changes made to the Edit Extension Properties entity view, do action blocks are responsibile for processing the entity view submission action, which in this case is translating the entity view properties back to the component on the commerce entity and then persisting it.

public class DoActionEditSellableItemExtensionViewBlock : AsyncPipelineBlock<EntityView, EntityView, CommercePipelineExecutionContext>
{
    protected CommerceCommander Commander { get; set; }

    public DoActionEditSellableItemExtensionViewBlock(CommerceCommander commander)
    {
        this.Commander = commander;
    }

    public override async Task<EntityView> RunAsync(EntityView entityView, CommercePipelineExecutionContext context)
    {
        // Ensure parameters are provided
        Condition.Requires(entityView, nameof(entityView)).IsNotNull();

        var viewsPolicy = context.GetPolicy<KnownCatalogViewsPolicy>();

        // Validate the context of the request, i.e. entity, view name, and action name
        var entity = context.CommerceContext.GetObject<CommerceEntity>(p => p.Id.EqualsOrdinalIgnoreCase(entityView.EntityId));
        if (!(entity is SellableItem) ||
            !entityView.Name.EqualsOrdinalIgnoreCase("ExtensionProperties") ||
            !entityView.Action.EqualsOrdinalIgnoreCase("EditExtensionProperties") ||
            !string.IsNullOrWhiteSpace(entityView.ItemId))
        {
            return entityView;
        }

        var sellableItem = entity as SellableItem;
        var extensionComponent = sellableItem.GetComponent<SellableItemExtensionComponent>();

        // Assign component property values from the entity view property values
        extensionComponent.CountryOfOrigin = entityView.GetPropertyValueByName(nameof(extensionComponent.CountryOfOrigin));
        extensionComponent.EnergyRating = int.Parse(entityView.GetPropertyValueByName(nameof(extensionComponent.EnergyRating)));

        // Persist the changes to the sellable item
        await Commander.PersistEntity(context.CommerceContext, sellableItem).ConfigureAwait(false);

        return entityView;
    }
}
public class DoActionEditVariationExtensionViewBlock : AsyncPipelineBlock<EntityView, EntityView, CommercePipelineExecutionContext>
{
    protected CommerceCommander Commander { get; set; }

    public DoActionEditVariationExtensionViewBlock(CommerceCommander commander)
    {
        this.Commander = commander;
    }

    public override async Task<EntityView> RunAsync(EntityView entityView, CommercePipelineExecutionContext context)
    {
        // Ensure parameters are provided
        Condition.Requires(entityView, nameof(entityView)).IsNotNull();

        var viewsPolicy = context.GetPolicy<KnownCatalogViewsPolicy>();

        // Validate the context of the request, i.e. entity, view name, and action name
        var entity = context.CommerceContext.GetObject<CommerceEntity>(p => p.Id.EqualsOrdinalIgnoreCase(entityView.EntityId));
        if (!(entity is SellableItem) ||
            !entityView.Name.EqualsOrdinalIgnoreCase("ExtensionProperties") ||
            !entityView.Action.EqualsOrdinalIgnoreCase("EditExtensionProperties") ||
            string.IsNullOrWhiteSpace(entityView.ItemId))
        {
            return entityView;
        }

        var sellableItem = entity as SellableItem;
        var extensionComponent = sellableItem.GetComponent<VariationExtensionComponent>(entityView.ItemId, false);

        // Assign component property values from the entity view property values
        extensionComponent.Material = entityView.GetPropertyValueByName(nameof(extensionComponent.Material));
        extensionComponent.IsClearance = bool.Parse(entityView.GetPropertyValueByName(nameof(extensionComponent.IsClearance)));

        // Persist the changes to the sellable item
        await Commander.PersistEntity(context.CommerceContext, sellableItem).ConfigureAwait(false);

        return entityView;
    }
}
services.Sitecore().Pipelines(pipelines => pipelines

    .ConfigurePipeline<IDoActionPipeline>(pipeline => pipeline
        .Add<Pipelines.Blocks.DoActionEditSellableItemExtensionViewBlock>().After<ValidateEntityVersionBlock>()
        .Add<Pipelines.Blocks.DoActionEditVariationExtensionViewBlock>().After<ValidateEntityVersionBlock>()
    )

);

Now we should see our persisted values render in the Extended Infomation entity views of the Merchandising pages and against their respective catalog items in the Sitecore Content Editor.

If the property values are not reflected in Sitecore, run the Refresh Commerce Cache command from the Commerce ribbon menu.

Extended Information populated on sellable item Sitecore item.
Extended Information populated on variant Sitecore item.

Variants will have sellable item properties populated, while sellable items will not have variant properties populated as variants represent a specialised form of the sellable item, while the sellable item should not know the specifics of any one variant.

Summary

Implementation Highlights

The following bullet points can be utilised as a checklist to ensure that all bases have been covered :

  • Create components to house custom properties.
  • Create get view blocks to retrieve components properties for BizFx pages (view), BizFx modals (create and edit actions) and CommerceConnect (generate catalog item template).
  • Create populate view actions blocks to allow business user to trigger actions, e.g. create, edit, delete.
  • Create do action blocks to persist create, edit, delete actions to commerce entities.

Considerations for Extending Catalog Items

  • Logically group properties into multiple components over using a catch all component. This could mean grouping related properties, grouping only properties that will be mapped to the Sitecore catalog items, or grouping properties into a component that will be utilised to extend cart lines.
  • View property names should match their component property names in order for the values to be mapped from the commerce entity to the Sitecore catalog item properties.
  • Property names must be unique for the catalog item commerce entity, otherwise this can cause a conflict in mapping values; properties are resolved by mapping the first instance of a property with the given name on the commerce entity.
  • Sellable items and variants Sitecore items inherit the same catalog generated templates.
    • Sellable items will host the variant properties on their Sitecore items, however these values will not be populated.
    • Variants will host the sellable item properties on their Sitecore items and these properties will be populated with the sellable item property values.

References

Sitecore KB article: How to extend Catalog system entities schema in Sitecore Experience Commerce

Source Code

Sitecore Commerce Catalog Component Extension Sample project repository

Sitecore Experience Commerce: Working with Environment Variables

Reading Time: 3 minutes

In this article, we will review how environment variables are utilised in the Commerce Engine solution. These are findings that provide some more context on top of Commerce Developer Reference: Configuring the Commerce Engine using environment variables, which will allow us to work with them more effectively.

Introduction

Environment variables are primarily utilised in 3 areas of the Commerce Engine and each area has nuances that we need to be aware of. The first area is in the Commerce Engine configuration file, config.json. The second is the global environment configuration, global.json. The third are is made up of the role environment and policy set configurations.

Environment variables will only be consumed into the Commerce Engine’s configuration builder if they are prefixed with "COMMERCEENGINE_".

Environment Variable Usage in Configuration Files

The Commerce Engine Configuration File (config.json)

Using the environment variable configuration provider, the config.json is updated without the need for placeholders or data type specification.

Updating a property value simply requires adding an environment variable that represents the path of the property to be overridden.

For example, adding the environment variable, COMMERCEENGINE_Serilog__MinimumLevel__Default: Information, will override the corresponding configuration property by resolving it to the structure of the configuration.

{
  "AppSettings": { ... },
  "Serilog": {
    ...
    "MinimumLevel": {
      "Default": "Warning",
      ...
    }
  },
  ...
}

While the placeholder values aren’t relevant to the overrides themselves, the Commerce Engine is distributed with ‘PlaceholderFor<property>’ values in config.json. Consider these flags to ensure that environment variables are not omitted. When replacing other properties in the Commerce Engine configuration, placeholders are not required.

The Global Environment Configuration File (global.json)

Similar to the config.json, the global environment configuration file, global.json, is loaded during the start up process of the Commerce Engine. However, while the Commerce Engine leverages the environment variables for this configuration, the replacement strategy differs from the environment variable configuration provider in that instead of resolving variables to the structure of the configuration file it instead resolves via placedholder matches.

For example, the environment variable COMMERCEENGINE_GlobalDatabaseUserName: sa will override the corresponding configuration property by resolving it to the placeholder.

{
  ...
  "Name": "GlobalEnvironment",
  "Policies: {
    "$type": "System.Collections.ObjectModel.ReadOnlyCollection`1[[Sitecore.Commerce.Core.Policy, Sitecore.Commerce.Core]], mscorlib",
    "$values": [
      ...
      {
        "$type": "Sitecore.Commerce.Plugin.SQL.EntityStoreSqlPolicy, Sitecore.Commerce.Plugin.SQL",
        ...
        "UserName": "PlaceholderForGlobalDatabaseUserName",
        ...
      },
      ...
    ]
  }
}

Role Environment and Policy Set Configuration Files

For environment variables used in role environment and policy set configurations, the Commerce Engine also uses the same strategy as per the global.json (placeholder matching over structure resolution), however the replacement is performed at the time of bootstrapping the Commerce Engine, not during the start up process of the Commerce Engine.

This means that while the role environment and policy set configurations will retain the ‘PlaceholderFor…’ values on disk, the engine startup will still load configurations from the commerce global database. Therefore, the Commerce Engine role will not resolve changes during the start up process with updated variables (e.g. running docker-compose up for containers).

Changing environment variables used in role environment and policy set configuration files, should be thought the same as making changes to the configuration files themselves, where bootstrapping the Commerce Engine is required to consume the changes.

Supported Data Types in Placeholders

In Commerce Developer Reference: Configuring the Commerce Engine using environment variables, it 3 mentions supported data types for placeholders, where string is the implicit (default) type, and boolean and integer values can be represented by appending ‘|bool’ and ‘|int’ to placeholder names respectively.

The reality is that under the hood all that is happening is identifying whether the value should be wrapped with quotation marks or not. This means that we can actually support other data types, such as decimals by appending either ‘|bool’ or ‘|int’ to the placeholder.

Data types apply to placeholders in the global environment, role environment and policy set configuration files. They do not apply to placeholders in the Commerce Engine configuration file (config.json).

PlaceholderValuesResults
“PlaceholderForMyVariable”dev.sitecore.com
true
“dev.sitecore.com”
“true”
“PlaceholderForMyVariable|bool” or
“PlaceholderForMyVariable|int”
dev.sitecore.com
true
3
1.2 (decimal)
dev.sitecore.com
true
3
1.2

Summary

The following table summarises how environment variables are utilised in the various configuration files of the Commerce Engine.

Configuration File(s)Property ResolverAllows Fallback / Default Value*AppliesApplied ByRequires Bootstrap
config.jsonStructureYesDuring start upEnvironment variable configuration provider (.Net Core)No
global.jsonPlaceholderNoDuring start upCommerce EngineNo
Environment/Policy Set ConfigurationsPlaceholderNoDuring BootstrapCommerce EngineYes
*Where environment variable not provided.

References

Sitecore Experience Commerce: Customising Commerce Content in the Sitecore Indexes for Storefront Search Results

Reading Time: 4 minutes

In this article, we will look at how to control the storefront search results by customising the commerce content that is indexed in the Sitecore master and web indexes.

If you are looking for how to add new fields for faceting and other purposes, see Adding a property field to an index.

How Storefront Search Works

The SXA Search component creates a solr query based on a number of criteria, however focusing on how the search term is involved in the query, we see that the sxacontent field is our culprit for this customisation. This can be seen highlighted below in our storefront and in our search log.

From XC 9.3 onwards, the commerce portion of the Sitecore indexes were migrated over to the Commerce Engine for indexing performance improvements. There are a number of handlers utilised for populating the indexes with catalog data, however for managing the content related to the storefront search component we will look at the SxaContentFieldHandler.

See Catalog Search Field Handlers for a full list of handlers provided with XC, which are utilised when registering index fields in Plugin.Search.Solr.PolicySet-1.0.0.json.

The SxaContentFieldHandler Class

By default, the sellable item properties that are added to the sxacontent field consist of the following entries:

  • Tags
  • ProductId
  • Name
  • DisplayName
  • ItemDefinition
  • Brand

As we can see from the sitecore_web_index in Solr, a query for a specific ‘Spectra’ product, productid_t:6042260, shows that these properties are indexed against the sellable item.

{
  "sxacontent_txm":["39inch|4k|uhd|television|spectra",
    "6042260",
    "Habitat Spectra 39” 4K LED Ultra HD Television",
    "Habitat Spectra 39” 4K LED Ultra HD Television",
    "Product",
    "Spectra Televisions"],
  "productid_t":"6042260",
  ...
}

A common property that I have seen often requested to be included for searching is the sellable item’s description, so we will use this property as well as a generic property from a custom component for demonstration purposes.

In the sample code below, we see that we inherit from the default SxaContentFieldHandler and execute the base ComposeValue method, which will populate the default fields listed above. We then simply add the properties to the sxaContent reponse object, which in this case is a list of strings.

You may have noticed that we are only adding the properties to sxacontent if a value is present. This is to minimise the bloat of empty entries and may lead to performance improvement however insignificant it may be. You may prefer to leave empty entries in the index to simplfy troubleshooting in mapping each entry back to its source property, so choose an approach that best suits you.

public class MySxaContentFieldHandler : Sitecore.Commerce.Plugin.Catalog.SxaContentFieldHandler
{
    public override object ComposeValue(object source, ConcurrentDictionary<string, object> context)
    {
        var sxaContent= base.ComposeValue(source, context) as List<string>;
        if (!(source is SellableItem) || sxaContent == null || sxaContent.Count() == 0)
        {
            return sxaContent;
        }

        var sellableItem = source as SellableItem;

        if (!string.IsNullOrWhiteSpace(sellableItem.Description))
        {
            sxaContent.Add(sellableItem.Description);
        }

        var myProperty = sellableItem.GetComponent<MyCustomComponent>().MyCustomProperty;
        if (!string.IsNullOrWhiteSpace(myProperty))
        {
            sxaContent.Add(myProperty);
        }

        return sxaContent;
    }
}

Now that we have created our modified SxaContentFieldHandler class, we register it in Plugin.Search.Solr.PolicySet-1.0.0.json for both the master and web indexes.

{
  "$type": "Sitecore.Commerce.Plugin.Search.ItemIndexablePolicy, Sitecore.Commerce.Plugin.Search",
  "IndexName": "sitecore_web_index",
  "FieldTypeMappers": [ ... ],
  "Fields": [
    {
      "$type": "Sitecore.Commerce.Plugin.Search.Solr.SolrIndexFieldConfiguration, Sitecore.Commerce.Plugin.Search.Solr",
      "Name": "sxacontent",
      "Type": "System.Collections.Generic.List`1[System.String]",
      "TypeHint": "textCollection",
      "Handler": {
        "$type": "Sitecore.Commerce.Engine.Search.MySxaContentFieldHandler, Sitecore.Commerce.Engine"
      }
    },
    ...
  ]
}

After deploying our customisation, boostrapping, and reindexing, we can see our custom entries in the sxacontent field.

{
  "sxacontent_txm":["39inch|4k|uhd|television|spectra",
    "6042260",
    "Habitat Spectra 39” 4K LED Ultra HD Television",
    "Habitat Spectra 39” 4K LED Ultra HD Television",
    "Product",
    "Spectra Televisions",
    "Enjoy incredible picture and dramatic detail with 4X the resolution of full HD. Enjoy incredible hues of color with technology that blends digital color for near-perfect representation. Experience Ultra HD picture quality with enhanced detail in every way.",
    "mycustomproperty"],
  "productid_t":"6042260",
  ...
}

And by performing a search in the storefront our search results now return our product from our custom search entries.

Development Considerations

Field Handlers are Synchronous

At this time, field handlers have been implemented synchronously and expect the information you require to be available on the provided source entity, e.g. sellable item in this case, therefore if you are looking at sourcing data externally it may be worth further consideration.

Following Helix Priniciples

Whether upgrading from a pre XC 9.3 solution or introducing existing component properties into the search index, by implementing the custom SxaContentFieldHandler you may be faced with having to break helix principles, i.e. housing your custom SxaContentFieldHandler in a feature project while referencing another feature project to retrieve the desired properties/content. As feature projects should not reference each other, I reluctantly chose to add MySxaContentFieldHandler to the Commerce Engine project in this instance.

References

Sitecore Experience Commerce: Pipeline Block Types

Reading Time: 3 minutes

In this article, we will look at the foundational pipeline block types that are used to construct pipelines within the Commerce Engine plugins and custom solutions.

Asynchronous vs Synchronous Pipeline Blocks

From XC 10.0, the PipelineBlock class has been split into AsyncPipelineBlock and SyncPipelineBlock classes for improved performance and stability, with the primary implementation difference being whether to call the pipeline block asynchronously or not during pipeline execution.

A notable change to the AsyncPipelineBlock is that it uses the RunAsync method instead of the Run method to enforce that the return type is a Task<TOutput> and as an added reminder that the pipeline block is in fact asynchronously executed.

How Async and Sync Pipeline Blocks Work in the Same Pipeline

The initial questions I had when seeing the pipeline split were “how does this affect registering pipeline blocks to pipelines?” and “how does this affect the way in which pipelines are executed?”. The good news here is that is doesn’t affect either from an implementation standpoint.

From the registration perspective, both async and sync pipelines are registered as per XC 9.X registration mechanisms.

.AddPipeline<IMyPipeline, MyPipeline>(pipeline => pipeline
    .Add<MySyncPipelineBlock>()
    .Add<MyAsyncPipelineBlock>()
    .Add<MyAsyncConditionalPipelineBlock>()
    .Add<MyAsyncPolicyTriggerConditionalPipelineBlock>()
    .Add<MyConditionalPipelineBlock>()
    .Add<MyAsyncConditionalPipelineBlock>()
)

From the async/sync execution perspective, async pipeline blocks are awaited before continuing on to the following pipeline block, which ensures the output of a pipeline block is the input of the following pipeline block.

Specialised Pipeline Blocks

You may have seen a few types of enhanced pipeline blocks in XC 9.X+, being ConditionalPipelineBlock and PolicyTriggerConditionalPipelineBlock, which may have been better suited to your custom implementations over adding conditional statements to the begining of your Run/RunAsync method.

Conditional Pipeline Blocks

As indicated by their names, the ConditionalPipelineBlock and AsyncConditionalPipelineBlock classes will be conditionally executed. This is achieved by defining the BlockCondition predicate to be evaluated to determine if the Run/RunAsync method should be called.

Where the evaluated BlockCondition returns false, an alternate method called ContinueTask is executed instead of Run/RunAsync and is intended to simply return the arg or null.

Returning arg from ContinueTask considers the pipeline block as optional whereas returning null may consider the pipeline block as mandatory depending on how this output is handled in subsequent pipeline blocks or the pipeline itself.

Warning: Using the ContinueTask method to run alternate code logic may be a sign of a bad code smell, such as breaking the separation of concerns rule. Having 2 separate pipeline blocks with inverted predicates is the recommended approach.

public class MyConditionalPipelineBlock : ConditionalPipelineBlock<MyArgument, MyArgument, CommercePipelineExecutionContext>
{
    public MyConditionalPipelineBlock()
    {
        BlockCondition = obj => ((CommercePipelineExecutionContext)obj).CommerceContext.HasPolicy<MyCustomPolicy>();
    }

    public override MyArgument Run(MyArgument arg, CommercePipelineExecutionContext context)
    {
        Condition.Requires(arg, nameof(arg)).IsNotNull();

        // My code logic

        return arg;
    }

    public override MyArgument ContinueTask(MyArgument arg, CommercePipelineExecutionContext context)
    {
        return arg;
    }
}

Policy Trigger Conditional Pipeline Blocks

Another more specialised form of conditional pipeline blocks are the PolicyTriggerConditionalPipelineBlock and AsyncPolicyTriggerConditionalPipelineBlock. These blocks actually have somewhat inverted logic to their name as you will need to specify the name of a policy in the ShouldNotRunPolicyTrigger property which will ensure the pipeline is not executed.

When the policy name is present in the request header’s PolicyKeys value the pipeline block will execute the ContinueTask method over the Run/RunAsync method (See Conditional Pipeline Blocks for more details).

A full set of existing policy keys and their usages can be found in Commerce Developer Reference: Policy keys. It is recommended that the Commerce Engine policy keys be avoided when creating custom policy trigger conditional pipeline blocks.

The BlockCondition predicate is already implemented to manage the conditional logic as mentioned above and the ContinueTask method will return the arg as policy trigger conditional pipeline blocks should be considered optional and not mandatory.

public class MyPolicyTriggerConditionalPipelineBlock : PolicyTriggerConditionalPipelineBlock<MyArgument, MyArgument, CommercePipelineExecutionContext>
{
    public override string ShouldNotRunPolicyTrigger => "IgnoreMyPipelineBlock";

    public override MyArgument Run(MyArgument arg, CommercePipelineExecutionContext context)
    {
        Condition.Requires(arg, nameof(arg)).IsNotNull();

        // My code logic

        return arg;
    }
}

References

Sitecore Experience Commerce: Debugging the Commerce Engine from Visual Studio in XC 10

Reading Time: 2 minutes

In this article, we will review how to attach a running Commerce Engine instance to the Visual Studio Debugger for local debugging.

Introduction

In Sitecore Experience Commerce 9.X.Y, the Commerce Engine was built on .NET Core 2.2 or lower, which either only supported the out-of-process hosting or is the default configuration. This meant that IIS was essentially being used as a proxy to forward requests to the Commerce Engine application, which is why you are probably familiar with attaching the debugger to a process named Sitecore.Commerce.Engine.exe. By hovering over the process, the source Commerce Engine could easily be identified when attaching the process to Visual Studio.

Sitecore Experience Commerce 10 now leverages .Net Core 3.1, which uses in-process hosting, meaning the Commerce Engine instance run in the same process as its IIS worker process. Overall, the in-process hosting provides improved performanced as requests aren’t being proxied over the loopback adapter.

Now that we have a better understanding of the switch from out-of-process to in-process hosting in XC 10, it should be apparent as to why we need to amend how we attach the Commerce Engine to Visual Studio’s debugger.

Attaching the Commerce Engine instance to the Visual Studio Debugger

First thing we will need to do is to retrieve the process Id to verfiy that we are attaching the correct process in Visual Studio. To do this, open IIS and navigate to the Worker Processes view.

In the Worker Processes view, look for the application pool name containing the name of the application pool configured for the Commerce Engine instance and note the Process Id.

If the application pool does not show the Commerce Engine instance, it has likely not started, or shut down due to inactivity. Execute a request to the Commerce Engine instance and refresh the Worker Processes view in IIS.

Over in Visual Studio, open the Attach to Process dialog, select the Show processes from all users as you will likely be running the Commerce Engine under a dedicated user profile, and locate the ID that we identified from the Worker Proccesses view in IIS. The ‘w3wp’ can also be applied to the process filters to more easily locate the process.

References

Microsoft: Host ASP.Net Core on Windows with IIS > Hosting models

Sitecore Experience Commerce: Promotion Evaluation and Application Logic in XC 10

Reading Time: 4 minutes

In this article, we will review the breaking changes to promotions that have been introduced in XC 10, considerations for upgrading from a XC 9.X solution, and the updated business logic that the Commerce Engine utilises to evaluate and apply promotions.

Note: References to date will indicate both date and time throughout this article.

Introduction

Previously in Sitecore Experience Commerce: Promotion Evaluation and Application Logic, we had identified that promotions calculations were broken down into cart line level and cart level promotions, of which cart line level promotions were calculated and applied prior to cart level promotions.

In Sitecore Commerce 10, there are 3 key changes that are important to understand, especially when upgrading solutions to XC 10, as the changes to rules for promotion application means that cart line and cart subtotal and total calculations may differ.

  1. Exclusive promotions are now exclusive across the cart line level and cart level promotions.
  2. Promotion Priority indexes have been introduced, allowing business users to specify a priority level that will take precedence in the initial ordering of promotions during evaluation. The lower the promotion priority value, the higher the promotion is evaluated (let it sink in for a minute).
    1. For exclusive promotion application, automatic promotions are addressed prior to coupon promotions, then Promotion Priority is the decider for determining the exclusive promotion within the group regardless of whether it’s a cart line level or cart level promotion.
    2. For applying multiple non-exclusive promotions, cart line level promotions, still take precedence over cart level promotions, while the Promotion Priority is a secondary factor.
 
Sitecore.Commerce.Plugin.Carts
ICalculateCartPipeline (Sitecore.Commerce.Plugin.Carts.Cart => Sitecore.Commerce.Plugin.Carts.Cart)
     ------------------------------------------------------------
     Plugin.Carts.ClearCartBlock (Sitecore.Commerce.Plugin.Carts.Cart => Sitecore.Commerce.Plugin.Carts.Cart)
     ------------------------------------------------------------
     Plugin.Carts.CalculateCartSubTotalsBlock (Sitecore.Commerce.Plugin.Carts.Cart => Sitecore.Commerce.Plugin.Carts.Cart)
     ------------------------------------------------------------
     Plugin.Fulfillment.CalculateCartLinesFulfillmentBlock (Sitecore.Commerce.Plugin.Carts.Cart => Sitecore.Commerce.Plugin.Carts.Cart)
     ------------------------------------------------------------
     Plugin.Fulfillment.CalculateCartFulfillmentBlock (Sitecore.Commerce.Plugin.Carts.Cart => Sitecore.Commerce.Plugin.Carts.Cart)
     ------------------------------------------------------------
     Plugin.Promotions.CalculateCartPromotionsBlock (Sitecore.Commerce.Plugin.Carts.Cart => Sitecore.Commerce.Plugin.Carts.Cart)
     ------------------------------------------------------------
     Plugin.Promotions.RemoveUnwatedFreeGiftsFromCartBlock (Sitecore.Commerce.Plugin.Carts.Cart => Sitecore.Commerce.Plugin.Carts.Cart)
     ------------------------------------------------------------
     Plugin.Tax.CalculateCartLinesTaxBlock (Sitecore.Commerce.Plugin.Carts.Cart => Sitecore.Commerce.Plugin.Carts.Cart)
     ------------------------------------------------------------
     Plugin.Tax.CalculateCartTaxBlock (Sitecore.Commerce.Plugin.Carts.Cart => Sitecore.Commerce.Plugin.Carts.Cart)
     ------------------------------------------------------------
     Plugin.Carts.CalculateCartTotalsBlock (Sitecore.Commerce.Plugin.Carts.Cart => Sitecore.Commerce.Plugin.Carts.Cart)
     ------------------------------------------------------------
     Plugin.Payments.CalculateCartPaymentsBlock (Sitecore.Commerce.Plugin.Carts.Cart => Sitecore.Commerce.Plugin.Carts.Cart)
     ------------------------------------------------------------
     Plugin.Carts.WriteCartTotalsToContextBlock (Sitecore.Commerce.Plugin.Carts.Cart => Sitecore.Commerce.Plugin.Carts.Cart)

Promotion Evaluating Logic

The following diagram shows the pipelines and pipeline blocks that are called during the process of evaluating the applicable promotions and additional filtering for exclusive promotion evaluation.

Figure 1. Promotion qualification evaluation pipeline logic

The following steps make up the evaluation process:

  1. Pre-Evaluate Promotions: Removes any previous selected free gift cart lines from the cart and adds them as a unique object by type to the commerce context. This is too ensure that these cart lines are not utilised when evaluating applicable promotions.
  2. Search For Promotions: Performs a search on the promotions index and retrieves the promotion entities from the commerce database:
    • Index Search Filters:
      1. By Promotion Entity Type: Filters down to the promotion entity type, i.e. excludes promotion book indexes.
      2. By Valid Date: Filters out promotions that do not fall within the Valid From/To dates based on effective date.
      3. By Catalogs: Filters out promotions where the associated catalog does not match any of the catalogs that are associated to any of the cart line items.
    • Post-Search Filters on Entity List:
      1. Filter Not Approved Promotions: Removes promotions that are not approved and, if the promotion is disabled, where the effective date is prior to the updated date (the date the promotion was disabled). The latter rule is to allow the promotion to be active when reviewed the storefront at a previous point in time.
  3. Filter Promotions By Items: Removes promotions where the cart contains no sellable items marked as included in the ItemsCollection qualification or where the cart contains any of the sellable items marked as excluded in the ItemsCollection qualification.
  4. Filter Promotions By Coupon: Removes promotions that require a coupon that has not been applied to the cart.
  5. Evaluate Promotions: Filters out promotions where promotion qualification and benefit rules are not applicable to the current cart.
  6. Filter Promotions With Coupons By Exclusivity: If exclusive coupon promotions are present in the promotions list, the list will be filtered down to a single exclusive coupon promotion. The exclusive promotion will be determined with the lowest Promotion Priority value, followed by the Added date that their corresponding coupons were applied to the cart, in the event of a tie breaker.
  7. Filter Promotions By Exclusivity: If exclusive automatic promotions are present in the promotions list, the list will be filtered down to a single exclusive automatic promotion. The promotion will be determined by the lowest Promotion Priority value, followed by the earliest (oldest) Valid From date, and in the event of multiple promotions sharing the same lowest Promotion Priority value and earliest Valid From date the promotion that was created earliest will take win.
  8. Post-Evaluate Promotions: Adds the previously selected free gift cart lines back to the cart; retrieved from the commerce context.

Promotion Priorisation Rules

While the previous section covered how promotions are evaluated, and also provided some insight into promotion priorisation, we will now cover the prioritisation rules.

The following diagram shows the logic used to determine which promotion(s) to apply to the cart.

Figure 2. Flow chart of promotion application logic

The blue boxes represent logic for maintaining free gift selections and don’t impact the application of the promotions, however this shows where this logic is handled.

There are essentially 3 steps that make up the promotion application process:

  1. Apply a single exclusive automatic promotion.
    • The promotion will be determined by the lowest Promotion Priority value, which will fallback to the earliest (oldest) Valid From date, and then the earliest Created date the promotion that was created, in the result of tied values.
    • If a promotion is applied here, no further promotions are applied.
  2. Apply a single exclusive coupon promotion.
    • The promotion will be determined by the lowest Promotion Priority value, with the Added date that their corresponding coupons were applied to the cart as a fallback to manage tied values.
    • If a promotion is applied here, no further promotions are applied.
  3. Apply all non-exclusive promotions.
    • The promotion order will be determined by cart line level promotions being applied first and cart level promotions applied second, both ordered by ascending Promotion Priority value. Where Promotion Priority values are equal, promotions are furthered ordered as follows:
      1. Automatic promotions, ordered by earliest (oldest) Valid From date, and in the event of multiple promotions sharing the same earliest Valid From date the promotion that was created earliest will win.
      2. Coupon promotions, ordered by earliest Added date that their corresponding coupons were applied to the cart.

Can Promotions Be Configured to XC 9.X Logic?

If Promotion Priorities are not utilised, the promotion logic remains largely the same as cart line level promotions are still applied before cart level promotions. The key difference is the promotion logic now ensures a sole exclusive promotion, which cannot be reverted by configuration and will require customisation.

References

Sitecore Experience Commerce: Creating a Commerce Engine Plugin in XC 10

Reading Time: 3 minutes

In this article, we will look at the steps in creating a custom plugin project for the Commerce Engine solution using the current developer experience in XC 10.

Introduction

With XC 10, creating a Sitecore Commerce plugin project is currently not available as a Visual Studio extension project template and has been migrated to the .Net Core CLI as a static project template.

As per previous versions of the the Sitecore Commerce plugin project, this is intended as a reference project representing a loose end-to-end implementation with sample classes. It is also commonly utilised as the starting template for your project, where you will remove the sample classes and utilise the csproj file and the project’s folder structure as the skeleton for your plugins.

Installing the Sitecore.Commerce.Plugin.Template

The plugin project template is no longer distributed via the Commerce Engine SDK and is now available via the Sitecore Commerce Official NuGet Feed. To download the project template, search for Sitecore.Commerce.Plugin.Template and navigate to the package details page.

On the package details page, scroll down and download the package from right panel under the Info section.

The plugin project template can now be installed via the .Net Core CLI. Open PowerShell and run the following command, dotnet new -i <full path to Sitecore.Commerce.Plugin.Template.*.*.*.nupkg>.

dotnet new -i C:\Projects\Sitecore.Commerce.Plugin.Template.6.0.4.nupkg

Now if we run the dotnet new command in PowerShell, we can see the installed plugin project template.

Creating a new Sitecore Commerce Plugin Project

Now with the plugin project tempate installed, we can create a new project using the template.

Using you Commerce Engine solution’s root directory, the following command will create the plugin project in the desired directory, dotnet new pluginsample -o <relative path to project directory>/<project name>.

dotnet new pluginsample -o src/Foundation/MyPlugin/Engine/Foundation.MyPlugin.Engine

Note: The project name has not been configured at this time, so we will perform some post project creation steps to resolve this.

After creating the project, navigate to the folder where the project was created and rename Sitecore.Commerce.Plugin.Sample.csproj to your project name, e.g. Foundation.MyPlugin.Engine.csproj

To resolve namespaces within the project, you can use a tool, such as Notepad++, to replace all references of ‘Sitecore.Commerce.Plugin.Sample’ to <your project name>, e.g. Foundation.MyPlugin.Engine.

Adding the Plugin to the Commerce Engine Solution

With our new project created, we can add it the Commerce Engine solution by right-clicking a solution folder, selecting the Add Existing Project command, and adding the project from its location.

Finally add the project to the Commerce Engine by adding the project reference to the Sitecore.Commerce.Engine project.