Reading Time: 3 minutes
In this article, we will review a sample configuration of the layers.config file to better manage your solution’s configuration files when working with Sitecore Experience Commerce 9 (XC9).
Deprecated Article: See Sitecore: Using a Dedicated Custom Include Folder for Actual Custom Configuration Files for a more streamline approach to this problem.
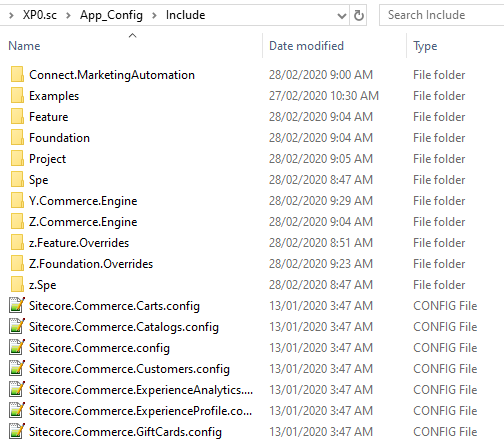
If you take a look at an XC9 website’s /App_Config/Include folder, you would have noticed that there’s still some chaos happening with folder and file prefixes of ‘Y’ and ‘Z’ to assign priority order to the patch configuration files. On top of this, you may have even previous worked on projects where there have been crazy levels of prefixing ‘z’, ‘zz’, ‘zzzzz’, etc. to folders and files (I know I have seen some crazy levels of this), leading to developers pulling their hair out trying to locate the file’s origin. As chaotic as this is, we will look at how we can bring back order for our solution.
Configuring layers.config
Our intention is to ensure that our solution’s patch config files are always in a position to override the platform’s patch files, while adhering to the Helix layers principle.
With the following approach, the only additional consideration introduced is to review the platform’s custom config folders and files during any future upgrades to update the layers.config file to ensure the intended load order remains in tact.
Note: The following way is just one of many that can be implemented to achieve the same outcome. There is no one right way, so if you manage your solution’s configuration files differently there is no need to align to this.
- Backup the layers.config. Always important when you plan on modifying any files that are not part of your project solution (as infrequent as this should be).
- Copy the layers.config file out of the App_Config folder into a core project in the same location. This is because the layers.config file itself cannot be patched and we would want this file version controlled so that the file can be deployed to all environments, and modified (if required) by our colleagues.
- The layers.config file is then updated to specify the load order for all current folders. While this step is a bit of a pain, as any omissions will mean that any folder/files unspecified will be applied after the loadOrder , it allows us to ensure that all of our solution configuration files will be applied last, having the highest level of priority.
<layer name="Custom" includeFolder="/App_Config/Include/">
  <loadOrder>
    <add path="Cognifide.PowerShell.config" type="File" />
    <add path="Sitecore.Commerce.Carts.config" type="File" />
    <add path="Sitecore.Commerce.Catalogs.config" type="File" />
    <add path="Sitecore.Commerce.config" type="File" />
    <add path="Sitecore.Commerce.Customers.config" type="File" />
    <add path="Sitecore.Commerce.GiftCards.config" type="File" />
    <add path="Sitecore.Commerce.Globalization.config" type="File" />
    <add path="Sitecore.Commerce.Inventory.config" type="File" />
    <add path="Sitecore.Commerce.LoyaltyPrograms.config" type="File" />
    <add path="Sitecore.Commerce.Orders.config" type="File" />
    <add path="Sitecore.Commerce.Payments.config" type="File" />
    <add path="Sitecore.Commerce.Prices.config" type="File" />
    <add path="Sitecore.Commerce.Shipping.config" type="File" />
    <add path="Sitecore.Commerce.WishLists.config" type="File" />
    <add path="z.Cognifide.PowerShell.config" type="File" />
    <add path="ContentTesting" type="Folder" />
    <add path="Examples" type="Folder" />
    <add path="Feature" type="Folder" />
    <add path="Foundation" type="Folder" />
    <add path="Foundation.Overrides" type="Folder" />
    <add path="Project" type="Folder" />
    <add path="Y.Commerce.Engine" type="Folder" />
    <add path="Z.Commerce.Engine" type="Folder" />
    <add path="z.Feature.Overrides" type="Folder" />
    <add path="Z.Foundation" type="Folder" />
    <add path="Z.Foundation.Overrides" type="Folder" />
    <add path="Z.LayoutService" type="Folder" />
  </loadOrder>
</layer>
- We then create three folders, following the Helix principles for our project solution. I just chose to use ‘Helix’ as a prefix to drill the point in.
- Helix.Feature
- Helix.Foundation
- Helix.Project
- Add the new folders to the <loadOrder>.
<layer name="Custom" includeFolder="/App_Config/Include/">
  <loadOrder>
    ...
    <add path="Z.LayoutService" type="Folder" />
    <add path="Helix.Foundation" type="Folder" />
    <add path="Helix.Feature" type="Folder" />
    <add path="Helix.Project" type="Folder" />
  </loadOrder>
</layer>
- As you are developing your solution you may find that you need to set the load order for the individual configuration files within a certain layer. In this case, you can list out the file order required. In the sample below, we have Feature A, Feature B, and Feature C. Feature A has a configuration conflict with Feature B and needs higher priority. Feature C has no conflicts. We only need to specify the config for Feature A after the folder to ensure the correct patch order.
-
<layer name="Custom" includeFolder="/App_Config/Include/">
  <loadOrder>
    ...
    <add path="Helix.Feature" type="Folder" />
    <add path="Helix.Feature/Feature.A.config" type="File" />
    <add path="Helix.Project" type="Folder" />
  </loadOrder>
</layer>
- Deploy your solution.
Summary
While you could continue down the path of having project with ‘z’, ‘zz’, ‘zzzzz’, etc. prefixes, by taking the initial steps to isolate and manage your solution’s patch files under managed folder and file load order, we bring the chaos back to order with meaningfully named patch files that can be found exactly where you expect them to be located.