In this article, we will review the business logic that Sitecore OrderCloud utilises when the order submit endpoint (POST /orders/{direction}/{orderID}/submit) is executed for a better checkout design, implementation and error handling.
Introduction
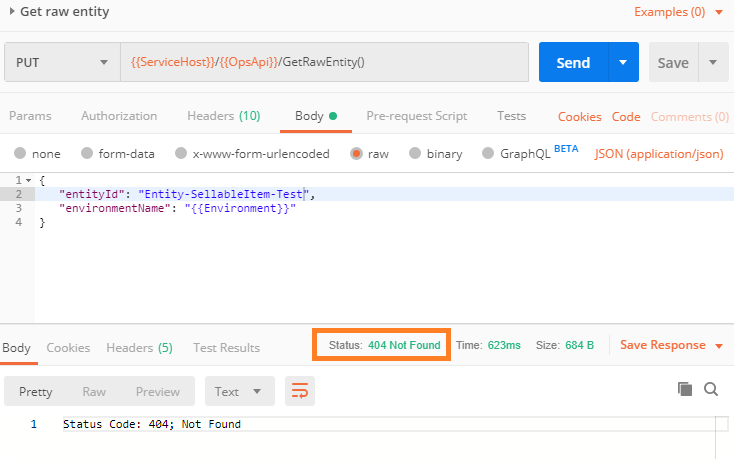
When it comes to submitting an order that is either incomplete or has become invalid, the OrderCloud API provides fairly easy to understand error codes to facilitate troubleshooting. What is not provided however, is a complete list of error codes that one may expect from an endpoint in order to be proactive in catering for such situations.
While a global catch all may be the quickest and easiest way to approach order submission error handling, the user experience of being informed that “A technical difficulty has occurred. Please contact support” in your storefront’s checkout will likely have a negative impact on the conversion rate. In addition, the admin application tends to be neglected with the love required to support business users in identifying and rectifying the issues themselves, so more often than not it is the developer to the rescue, but there are ways we can prevent these scenarios from occurring.
As OrderCloud is always utilising the latest code base, it is possible that the documented processes can change over time without warning.
Order Submission Logic
The following sections covering order submission logic, will highlight most of the platform logic, but will omit more trivial details.
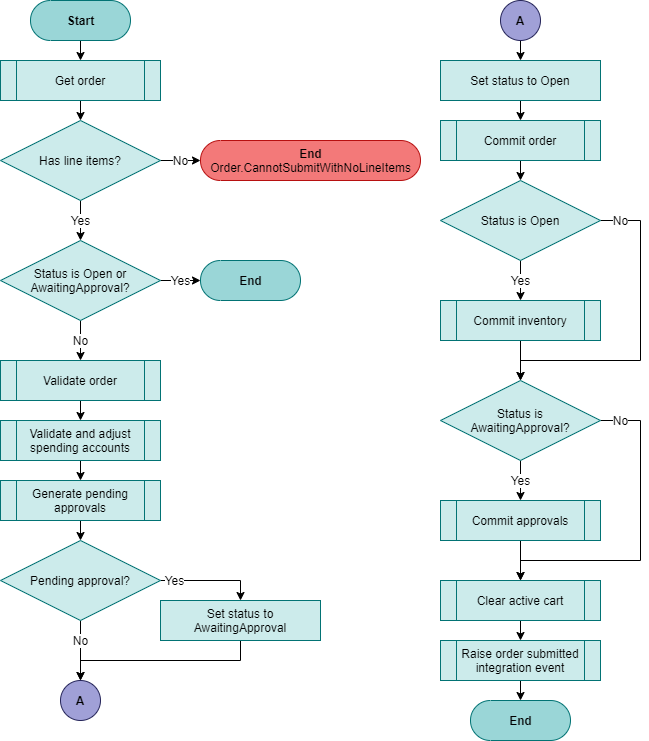
When an exception is thrown by the API, denoted by the red End terminators with given error code, any pending changes to the underlying database entities are rolled back.
Order Submit
The order submit logic is essentially the entry point for validating and processing a submitted order.
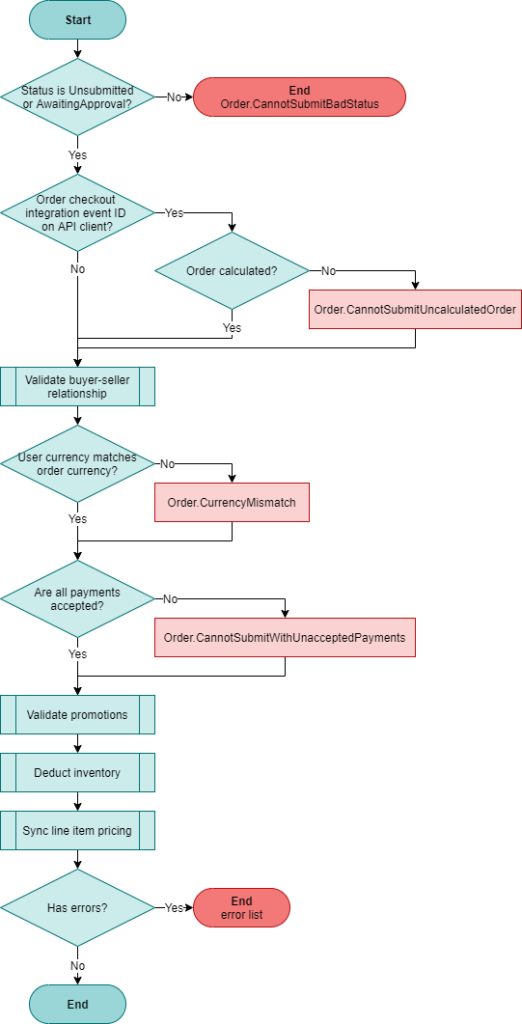
Validate Order
The validate order process not only used in the order submit process, but is the entire validation taking place for the order validate endpoints.
In figure 2, soft errors, represented by the red boxes, allows the API to validate other areas of the order and return errors in list form, which can see your overall solution being more performant with less back and forth to resolve all order validation errors.
The Deduct inventory sub-process will validate inventory is available for the order, but does not persist inventory changes as this can be found in figure 1, under Commit inventory.
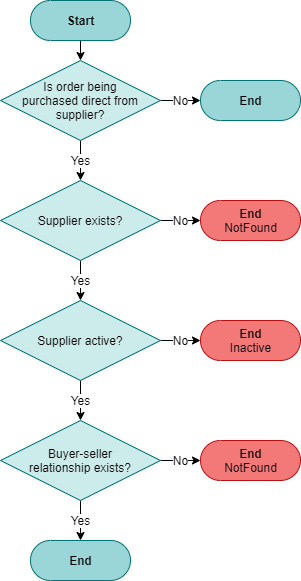
Validate Buyer-Seller Relationship
The buyer-seller relationship effectively validates that the user is authorised to purchase an order directly from a supplier. The relationship can be implicit, i.e. the supplier can be configured with AllBuyerCanOrder set as true or the user is an admin user, or an explicit relationship between the buyer and supplier has been defined.
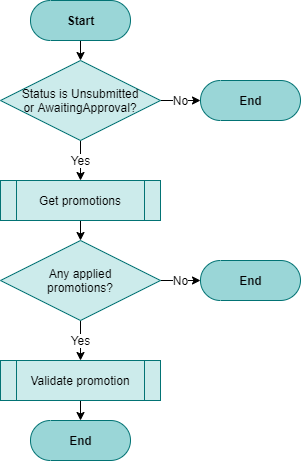
Validate Promotions
The validate promotions logic in figure 4 shows the relevant flow for the order submit process.
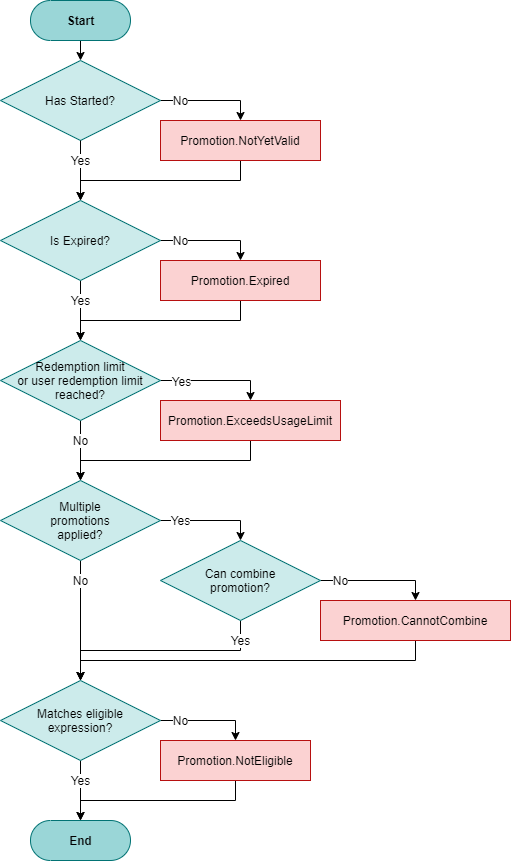
Validate Promotion
For each promotion applied to the order, it is validated during the order submit to ensure it is still eligible. Any and all errors found are added to the error list, which will be returned by the API as part of the validate order logic in figure 2.
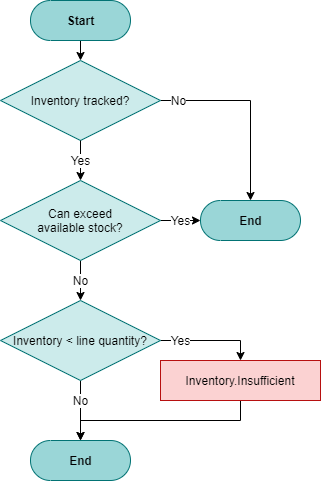
Deduct Line Item Inventory
Order inventory will be validated to ensure that there is sufficient inventory for all order lines. Any and all errors found are added to the error list, which will be returned by the API as part of the validate order logic in figure 2.
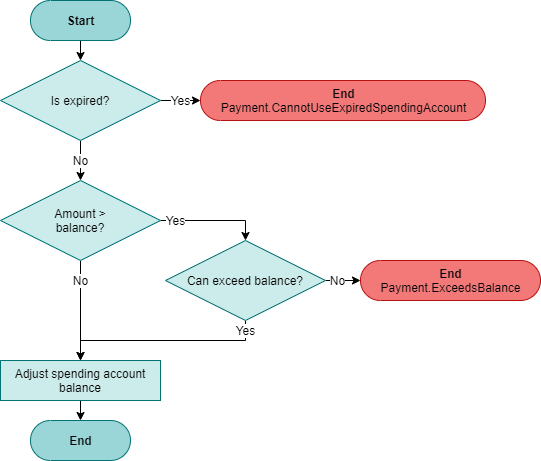
Validate and Adjust Spending Account
For the sub-process Validate and adjust spending accounts in figure 1, the following flowchart represents how each spending account is evaluated as they are iterated over for all applied payments for the order.
Summary
With this insight into the order submit processes, you should now be well equipped to identify how extending OrderCloud order submit functionality through webhooks, wrapped API calls, and integration events fit in with your solutions, as well as anticipate the many errors that can occur and be more proactive with more specific error handling over a global catch all implementation.