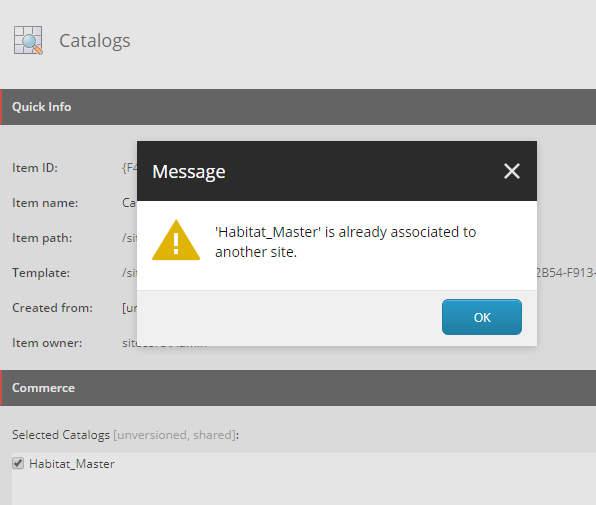
In this article, we look at how to fix the “‘<catalog>’ is already associated to another site.” error message that can occur when attempting to save the catalog association to a site, although no other sites have an association to this catalog at the time.
Note: This solution is only intended for local development and not recommended for production instances.
Background
Over in Sitecore Commerce, the category and sellable item entities contain a ParentCatalogList property that houses the Sitecore ids of the associated catalog entities. For catalog entities however, the ParentCatalogList is being repurposed for the site association Sitecore id and acts as a lock, preventing the catalog from being associated to other sites.
If you happen to have deleted a site that had a existing catalog association, the catalog commerce entity will not be updated to release the lock. Similar scenarios may also be seen if the commerce shared database is restored to an environment that has conflicting sitecore ids with existing sites, as often can be seen during development across teams that do not sync their Sitecore and Commerce data.
Solution
Removing the lock can be achieved by executing the following script against the commerce shared database.
Update the database name and catalog friendly id values, in the highlighted lines, as appropriate.
USE SitecoreCommerce9_SharedEnvironments
GO

DECLARE @catalogEntityId VARCHAR(MAX) = 'Habitat_Master';
DECLARE @uniqueId VARCHAR(MAX);
DECLARE @entity VARCHAR(MAX);
DECLARE @modifiedEntity VARCHAR(MAX);

SELECT @entity = Entity,
       @uniqueId = Entities.UniqueId
FROM   sitecore_commerce_storage.CatalogEntities AS Entities
       INNER JOIN sitecore_commerce_storage.CatalogEntity AS Entity
               ON Entities.UniqueId = Entity.UniqueId
WHERE  Id = 'Entity-Catalog-' + @catalogEntityId

UPDATE sitecore_commerce_storage.CatalogEntity
SET    Entity = JSON_MODIFY(@entity, '$.ParentCatalogList', '')
WHERE  UniqueId = @uniqueId
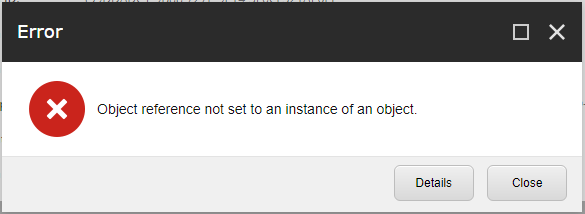
Now that we have released the lock, we can associate the catalog to our site, however we may still encounter issues navigating through the catalog structure in the content editor and attempting to publish the site may throw null reference exceptions.
Error message when trying to navigate to category under catalog in the Content Editor.
Site Publish Error Message Job started: Publish to ‘web’|#Exception: System.Reflection.TargetInvocationException: Exception has been thrown by the target of an invocation. —> System.NullReferenceException: Object reference not set to an instance of an object. at Sitecore.Commerce.Engine.Connect.DataProvider.ReadOnlyCatalogDataProvider.GetChildIDs(ItemDefinition parentItem, CallContext context) …
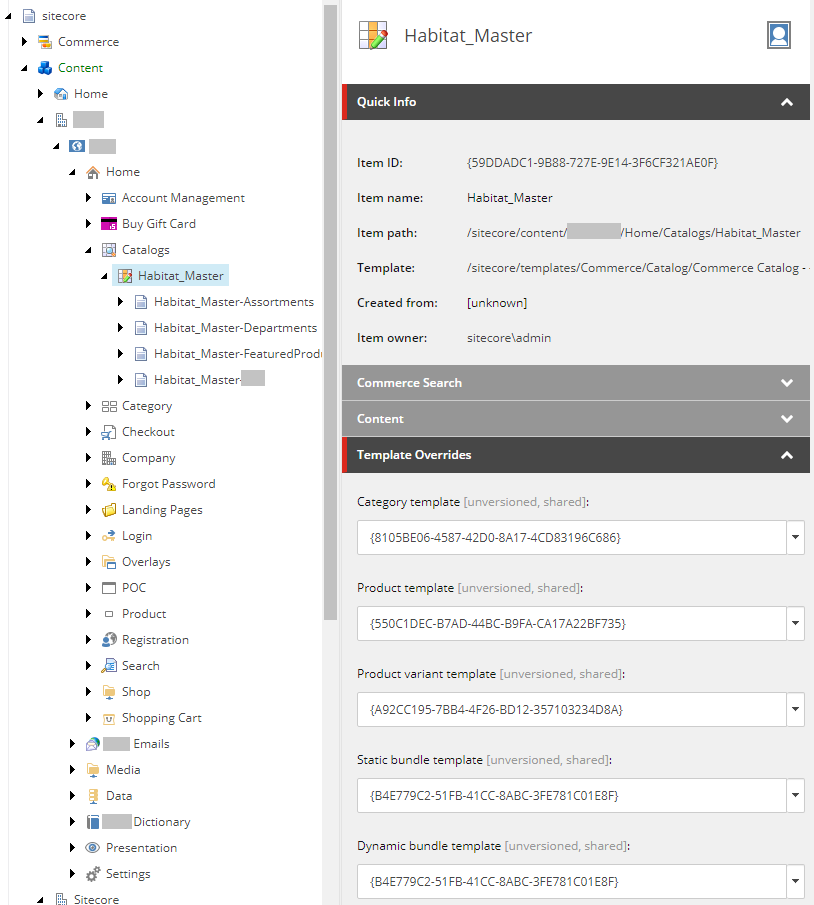
These issues are caused by the catalog’s Template Overrides, which are configured to templates that don’t exist in this Sitecore instance.
Updating the Template Overrides to valid templates for the site will resolve these issues and you should be up and running again.
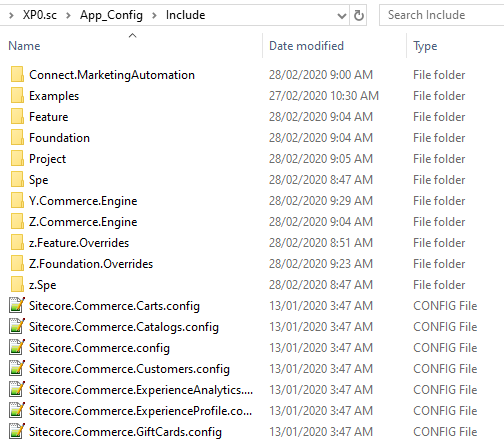
In this article, we will look at creating our own custom include folder in Sitecore to avoid the ugliness of the folder/file structure that comes with a Sitecore installation and all of its modules.
Include folder contents from default installation of Sitecore with Sitecore XC 9.3
Previously, I covered Managing Commerce Configuration to Align with Helix Principles, however this approach was overly complex and not really developer friendly. Since then I have concluded that the simpler approach would be leave the “custom” folder for the Sitecore integrations and create a dedicated custom folder outside of the “custom” for solution specific custom configurations.
Added benefits to this approach include:
When performing an upgrade, a new or updated configuration will not override your custom configurations based on load order.
You won’t need to revisit the Layers.config file as potentially required with my previously documented approach.
For local development, you can comfortablely delete the dedicated custom folder and redeploy, avoiding any stale custom configurations from your current build.
Configuring Layers.config
As the order of the layer nodes in the Layers.confg defines the order in which they load at runtime, all that is required for this approach is to add the new custom folder to Layers.config after the “Custom” layer and ensure your custom solution configuration files are placed in the App_Config/Custom_Include folder within the projects.
Add the custom folder after the “Custom” layer entry and include the “Foundation”, “Feature”, and “Project” folders to manage configuration files using Helix principles.
Custom Include folder contents segregated from the Include folder of the default installation of Sitecore with Sitecore XC 9.3
Summary
No longer will you need to fight for configuration priority over the platform’s standard configuration files or soil your solution with ‘zzz’ prefixed patch files.
Throughout this article we will utilise the categoryComputers and Tablets > Kid’s Tablets and productMinnow Kid’s Tablet—7”, 8GB to review our progress. These examples also contain some non-alphanumeric characters to ensure we take these special characters into consideration.
How Storefront URLs are Generated
Storefront URLs are constructed using the configuration of the site’ s linkManager. The configuration is located at sitecore/linkManager/providers/add[@name=’commerce‘].
An important note about the provider configuration properties is that only 3 properties actually affect the generated URLs – includeFriendlyName, useShopLinks, and encodeNames.
includeFriendlyName: Includes the DisplayName of the category or product in the URL segment. i.e. {category DisplayName}={category FriendlyId}and {product DisplayName}={ProductId/FriendlyId}.
useShopLinks: Constructs URL with shop/{category}/{product} if enabled, otherwise as category/{category} and product/{product}for category and product URLs respectively.
includeCatalog:Not currently supported
addAspxExtension: N/A
alwaysIncludeServerUrl: N/A
encodeNames: Encodes the DisplayName portion of the category and product segments. Only supported when useShopLinks is true.
languageEmbedding: N/A
languageLocation: N/A
lowercaseUrls: Not currently supported
shortenUrls: Not currently supported
useDisplayName: Not currently supported
URLs Generated from Various Configurations
The following decision table shows the available configurations
Rules
Conditions
1
2
3
4
5
useShopLinks
Y
Y
Y
N
N
includeFriendlyName
Y
Y
N
Y
N
encodeNames
Y
N
Y
Actions
1
2
3
4
5
Shop
X
X
X
Product/Category
X
X
Display Name prefix
X
X
X
Display Name encoding
X
X
The following table shows the URLs generated from the rules in the above table.
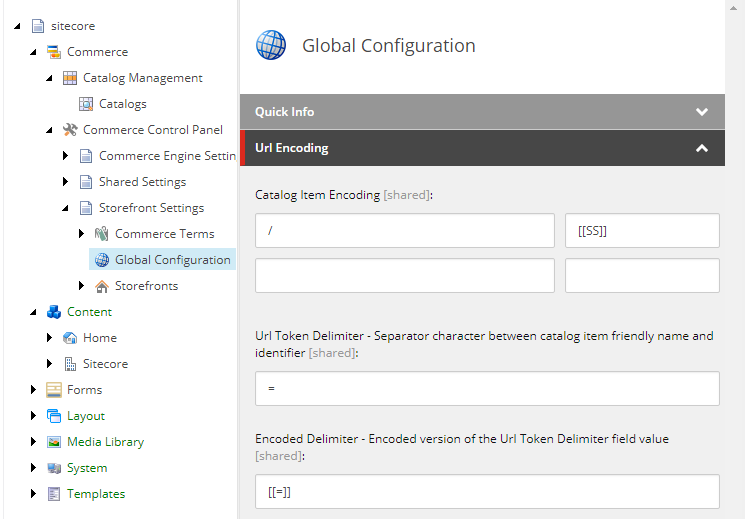
The URLs generated are looking good. We do have an issue with the URLs still containing encoded spaces. To control character encoding there is a configuration in the content editor at /sitecore/Commerce/Commerce Control Panel/Storefront Settings/Global Configuration > URL Encoding > Catalog Item Encoding.
Unfortunately there is a quirk in which it doesn’t accept space entries, so we will override the EncodeUrlToken and DecodeUrlToken methods instead. As we aren’t allowed to have hyphens in the category names, we won’t have any character conflicts where encoding or decoding.
Now that we have our category URL structure that meets our requirements, our last step is to ensure the URLs are resolving back to their correct Sitecore items.
Updating the CatalogPageItemResolver
Now we have covered the URL generation implementation, we now need to resolve these URLs back to their correct Sitecore items.
public override void Process(PipelineArgs args)
{
	if (Context.Item == null || SiteContext.CurrentCatalogItem != null)
	{
		return;
	}

	var contextItemType = GetContextItemType();
	switch (contextItemType)
	{
		case ItemTypes.Category:
		case ItemTypes.Product:
			var isProduct = contextItemType == ItemTypes.Product;
			var catalogItemIdFromUrl = GetCatalogItemIdFromUrl(isProduct);
			if (string.IsNullOrEmpty(catalogItemIdFromUrl))
			{
				break;
			}
			var catalog = StorefrontContext.CurrentStorefront.Catalog;
			var catalogItem = ResolveCatalogItem(catalogItemIdFromUrl, catalog, isProduct);
			if (catalogItem == null && !isProduct)
			{
				catalogItemIdFromUrl = GetCatalogItemIdFromUrl(true);
				if (string.IsNullOrEmpty(catalogItemIdFromUrl))
				{
					break;
				}
				catalogItem = ResolveCatalogItem(catalogItemIdFromUrl, catalog, isProduct);
			}
			if (catalogItem == null)
			{
				WebUtil.Redirect("~/");
			}

			SiteContext.CurrentCatalogItem = catalogItem;
		break;
	}
}

private string GetCatalogItemIdFromUrl(bool isProduct)
{
    var catalogItemId = string.Empty;
    var rawUrl = HttpContext.Current.Request.RawUrl;
    var urlTokens = rawUrl.Split('/');
    if (urlTokens.Any())
    {
        var item = urlTokens.Last();
        var queryStringPosition = item.IndexOf("?", StringComparison.OrdinalIgnoreCase);
        if (queryStringPosition > 0)
        {
            item = item.Substring(0, queryStringPosition);
        }

        if (isProduct && urlTokens.Length >= 4)
        {
            var parentCategoryName = urlTokens[urlTokens.Length - 2];
            item = $"{parentCategoryName}{item}";
        }
        catalogItemId = CatalogUrlManager.ExtractItemId(item);
    }

    return catalogItemId;
}
Summary
We learnt that the construction of the URL can be managed via Sitecore Configuration, the Sitecore Content Editor and via code customisations, depending on the URL requirements.
In this article, we will review a sample configuration of the layers.config file to better manage your solution’s configuration files when working with Sitecore Experience Commerce 9(XC9).
If you take a look at an XC9 website’s /App_Config/Include folder, you would have noticed that there’s still some chaos happening with folder and file prefixes of ‘Y’ and ‘Z’ to assign priority order to the patch configuration files. On top of this, you may have even previous worked on projects where there have been crazy levels of prefixing ‘z’, ‘zz’, ‘zzzzz’, etc. to folders and files (I know I have seen some crazy levels of this), leading to developers pulling their hair out trying to locate the file’s origin. As chaotic as this is, we will look at how we can bring back order for our solution.
Configuring layers.config
Our intention is to ensure that our solution’s patch config files are always in a position to override the platform’s patch files, while adhering to the Helix layers principle.
With the following approach, the only additional consideration introduced is to review the platform’s custom config folders and files during any future upgrades to update the layers.config file to ensure the intended load order remains in tact.
Note: The following way is just one of many that can be implemented to achieve the same outcome. There is no one right way, so if you manage your solution’s configuration files differently there is no need to align to this.
Backup the layers.config. Always important when you plan on modifying any files that are not part of your project solution (as infrequent as this should be).
Copy the layers.config file out of the App_Config folder into a core project in the same location. This is because the layers.config file itself cannot be patched and we would want this file version controlled so that the file can be deployed to all environments, and modified (if required) by our colleagues.
The layers.config file is then updated to specify the load order for all current folders. While this step is a bit of a pain, as any omissions will mean that any folder/files unspecified will be applied after the loadOrder , it allows us to ensure that all of our solution configuration files will be applied last, having the highest level of priority.
As you are developing your solution you may find that you need to set the load order for the individual configuration files within a certain layer. In this case, you can list out the file order required. In the sample below, we have Feature A, Feature B, and Feature C. Feature A has a configuration conflict with Feature B and needs higher priority. Feature C has no conflicts. We only need to specify the config for Feature A after the folder to ensure the correct patch order.
While you could continue down the path of having project with ‘z’, ‘zz’, ‘zzzzz’, etc. prefixes, by taking the initial steps to isolate and manage your solution’s patch files under managed folder and file load order, we bring the chaos back to order with meaningfully named patch files that can be found exactly where you expect them to be located.