Sitecore Experience Commerce: Implementing Multi-Step Actions in the Business Tools

Reading Time: 6 minutes

In this article, we will look at multi-step actions and how we can implement them for customising the Sitecore Commerce Business Tools.

What is a Multi-Step Action?

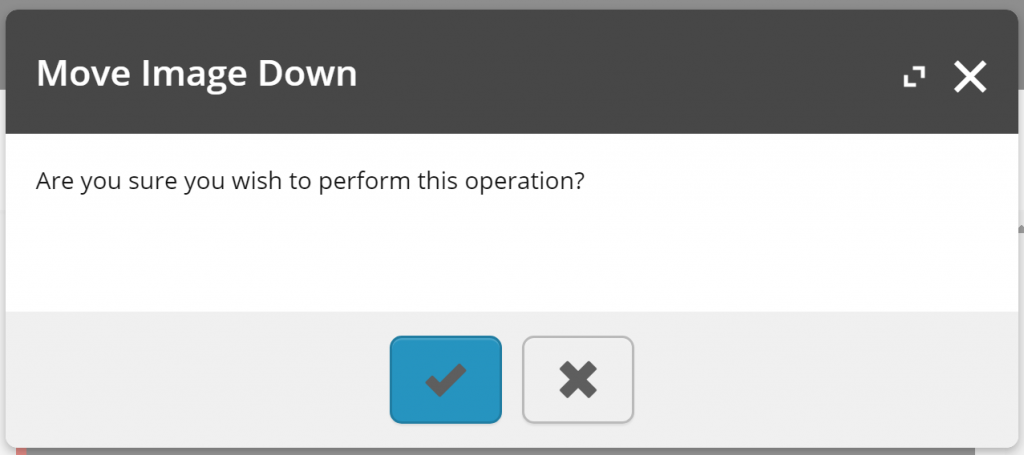
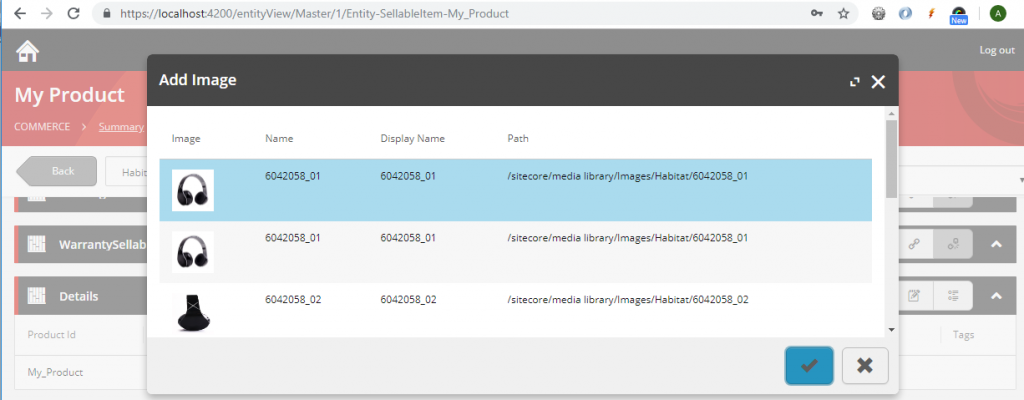
The multi-step action is the approach to building out entity view modals to act as a kind of wizard, where inputs from each step can affect the subsequent steps.

Adding a qualification/condition to a promotion – step 1.
Adding a qualification/condition to a promotion – step 2.

A Dive into the Multi-Step Action Implementation

We will take a dive into the pieces that make up the multi-step action implementation to see just how we should be building our custom multi-step modal, using the Add Qualification modal for promotions as our working example.

This section is focused on explaining what will be found in the current platform implementation, which can be useful if looking to extend the BizFx and Commerce Engine functionality, but can be skipped if you are only after Implementing Custom Multi-Step Actions as quick as possible.

MultiStepActionPolicy

The MultiStepActionPolicy houses a single property, FirstStep, which will contain the EntityActionView that will be populated in the modal entity view.

public MultiStepActionPolicy()
{
    this.FirstStep = new EntityActionView();
}

public EntityActionView FirstStep { get; set; }

In the following code snippet, we see that the MultiStepActionPolicy is added to the EntityActionView, in which the QualificationsDetails that is assigned to the EntityView will use to populate the first step of the add qualification modal.

Line 18 highlights the Name of the entity view action, which will be resolved to its localised value from the …/Commerce Terms/BusinessTools/ViewActionNames/AddQualification, and populates modal’s title.

var actionPolicy = arg.GetPolicy<ActionsPolicy>();
actionPolicy.Actions.Add(
        new EntityActionView(new List<Policy>
        {
            new MultiStepActionPolicy
            {
                FirstStep = new EntityActionView
                {
                    Name = context.GetPolicy<KnownPromotionsActionsPolicy>().SelectQualification,
                    DisplayName = "Select Qualification",
                    Description = "Selects a Qualification",
                    IsEnabled = isEnabled,
                    EntityView = context.GetPolicy<KnownPromotionsViewsPolicy>().QualificationDetails
                }
            }
        })
        {
            Name = context.GetPolicy<KnownPromotionsActionsPolicy>().AddQualification,
            DisplayName = "Add Qualification",
            Description = "Adds a Qualification",
            IsEnabled = isEnabled,
            EntityView = string.Empty,
            Icon = "add"
        });
The entity view populated in the first step, of the Add Qualification modal, is resolved from the entity view action name of the EntityActionView, assigned to the MultiStepActionPolicy’s FirstStep, which in this case is the SelectQualification action.

LocalizeEntityViewBlock

In the LocalizeEntityViewBlock, we find that the SelectQualification action name is being populated with the localised term, however as mentioned above, the modal utilises the AddQualification localised term instead, therefore we don’t need to be concerned with this.

if (!action.HasPolicy<MultiStepActionPolicy>())
{
    continue;
}

var firstStepAction = action.GetPolicy<MultiStepActionPolicy>().FirstStep;
await SetActionLocalizedTerms(firstStepAction, context).ConfigureAwait(false);

MultiStepActionModel

This model is quite simple. The NextStep represents the name of the action to be executed when the modal form is submitted.

public MultiStepActionModel(string nextStep)
{
    this.NextStep = nextStep;
}

public string NextStep { get; set; }

In the following extract of DoActionSelectQualificationBlock, I have substituted out most of the code with comments, explaining the original code logic, to reduce the noise and keep focus on the multi-step implementation functionality.

In line 11, we see that the original condition property has been made readonly as we don’t want the user to change their mind at this stage, however we don’t want to hide the property as the user still needs to have context of what was previously selected.

Updating the readonly status of submitted view properties is considered a recommended practice.

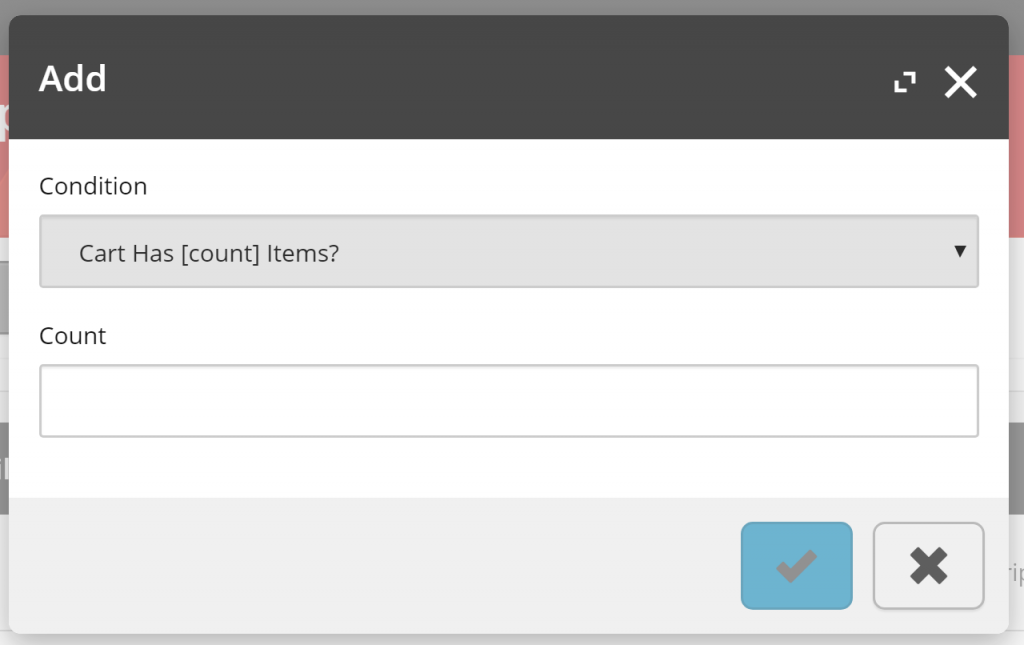
Line 15 we have a comment that tells us that this is where the next step’s view properties are added to the current entity view, building out the modal form.

This also means that the Do Action Blocks acts a pseudo Get Entity View Block as the initial modal’s entity view is populated via the GetEntityView() API, utilising the IGetEntityViewPipeline under the hood, while subsequent updates in the multi-step implementation are triggered as the DoUxAction() API calls the IDoActionPipeline to process requests.

Finally, line 17 has the original entity view action name, ‘AddQualification’, added to the MultiStepActionModel as the NextStep and applied to the commerce context.

With the knowledge that adding the MultiStepActionModel to the context effectively creates the next step in the modal, there is no limit to how many steps we can add to a multi-step modal.

public override async Task<EntityView> Run(EntityView entityView, CommercePipelineExecutionContext context)
{
    /* validate action */

    /* validate promotion */

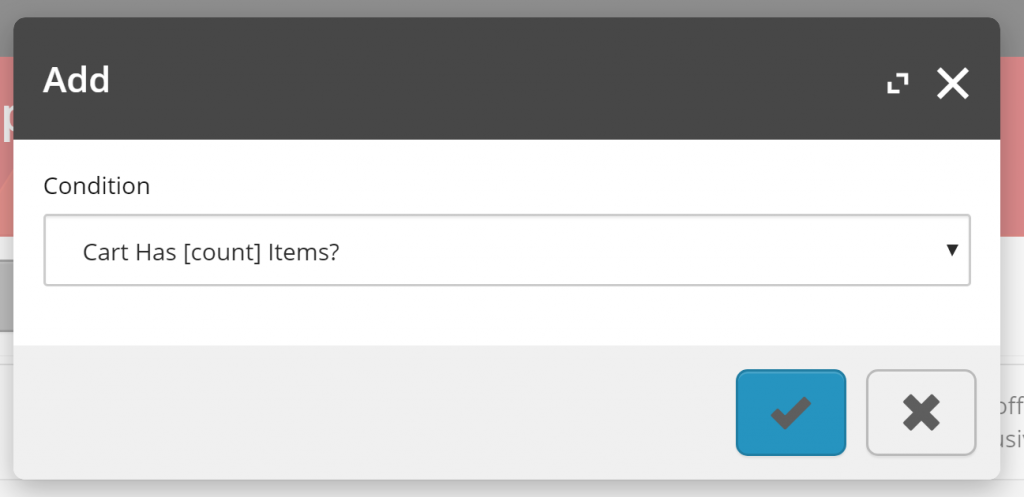
    var selectedCondition = entityView.Properties.FirstOrDefault(p => p.Name.Equals("Condition", StringComparison.OrdinalIgnoreCase));

    /* validate condition */

    selectedCondition.IsReadOnly = true;

    /* add and/or conditional operator. hide if no qualifications have been applied to the promotion so far */

    /* add new view properties for selected condition */

    context.CommerceContext.AddModel(new MultiStepActionModel(context.GetPolicy<KnownPromotionsActionsPolicy>().AddQualification));

    return entityView;
}
DoActionSelectQualificationBlock validates the Condition selection and updates the entity view to contain the remaining view properties required for configuring the ‘Cart Has [count] Items?’ qualification as the second step of this multi-step action modal.

CheckForMultiStepActionBlock

From the following snippet from CheckForMultiStepActionBlock, we see that it updates the current entity views action, removes the MultiStepActionModel from the commerce context, and adds the entity view to the commerce context.

In short, this logic is more of a helper, and we could get the same result by omitting the registration of the MultiStepActionModel, updating the entity view action, and add the entity view directly in the Do Action Block instead.

var multiAction = context.CommerceContext.GetModels<MultiStepActionModel>().FirstOrDefault();
if (string.IsNullOrEmpty(multiAction?.NextStep))
{
    return Task.FromResult(arg);
}

entityView.Action = multiAction.NextStep;
context.CommerceContext.RemoveModel(multiAction);
context.CommerceContext.AddModel(entityView);

The DoUxAction API

The last piece of the puzzle comes with BizFx’s handling of the response of the DoUxAction API when we submit the modal dialog.

If an entity view object is returned in the API response object, BizFx will render the modal with the updated view instead of closing the modal and refreshing the current page view.

If we were to change the modal’s entity view name during any of the steps it will not be reflected in the modal’s title as there is no handling for this implemented by default in BizFx.

Summary

Let’s review what we have learnt about multi-step actions.

  1. Adding the MultiStepActionPolicy to an EntityActionView basically swaps out the intended action from being executed in the initial GetEntityView() request, however the modal’s title will reflect the initial EntityActionView‘s localised name.
  2. The LocalizeEntityViewBlock application to the EntityActionView in the MultiStepActionPolicy’s FirstStep is superfluous and does not impact the multi-step implementation.
  3. Do Action Blocks act as pseudo Get Entity View Block for updating the modal’s entity view.
  4. When updating entity views with multi-step actions, previously input view properties should be set to readonly as a recommended practice.
  5. The usage of the MultiStepActionModel is more of a helper model in CheckForMultiStepActionBlock, rather than a dependent piece of the implementation.
  6. There is no limit to how many steps we can add to a multi-step action modal.
  7. The modal title is not updated with an updated entity view.
  8. When the Commerce Engine’s DoUxAction() API returns an entity view in the response model, BizFx will render it in the current modal view.

Implementing Custom Multi-Step Actions

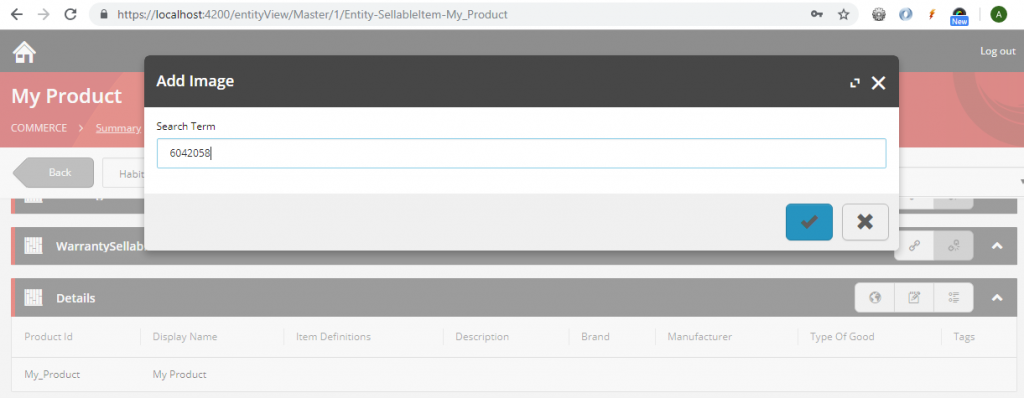
For implementing custom multi-step actions we will skip the details about how to build out the pre-requisites, being the initial Populate View Actions Block to create the entity view action that will trigger the modal, and the Get Entity View Block that will populate the initial entity view that is rendered in the modal, and instead focus on the Do Action Block that will allow us to add the additional steps to the modal.

The multi-step sample show the initial entity view that we will create the second step for.

Essentially, we can implement multi-step actions without using any of the MultiStep classes, simply by adding the new entity view to the commerce context during a Do Action Block, however providing a more complete sample, the following code logic would be applied to our custom Do Action Block.

  1. Validate action
  2. Validate entity (if applicable)
  3. Validate current view properties
  4. Set current view properties to read only
  5. Add new view properties to entity view for next step
  6. Update entity view action with action to perform on the next time the modal is submitted
  7. Add entity view to the commerce context
public override async Task<EntityView> Run(EntityView entityView, CommercePipelineExecutionContext context)
{
    Condition.Requires(entityView).IsNotNull($"{Name}: The argument cannot be null");

    /* 1. Validate action */
    if (string.IsNullOrEmpty(entityView?.Action)
        || !entityView.Action.Equals("FirstAction", StringComparison.OrdinalIgnoreCase))
    {
        return await Task.FromResult(entityView).ConfigureAwait(false);
    }

    /* 2. Validate entity (if applicable) */
    // Not applicable

    /* Validate current view properties */
    // Not critical for sample implementation

    /* Set current view properties to read only */
    foreach (var property in entityView.Properties)
    {
        property.IsReadOnly = true;
    }

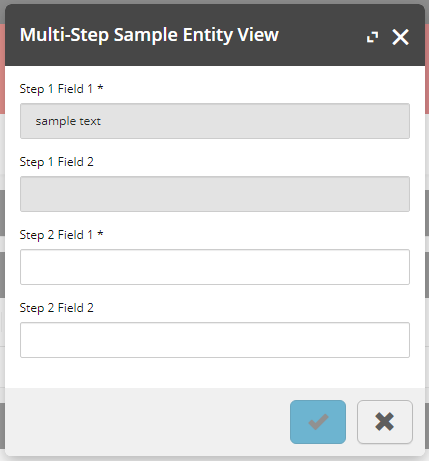
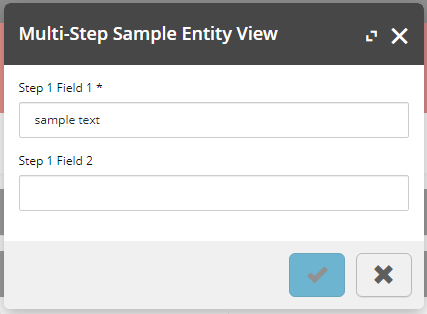
    /* Add new view properties to entity view for next step */
    entityView.Properties.Add(new ViewProperty
    {
        Name = "Step 2 Field 1"
    });

    entityView.Properties.Add(new ViewProperty
    {
        Name = "Step 2 Field 2",
        IsRequired = false
    });

    /* Update entity view action with action to perform on the next time the modal is submitted */
    entityView.Action = "SecondAction";

    /* Add entity view to the commerce context */
    context.CommerceContext.AddModel(entityView);

    return await Task.FromResult(entityView).ConfigureAwait(false);
}
Our multi-step sample entity view after the modal has been submitted, creating the second step view for completing data input.

Sitecore Experience Commerce: Configuring and Customising the BizFx Solution with Locale Support

Reading Time: 3 minutes

In this article, we will look at how the locale can be changed in BizFx to support a desired locale type and the steps required to add support for locales that haven’t been configured in the BizFx solution.

Working in Australia, a common customisation required is to add the ‘en-AU’ locale, primarily to support date/time formatting in BizFx.

A sample date using the default ‘en’ locale configuration.
The same sample date using the ‘en-AU’ locale.

Adding Support for a Locale

To add support for a locale that has not been registered to BizFx, the process is quite simple.

If you are looking to configure BizFx with any of the following locales, then this step will not be required. Default Locales: ‘en’ (‘en-US’), ‘fr-FR’, ‘de-DE’, and ‘Ja-JP’.

In the BizFx solution, open src\app\app.module.ts , import the locale and advanced formatting options from the extra dataset and register the locale via the registerLocaleData function.

The locales are already provided with the BizFx SDK, under src\locales.

/* Locales */
import localeFr from '../locales/fr';
import localeFrExtra from '../locales/extra/fr';
import localeJa from '../locales/ja';
import localeJaExtra from '../locales/extra/ja';
import localeDe from '../locales/de';
import localeDeExtra from '../locales/extra/de';
import localeEnAu from '../locales/en-AU';
import localeEnAuExtra from '../locales/extra/en-AU';

registerLocaleData(localeFr, 'fr-FR', localeFrExtra);
registerLocaleData(localeDe, 'de-DE', localeDeExtra);
registerLocaleData(localeJa, 'Ja-JP', localeJaExtra);
registerLocaleData(localeEnAu, 'en-AU', localeEnAuExtra);

Once we have registered the locale, if we were to configure the locale at this point we would find that there is some messaging in that is not rendered quite right. This is because there are also a handful of text overrides that are stored in the internationalisation folder of BizFx (‘src\assets\i18n\’) that also need to be added to override the default messaging in BizFx.

The LanguageSelector display text has not been configured.

Copy an existing locale file fom the internationalisation folder and update the messaging accordingly.

{
    "ValidationErrors": {
        "IsRequired": "{{DisplayName}} is required.",
        "IncorrectDecimalValue": "{{DisplayName}} has an incorrect decimal value.",
        "IncorrectDateValue": "{{DisplayName}} has an incorrect date value."
    },
    "ActionExecuted": "{{DisplayName}} executed.",
    "Back": "Back",
    "Logout": "Log out",
    "LanguageSelector": "Language displayed",
    "NoSearchResults": "No results matching your search were found.",
    "Searching": "Searching..."
}
The LanguageSelector display text when configured for ‘en-AU’.

Configuring the Locale for BizFx

Now that the locale has been registered to the BizFx solution, the next step is to update the BizFx configuration to use it.

Open src\assets\config.json and set the Language to the newly registered locale.

{
  "EnvironmentName": "HabitatAuthoring",
  "EngineUri": "https://commerceauthoring.XC92.local",
  "IdentityServerUri": "https://XP0.IdentityServer",
  "BizFxUri": "https://bizfx.XC92.local",
  "Language": "en-AU",
  "Currency": "USD",
  "ShopName": "CommerceEngineDefaultStorefront",
  "LanguageCookieName": "selectedLanguage",
  "EnvironmentCookieName": "selectedEnvironment",
  "AutoCompleteTimeout_ms": 300
}

Deploy the BizFx solution as per your preferred deployment method and the locale will now be utilised throughout the BizFx tooling.

Source Code

The source code for this example of adding the ‘en-AU’ locale and other BizFx customisations can be found at Ajsuth.BizFx.

Sitecore Experience Commerce: Associating Inventory from Sellable Item and Variant Pages

Reading Time: 2 minutes

In this article, we introduce a small custom plugin for Sitecore Commerce Business Tools that enables the inventory association for sellable items and variants directly from the Merchandising Manager pages.

Establishing inventory information associations is an action hosted within the Inventory Manager. Prior to the introduction of inventory indexes in XC 9.3, locating an existing inventory information record for large catalogs via the Inventory Manager can be quite a tedious task with the pagination controls being the only form of search.

The custom plugin adds the Associate Sellable Item to an inventory set action to the Inventory Sets entity view for the Sellable Item and Variant merchanding pages.

A transitional step to select the Inventory Set is added to the modal view, which in the Inventory Manager is driven by the inventory set being viewed.

The final step locks the Inventory Set and Sellable Item fields, as they have already been identified, and if the sellable item already had been associated to the selected inventory set then this would behave like an edit view, keeping the UX at the forefront of this implementation.

Managing existing inventory information records can also be more achieved via the Sellable Item and Variant pages in the Inventory Sets entity view actions, however prior to XC 9.3 a business was required to create a new entity version to enable these controls, unless the EntityVersionsActionsPolicy had been updated to allow these actions to bypass the entity version (as they should). This process was also documented in Enabling Disassociate, Edit, and Transfer Inventory Actions for Published Sellable Items and Variants.

Source Code: Extended Sitecore Commerce Inventory project repository

Sitecore Identity Server: Increasing the Token Lifetime for Local Development

Reading Time: < 1 minute

In this article, we will review how to change the authentication token timeout values that force us to log back in to Sitecore or request a new token from Postman. If you are like me, generally working with Sitecore/Sitecore Commerce 10+ hours per day, 6 days a week, it can seem like you are kicked out every 5 minutes. Personally, I set these timeouts to a week (604800 seconds).

Changing the timeouts are not recommended for production instances.

Changing the Timeouts in Sitecore Identity Server

Sitecore Identity Server was first introduced with Sitecore Commerce 9.0.0 and with the release of Sitecore 9.1, Sitecore Identity Server was added to Sitecore authentication process.

Updating the Token Lifetimes in 9.0.X

  1. Open <Sitecore Identity Server root>\wwwroot\appsettings.json.
  2. Under AppSettings.Clients, update the CommerceBusinessTools and Postman API clients for BizFx and Postman applications respectively :-
    1. Update the AccessTokenLifetimeInSeconds and IdentityTokenLifetimeInSeconds from the default 3600 (seconds) to the desired timespan, in seconds.
    2. Save the configuration.
  3. Restart the Sitecore Identity Server so that the updated configuration is consumed on startup.

Updating the Token Lifetimes in 9.3

  1. Open <Sitecore Identity Server root>\Config\production\Sitecore.Commerce.IdentityServer.Host.xml.
  2. Under /Settings/Sitecore/IdentityServer/Clients, update the CommerceClient and PostmanClient for BizFx and Postman applications respectively:-
    1. Update the AccessTokenLifetimeInSeconds and IdentityTokenLifetimeInSeconds from the default 3600 (seconds) to the desired timespan, in seconds.
    2. Save the configuration.
  3. Restart the Sitecore Identity Server so that the updated configuration is consumed on startup.

Working with the BizFx SDK: Preparing the Base Solution for Customisation

Reading Time: 3 minutes

In this article, we will look at preparing the BizFx project for customisation, by first aligning the default configuration of the SDK with the configuration that was deployed with the Sitecore Commerce installation, and then reviewing how to build and deploy solution.

Fair warning: I am not an expert in Angular, however the information provided is enough for getting started and performing the bare minimum to align the BizFx SDK for custom solutions.

Creating the BizFx Development Solution

The Sitecore Commerce On Premise package contains the BizFx SDK and the speak files that will be required for the new project.

Extract the contents of the Sitecore.BizFX.SDK.*.*.*.zip into your desired folder location, e.g. C:\projects\, and copy the speak-ng-bcl-*.*.*.tgz and speak-styling-*.*.*-r*****.tgz files into the same folder as the SDK.

The BizFx SDK does come with a README.md file containing some general instructions on preparing the solution for building, however we will highlight the main aspects of these instructions and cover some addition steps for local and production deployments.

In src\assets\config.json we need to copy the values from our local BizFx installation, located by default at <web root>\<BizFx>\assets\config.json, so that when we deploy our new version the configuration isn’t corrupted. You’ll notice the values that need to be updated are named ‘PlaceholderFor<context>’.

{
  "EnvironmentName": "HabitatAuthoring",
  "EngineUri": "PlaceholderForAuthoringUrl",
  "IdentityServerUri": "PlaceholderForIdentityServerUrl",
  "BizFxUri": "PlaceholderForBizFxUrl",
  "Language": "PlaceholderForDefaultLanguage",
  "Currency": "PlaceholderForDefaultCurrency",
  "ShopName": "PlaceholderForDefaultShopName",
  "LanguageCookieName": "selectedLanguage",
  "EnvironmentCookieName": "selectedEnvironment",
  "AutoCompleteTimeout_ms": 300
}

The other value that will need to be updated for projects will be the EnvironmentName, which is used to select the default environment in BizFx.

It is recommended that the LanguageCookieName and EnvironmentCookieName properties remain as their default value as they may only need to be changed for advanced customisations. We will not cover modifying these properties in this article.

Prerequisites for Building

Assuming node installed already, from the BizFx solution folder, open your preferred CLI tool and run the following commands:-

npm config set @speak:registry=https://sitecore.myget.org/F/sc-npm-packages/npm/
npm config set @sitecore:registry=https://sitecore.myget.org/F/sc-npm-packages/npm/
​​​​​​​npm install speak-ng-bcl-0.8.0.tgz
npm install speak-styling-0.9.0-r00078.tgz
npm install @sitecore/bizfx
npm install

Building and Deploying the BizFx Solution

For building the BizFx Angular application, the ng build command will compile into an output folder named dist, defaulting to the workspace folder. Within the dist folder, the sdk will be the equivalent of the <BizFx> website folder in the web root.

For production builds execute the ng build --prod command, which optimises the compiled solution for production deployments.

For more information about the Angular commands see https://angular.io/cli.

To deploy the BizFx solution, copy the contents of the dist/sdk into the <web root>\<BizFx> folder.

Building and Deploying via Gulp

For building and deploying the BizFx solution, I use a gulp script to wrap the angular commands. See the Source Code link at the end of the article to download the script.

If you haven’t installed gulp, run the following command:-

​​​​​​​npm install gulp

Running the default gulp command will build the solution, clean out the BizFx folder in the web root and the deploy the solution to the BizFx folder.

As the gulp tasks will be performing operations on system restricted folders, make sure you run the gulp command under Administrator privileges.

Source Code: Ajsuth.BizFx.DeploymentScripts

Business Tools: The Autocomplete UI Type Control

Reading Time: 5 minutes

In this article, we will review the Autocomplete UI Type control in detail to understand what capabilities we have available to us with and without further customisation.

What Does the Autocomplete UI Type Control Do?

The Autocomplete control provides the user with a list of potentially search matches to identify the entity with only a partial match. This occurs only when 4 or more characters have been entered into the field.

Upon selection, the entity is converted from its user-friendly display name to the raw entity id value required by the system.

The Implementation Behind the Autocomplete Control?

Commerce Engine Configuration

The autocomplete control is configured by setting a ViewProperty’s UiType to “Autocomplete”. In addition to this there are two policies that need to be added to the ViewProperty, which are required to complete its configuration.

The first policy is the SearchScopePolicy, which is utilised to retrieve the index name from, which is set in the Plugin.Search.PolicySet-1.0.0.json in the Commerce Engine. Using the GetPolicyByType method, pass in the typeof entity that the is configured to the policy’s EntityTypeNames property.

Note: Only the Catalog Items Scope is supported by default.

var searchScopePolicy = SearchScopePolicy.GetPolicyByType(context.CommerceContext, context.CommerceContext.Environment, typeof(SellableItem));

The second policy is a generic policy that will be utilised by BizFx to apply some post-search filtering to the search results. This policy must have the PolicyId of “EntityType” and will contain a list of up to two models.

The first model’s name must be set as the name of the entity without the “Entity-“ prefix (“SellableItem”, “Category”, or “Catalog”). This is known as the policy scope in BizFx.

The second model’s name is only applicable for sellable items and can only be set as “SearchVariants” if you want the variants to be included in the search results for selection. All other values will be ignored and you cannot set multiple entities to be included in the autocomplete list.

var policy = new Policy(new List<Model>()
{
	new Model() { Name = "SellableItem" },
	new Model() { Name = "SearchVariants" }
})
{
	PolicyId = "EntityType"
};

BizFx Implementation

The sc-bizfx-autocomplete.component.ts file that is shipped with the BizFx SDK is where some of the magic happens. A couple of magic strings and magic indexes are the keys to processing the translating the ViewProperty configuration into search parameters and post-search filtering.

In short, when 4 or more characters are available in the text field, the text is added as the search term parameter, and the search index name, which is extracted from the SearchScopePolicy, is added as the scope parameter, passed into the Commerce Engine’s Search API, querying the top 100 results. The results are then processed by the BizFx component by filtering out entities that don’t match the entity type, specified in the policy scope model from the EntityType policy. The results are then added to the list of results that will populate the autocomplete dropdown, using the displayname as the display name and the entityid as the value.

Where SearchVariants have been configured for sellable item searches, the BizFx component iterates over the pipe separated variantdisplayname and variantid fields to create variant entries in the autocomplete list.

Note: As BizFx uses the displayname field to render the autocomplete item list, the order and customer indexes, which do not contain a displayname field cannot be configured with autocomplete functionality without customisation. Alternatively, the Search entity views in the Customers Manager and Orders Manager are available.

Search Configuration

In the Solr core’s managed-schema, copies fields over to the _text_ field, which is used to construct the search query in the Commerce Engine.

The catalog item scope index contains the Catalog, Category, and Sellable Item data, based on the SearchScopePolicy configuration of the Entity Type Names from the Commerce Engine SDK. Search queries will attempt to match fields copied into the _text_ field in the search provider’s index schema.

<copyField source="displayname" dest="_text_"/>
<copyField source="variantid" dest="_text_"/>
<copyField source="variantdisplayname" dest="_text_"/>
<copyField source="productid" dest="_text_"/>
<copyField source="name" dest="_text_"/>

Note: I have only looked into the Solr configuration, so for those using Azure Search there may be some investigation work required to identify its search configuration.

What Configurations are Available for the Autocomplete Control?

Catalog Search

The catalog search is not used by the business tools by default. Instead, due to the low catalog entity count, the underlying code logic for associating a catalog to a price book or promotion book utilises the IFindEntitiesInListPipeline to populate a dropdown list control.

Note: Only the displayname and name fields will be present in the catalog entity indexes.

Category Search

The category search will return results for categories, regardless of the catalog it resides in.

Note: Only the displayname and name fields will be present in the category entity indexes.

Sellable Item Search

The sellable item search has two configurations available. One without variants included in the search results, and one with variants.

Sellable Item without Variants Search

Sellable Item with Variants Search

Sitecore Experience Commerce: Exposing Variation Properties in the Variants Entity View

Reading Time: 2 minutesIn this article, we review another small plugin created, which exposes the variation properties in the Variants entity view within the Merchandising Manager.

The Habitat catalog data has been created in such a way in which the variation properties are exposed via adding the variation property value to the variant display name, e.g. Habitat Dwell Bagless Upright Vacuum (Red). While this approach works to an extent, it will get more ugly as the variation properties grow, e.g. My Test Jeans (Blue, 32, slim).

The custom plugin will traverse over the variation’s components to find the the properties that match the names provided in the VariationPropertiesPolicy and render them to the Variants entity view.

In the example above, I have specified the following property names, Color, Size, Style, and Length, which works well when all properties have been specified (see below).

A couple of things to note about the platform implementation:

  • Variation Properties apply to all Sellable Items globally. If a product contains a value against a property that is specified in the Variation Properties Policy it will render as a variant selection in the Storefront.
  • There is no validation to ensure that variation properties are mandatory for variants. This is because not all products will utilise these variation properties. I didn’t think it was necessary to add more overhead to remove columns that contained no values.
  • You’ll notice above that the first 2 variants of my Test Pants have matching variation properties. This is again due to having no validation in place, which I believe will break the storefront. So whether you have implemented a catalog import or are entering product data manually be careful not to double up.

Source Code: Ajsuth.Feature.Catalog.VariantProperties.Engine

Sitecore Experience Commerce: Configuring Variation Properties for the Storefront

Reading Time: 2 minutesIn this article, we will review the process of configuring product variations properties so that the Product Variants SXA component will render them as dropdown selection controls. This controls allows the user to select the variant property combinations, where each combination represents individual product variants of a product family.

Configure the Variation Properties

In the Commerce Engine solution:

  1. Define all variation property names in the VariationPropertyPolicy of the environment configuration files.
    1. In this sample, we will add the Style property to the VariationPropertyPolicy.
      Note: The property names are the names of properties that exist on child components of the ItemVariationComponent. The fully qualified namespace for the property is not required as the SXA Storefront logic will use a property name match against the field names produced by the Catalog Generated templates.

      {
        "$type": "Sitecore.Commerce.Plugin.Catalog.VariationPropertyPolicy, Sitecore.Commerce.Plugin.Catalog",
        "PropertyNames": {
          "$type": "System.Collections.Generic.List`1[[System.String, mscorlib]], mscorlib",
          "$values": [
            "Color",
            "Size",
            "Style"
          ]
        }
      }
      
  2. Publish the solution and Bootstrap the Commerce Engine.
  3. Verify the variation property in the Storefront.
    Note: In the sample below I updated the sellable item’s Style property with the value “Modern” for demo purposes.

Add Variant Specification Label

If you create add new properties that does not have corresponding label configured the variation property label will display as “[YourProperty]“.

To resolve this, go to the Sitecore Content Editor:

  1. Add user friendly label value to /sitecore/Commerce/Commerce Control Panel/Storefront Settings/Commerce Terms/Variant Specification Labels.
  2. Publish the Sitecore Item and Reindex.

Sitecore Experience Commerce: Reordering Images on Sellable Items

Reading Time: 2 minutesIn this article, we introduce a small custom plugin for Sitecore Commerce Business Tools that enables the reordering of images for sellable items and variants.

In its current release (XC 9.0.3), the only way to reorder images is to remove existing images and re-adding them in the desired order. It’s not the best user experience and can take a considerable length of time to relocate the original images.

The custom catalog plugin adds 2 new actions to the Images actions – Move Image Up and Move Image Down.

The functionality is still a little clunky. The confirmation dialog shows each time an image is moved, the selected image will always reset to the first image after each action, and while the move buttons are not disabled for its outer limits, the code logic prevents out of boundary exceptions from being thrown. Overall, it is definitely an upgraded approach to reordering images.

Publishing the sellable item through workflow is still required in order to have the changes show in the storefront.

Source Code: Extended Sitecore Commerce Catalog project repository

Sitecore Experience Commerce: Managing Catalog Images

Reading Time: 5 minutes

In this article, we will look at how to manage catalog images that are associated to sellable items in the Business ToolsMerchandising Manager.

With the Habitat Master catalog and SXA Storefront site that is setup during the installation of Sitecore Experience Commerce, we have a great reference point for implementing custom sites. However, one of the not so obvious configurations is how to configure catalog images for new catalogs.

Commerce Media Items OData API Key

In Sitecore’s Core database (pre XC 9.1) or Master database (from XC 9.1), the Commerce Media Items OData API Key contains the Search Filter property, which is responsible for applying the filter of media items that are restricted in the search results.

(Fields/any(f: (f/Name eq 'Extension' and (f/Value eq 'png' or f/Value eq 'jpg'))) and Language eq 'en' and (contains(Path, '/images/adventure') or contains(Path, '/images/habitat')))

The Search Filter value itself is performing 3 levels of filtering:-

  1. Extension Type: The supported media extension types.
  2. Language: The language is utilised to prevent duplicate media items from being returned, i.e. per language version.
  3. Location: The media library folder where the catalog images are stored.

Note: This is a global configuration that will apply to all media search controls in Sitecore Commerce. This means that although we can segregate catalog images to different Media Library folders in Sitecore, the Image search results in the Business Tools will return results for all configured catalog image folder locations and extension types.  This makes sense considering sellable items can be associated across catalogs.

Configuring Image Extension Types

The default configured image types include jpg and png formats. To modify the extension types, we look at the extension part of the filter where we can add or remove the Value comparisons as desired.

(f: (f/Name eq 'Extension' and (f/Value eq 'png' or f/Value eq 'jpg')))

Configure the Value comparison in the format f/Value eq ‘<extension type>’. Don’t modify the wrapping logic. When specifying multiple extensions use the ‘or’ clause as per the initial configuration.

Adding Extension Type Example

In this example, I will add the gif extension type and sample image to validate the change.

Configure the Extension Type

In the Sitecore Content Editor using the Core database (pre XC 9.1) or Master database (from XC 9.1) :-

  1. Go to /sitecore/system/Settings/Services/API Keys/CommerceMediaItemsODataAPIKey
  2. Update the extension part of the Search Filter value to include the ‘gif’ comparison.
(f: (f/Name eq 'Extension' and (f/Value eq 'png' or f/Value eq 'jpg' or f/Value eq 'gif')))

Add Images of the New Extension Type

In the Sitecore Content Editor using the Master database:-

  1. Go to /sitecore/media library/Images/<catalog image folder>
  2. Upload the media file to the folder.

    e.g. sunglasses.gif
  3. Publish the item.
  4. Re-index the master/web databases.

Add the Image to a Sellable Item

In the Business Tools’ Merchandising Manager:-

  1. Navigation to the desired Sellable Item or create a new Sellable Item.
    1. Ensure the Sellable Item‘s Entity Version has not been published, otherwise a new version will need to be created.
  2. Under the Images section, click the Add an Image button.
  3. Search for the image name.
  4. Select the image name and click the tick (accept) button.
  5. Promote the sellable item through the workflow states until it’s published.

View the Image on the Sellable Item in the Storefront

In the Storefront’s website:-

  1. Either navigate to the Category or Search Results Page, containing the product, navigate to any page that contains any component that displays the Sellable Item, e.g. Promoted Products component, or navigate directly to the Product Details Page.

Configuring Image Source Location

For media image location, we need to configure the location part of the filter where we can add or remove the Path comparisons as desired.

By default, we see that the locations have been configured for the folders that have been utilised for the Adventure Works and Habitat catalogs.

(contains(Path, '/images/adventure') or contains(Path, '/images/habitat'))

Configure the Path to the location of the catalog images folder in the format contains(Path, ‘/<catalog image folder location>’)  where <catalog image folder location> is under the Media Library Sitecore item tree. When using multiple folder locations (usually one folder per catalog), use the ‘or’ clause as per the initial configuration.

Update: I found that the contains function had some issues with parsing the Path value where spaces are used in the item names, hence ‘/images/adventure’ rather than ‘/images/adventure works’. Another issue I found was that using the contains function also meant that any folder structure, outside the Media Library item, in the Sitecore tree that matched the path would also be included for the media search results causing undesired entries.

To resolve this, I found a more performant an accurate solution using the startswith function, which appears to resolve the Path value relative to the Media Library item and accepts spaces in the item names.

(startswith(Path, '/images/adventure works/')

Please note that I haven’t updated the remainder of this article with this change, but keep it in mind when making updating the filter yourself.

Adding Catalog Image Folder Example

In this example, I will add the HelloWorld catalog image folder type and sample image to validate the change.

Configure the Location Folders

In the Sitecore Content Editor using the Core database (pre XC 9.1) or Master database (from XC 9.1) :-

  1. Go to /sitecore/system/Settings/Services/API Keys/CommerceMediaItemsODataAPIKey
  2. Update the location part of the Search Filter value to include the ‘helloworld’ comparison.
(contains(Path, '/images/adventure') or contains(Path, '/images/habitat') or contains(Path, '/images/helloworld'))

Add Images of the Catalog Image Folder

In the Sitecore Content Editor using the Master database:-

  1. Go to /sitecore/media library/Images/HelloWorld
  2. Upload the media file to the folder.

    e.g. sunglasses.jpg
  3. Publish the item.
  4. Re-index the master/web databases.

Search for the Image in the Merchandising Manager

In the Business Tools’ Merchandising Manager:-

  1. Navigation to the desired Sellable Item or create a new Sellable Item.
    1. Ensure the Sellable Item‘s Entity Version has not been published, otherwise a new version will need to be created.
  2. Under the Images section, click the Add an Image button.
  3. Search for the image name.
  4. Ensure the image shows in the search results

Summary

We learnt that the configurations of image folder location and filtered media extension types for catalog images are set in the Search Filter field of the Commerce Media Items OData API Key Sitecore item in the Core database (pre XC 9.1) or Master database (from XC 9.1) . We also learnt that the configurations are global and will apply to all media search controls in the Business Tools.