Sitecore Experience Commerce: Implementing Multi-Step Actions in the Business Tools

Reading Time: 6 minutes

In this article, we will look at multi-step actions and how we can implement them for customising the Sitecore Commerce Business Tools.

What is a Multi-Step Action?

The multi-step action is the approach to building out entity view modals to act as a kind of wizard, where inputs from each step can affect the subsequent steps.
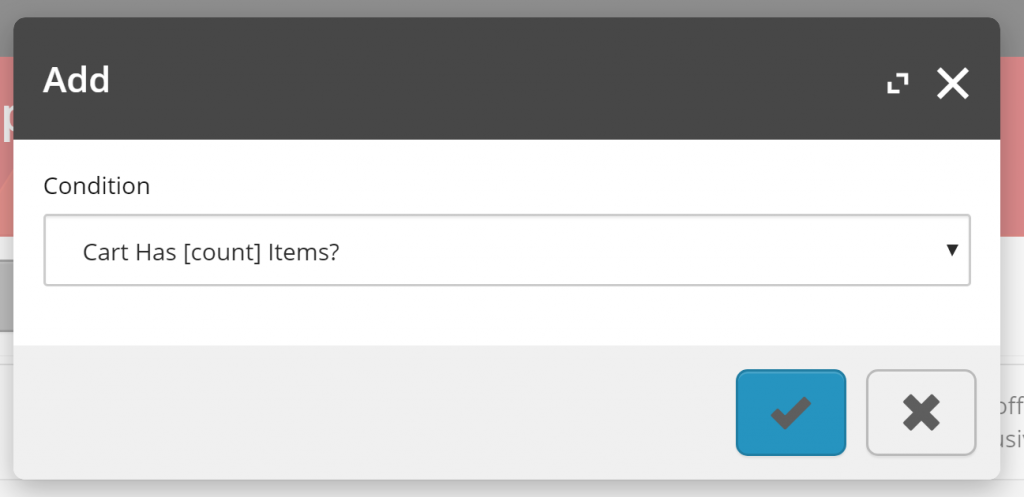
Adding a qualification/condition to a promotion – step 1.
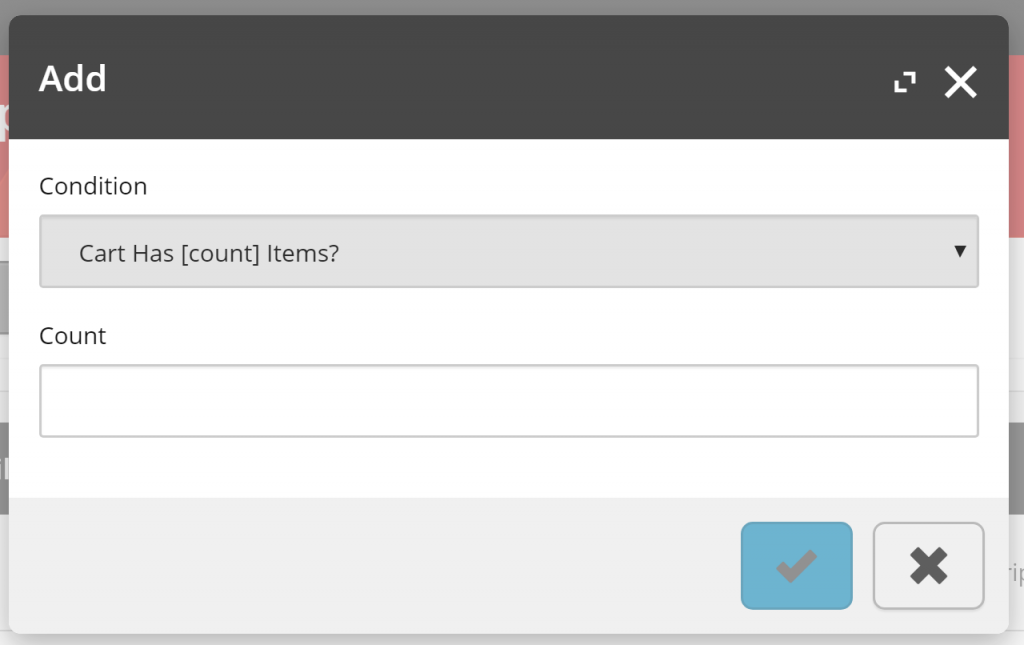
Adding a qualification/condition to a promotion – step 2.

A Dive into the Multi-Step Action Implementation

We will take a dive into the pieces that make up the multi-step action implementation to see just how we should be building our custom multi-step modal, using the Add Qualification modal for promotions as our working example.

This section is focused on explaining what will be found in the current platform implementation, which can be useful if looking to extend the BizFx and Commerce Engine functionality, but can be skipped if you are only after Implementing Custom Multi-Step Actions as quick as possible.

MultiStepActionPolicy

The MultiStepActionPolicy houses a single property, FirstStep, which will contain the EntityActionView that will be populated in the modal entity view.

public MultiStepActionPolicy()
{
    this.FirstStep = new EntityActionView();
}

public EntityActionView FirstStep { get; set; }

In the following code snippet, we see that the MultiStepActionPolicy is added to the EntityActionView, in which the QualificationsDetails that is assigned to the EntityView will use to populate the first step of the add qualification modal.

Line 18 highlights the Name of the entity view action, which will be resolved to its localised value from the …/Commerce Terms/BusinessTools/ViewActionNames/AddQualification, and populates modal’s title.

var actionPolicy = arg.GetPolicy<ActionsPolicy>();
actionPolicy.Actions.Add(
        new EntityActionView(new List<Policy>
        {
            new MultiStepActionPolicy
            {
                FirstStep = new EntityActionView
                {
                    Name = context.GetPolicy<KnownPromotionsActionsPolicy>().SelectQualification,
                    DisplayName = "Select Qualification",
                    Description = "Selects a Qualification",
                    IsEnabled = isEnabled,
                    EntityView = context.GetPolicy<KnownPromotionsViewsPolicy>().QualificationDetails
                }
            }
        })
        {
            Name = context.GetPolicy<KnownPromotionsActionsPolicy>().AddQualification,
            DisplayName = "Add Qualification",
            Description = "Adds a Qualification",
            IsEnabled = isEnabled,
            EntityView = string.Empty,
            Icon = "add"
        });
The entity view populated in the first step, of the Add Qualification modal, is resolved from the entity view action name of the EntityActionView, assigned to the MultiStepActionPolicy’s FirstStep, which in this case is the SelectQualification action.

LocalizeEntityViewBlock

In the LocalizeEntityViewBlock, we find that the SelectQualification action name is being populated with the localised term, however as mentioned above, the modal utilises the AddQualification localised term instead, therefore we don’t need to be concerned with this.

if (!action.HasPolicy<MultiStepActionPolicy>())
{
    continue;
}

var firstStepAction = action.GetPolicy<MultiStepActionPolicy>().FirstStep;
await SetActionLocalizedTerms(firstStepAction, context).ConfigureAwait(false);

MultiStepActionModel

This model is quite simple. The NextStep represents the name of the action to be executed when the modal form is submitted.

public MultiStepActionModel(string nextStep)
{
    this.NextStep = nextStep;
}

public string NextStep { get; set; }

In the following extract of DoActionSelectQualificationBlock, I have substituted out most of the code with comments, explaining the original code logic, to reduce the noise and keep focus on the multi-step implementation functionality.

In line 11, we see that the original condition property has been made readonly as we don’t want the user to change their mind at this stage, however we don’t want to hide the property as the user still needs to have context of what was previously selected.

Updating the readonly status of submitted view properties is considered a recommended practice.

Line 15 we have a comment that tells us that this is where the next step’s view properties are added to the current entity view, building out the modal form.

This also means that the Do Action Blocks acts a pseudo Get Entity View Block as the initial modal’s entity view is populated via the GetEntityView() API, utilising the IGetEntityViewPipeline under the hood, while subsequent updates in the multi-step implementation are triggered as the DoUxAction() API calls the IDoActionPipeline to process requests.

Finally, line 17 has the original entity view action name, ‘AddQualification’, added to the MultiStepActionModel as the NextStep and applied to the commerce context.

With the knowledge that adding the MultiStepActionModel to the context effectively creates the next step in the modal, there is no limit to how many steps we can add to a multi-step modal.

public override async Task<EntityView> Run(EntityView entityView, CommercePipelineExecutionContext context)
{
    /* validate action */

    /* validate promotion */

    var selectedCondition = entityView.Properties.FirstOrDefault(p => p.Name.Equals("Condition", StringComparison.OrdinalIgnoreCase));

    /* validate condition */

    selectedCondition.IsReadOnly = true;

    /* add and/or conditional operator. hide if no qualifications have been applied to the promotion so far */

    /* add new view properties for selected condition */

    context.CommerceContext.AddModel(new MultiStepActionModel(context.GetPolicy<KnownPromotionsActionsPolicy>().AddQualification));

    return entityView;
}
DoActionSelectQualificationBlock validates the Condition selection and updates the entity view to contain the remaining view properties required for configuring the ‘Cart Has [count] Items?’ qualification as the second step of this multi-step action modal.

CheckForMultiStepActionBlock

From the following snippet from CheckForMultiStepActionBlock, we see that it updates the current entity views action, removes the MultiStepActionModel from the commerce context, and adds the entity view to the commerce context.

In short, this logic is more of a helper, and we could get the same result by omitting the registration of the MultiStepActionModel, updating the entity view action, and add the entity view directly in the Do Action Block instead.

var multiAction = context.CommerceContext.GetModels<MultiStepActionModel>().FirstOrDefault();
if (string.IsNullOrEmpty(multiAction?.NextStep))
{
    return Task.FromResult(arg);
}

entityView.Action = multiAction.NextStep;
context.CommerceContext.RemoveModel(multiAction);
context.CommerceContext.AddModel(entityView);

The DoUxAction API

The last piece of the puzzle comes with BizFx’s handling of the response of the DoUxAction API when we submit the modal dialog.

If an entity view object is returned in the API response object, BizFx will render the modal with the updated view instead of closing the modal and refreshing the current page view.

If we were to change the modal’s entity view name during any of the steps it will not be reflected in the modal’s title as there is no handling for this implemented by default in BizFx.

Summary

Let’s review what we have learnt about multi-step actions.

  1. Adding the MultiStepActionPolicy to an EntityActionView basically swaps out the intended action from being executed in the initial GetEntityView() request, however the modal’s title will reflect the initial EntityActionView‘s localised name.
  2. The LocalizeEntityViewBlock application to the EntityActionView in the MultiStepActionPolicy’s FirstStep is superfluous and does not impact the multi-step implementation.
  3. Do Action Blocks act as pseudo Get Entity View Block for updating the modal’s entity view.
  4. When updating entity views with multi-step actions, previously input view properties should be set to readonly as a recommended practice.
  5. The usage of the MultiStepActionModel is more of a helper model in CheckForMultiStepActionBlock, rather than a dependent piece of the implementation.
  6. There is no limit to how many steps we can add to a multi-step action modal.
  7. The modal title is not updated with an updated entity view.
  8. When the Commerce Engine’s DoUxAction() API returns an entity view in the response model, BizFx will render it in the current modal view.

Implementing Custom Multi-Step Actions

For implementing custom multi-step actions we will skip the details about how to build out the pre-requisites, being the initial Populate View Actions Block to create the entity view action that will trigger the modal, and the Get Entity View Block that will populate the initial entity view that is rendered in the modal, and instead focus on the Do Action Block that will allow us to add the additional steps to the modal.
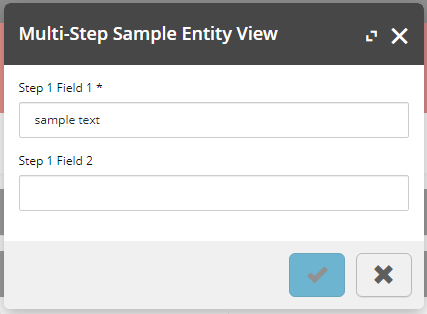
The multi-step sample show the initial entity view that we will create the second step for.

Essentially, we can implement multi-step actions without using any of the MultiStep classes, simply by adding the new entity view to the commerce context during a Do Action Block, however providing a more complete sample, the following code logic would be applied to our custom Do Action Block.

  1. Validate action
  2. Validate entity (if applicable)
  3. Validate current view properties
  4. Set current view properties to read only
  5. Add new view properties to entity view for next step
  6. Update entity view action with action to perform on the next time the modal is submitted
  7. Add entity view to the commerce context
public override async Task<EntityView> Run(EntityView entityView, CommercePipelineExecutionContext context)
{
    Condition.Requires(entityView).IsNotNull($"{Name}: The argument cannot be null");

    /* 1. Validate action */
    if (string.IsNullOrEmpty(entityView?.Action)
        || !entityView.Action.Equals("FirstAction", StringComparison.OrdinalIgnoreCase))
    {
        return await Task.FromResult(entityView).ConfigureAwait(false);
    }

    /* 2. Validate entity (if applicable) */
    // Not applicable

    /* Validate current view properties */
    // Not critical for sample implementation

    /* Set current view properties to read only */
    foreach (var property in entityView.Properties)
    {
        property.IsReadOnly = true;
    }

    /* Add new view properties to entity view for next step */
    entityView.Properties.Add(new ViewProperty
    {
        Name = "Step 2 Field 1"
    });

    entityView.Properties.Add(new ViewProperty
    {
        Name = "Step 2 Field 2",
        IsRequired = false
    });

    /* Update entity view action with action to perform on the next time the modal is submitted */
    entityView.Action = "SecondAction";

    /* Add entity view to the commerce context */
    context.CommerceContext.AddModel(entityView);

    return await Task.FromResult(entityView).ConfigureAwait(false);
}
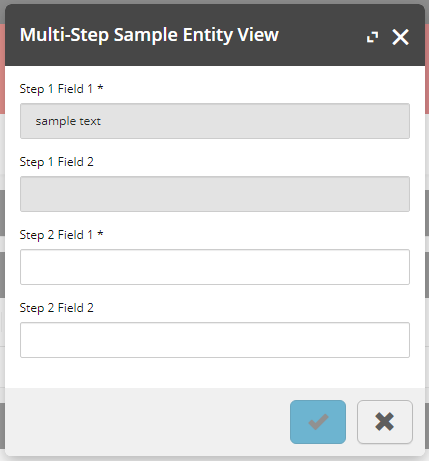
Our multi-step sample entity view after the modal has been submitted, creating the second step view for completing data input.

Sitecore Identity Server: Increasing the Token Lifetime for Local Development

Reading Time: < 1 minute

In this article, we will review how to change the authentication token timeout values that force us to log back in to Sitecore or request a new token from Postman. If you are like me, generally working with Sitecore/Sitecore Commerce 10+ hours per day, 6 days a week, it can seem like you are kicked out every 5 minutes. Personally, I set these timeouts to a week (604800 seconds).

Changing the timeouts are not recommended for production instances.

Changing the Timeouts in Sitecore Identity Server

Sitecore Identity Server was first introduced with Sitecore Commerce 9.0.0 and with the release of Sitecore 9.1, Sitecore Identity Server was added to Sitecore authentication process.

Updating the Token Lifetimes in 9.0.X

  1. Open <Sitecore Identity Server root>\wwwroot\appsettings.json.
  2. Under AppSettings.Clients, update the CommerceBusinessTools and Postman API clients for BizFx and Postman applications respectively :-
    1. Update the AccessTokenLifetimeInSeconds and IdentityTokenLifetimeInSeconds from the default 3600 (seconds) to the desired timespan, in seconds.
    2. Save the configuration.
  3. Restart the Sitecore Identity Server so that the updated configuration is consumed on startup.

Updating the Token Lifetimes in 9.3

  1. Open <Sitecore Identity Server root>\Config\production\Sitecore.Commerce.IdentityServer.Host.xml.
  2. Under /Settings/Sitecore/IdentityServer/Clients, update the CommerceClient and PostmanClient for BizFx and Postman applications respectively:-
    1. Update the AccessTokenLifetimeInSeconds and IdentityTokenLifetimeInSeconds from the default 3600 (seconds) to the desired timespan, in seconds.
    2. Save the configuration.
  3. Restart the Sitecore Identity Server so that the updated configuration is consumed on startup.

Sitecore Experience Commerce: Working with Digital Sellable Items – Part 1

Reading Time: 5 minutes

In this article, we will review the difference between physical and digital sellable items, while focusing on the lesser documented digital sellable items. We will also review how to configure digital sellable items in the business manager.

For a more technical details behind the implementation of digital sellable items, see Working with Digital Sellable Items – Part 2.

Sellable Item Classifications

Sellable items can either represent physical or digital items. The following high-level overviews detail some of the discerning factors between the two classifications of sellable items.

Physical Sellable Items

Physical sellable items are any tangible product that a customer can purchase and have delivered. This is the default product type when creating sellable items via the Merchandising Manager in Sitecore Commerce.

Inventory

With physical items, inventory is required to track stock levels and prevent overselling.

Fulfillment Option Types

When purchasing physical items, during the checkout delivery step, a customer typically enters a delivery address of where the items will be delivered to, or selects a ‘click and collect’ style fulfillment option type where they can pick up the items from.

The SXA Storefront provides the common ‘deliver to address’ (physical) fulfillment option type.

Digital Sellable Items

Digital sellable items represent non-tangible products that a customer can purchase that entitle the customer to a form of product or service. Examples of digital sellable items include services, such as installation, warranties, subscriptions, digital downloads, online access, and digital currency (gift cards).

Inventory

As digital sellable items are non-tangible, they do not require inventory information to be associated to them. This can also be thought of as having perpetual inventory, therefore always being available for purchase.

Fulfillment Option Types

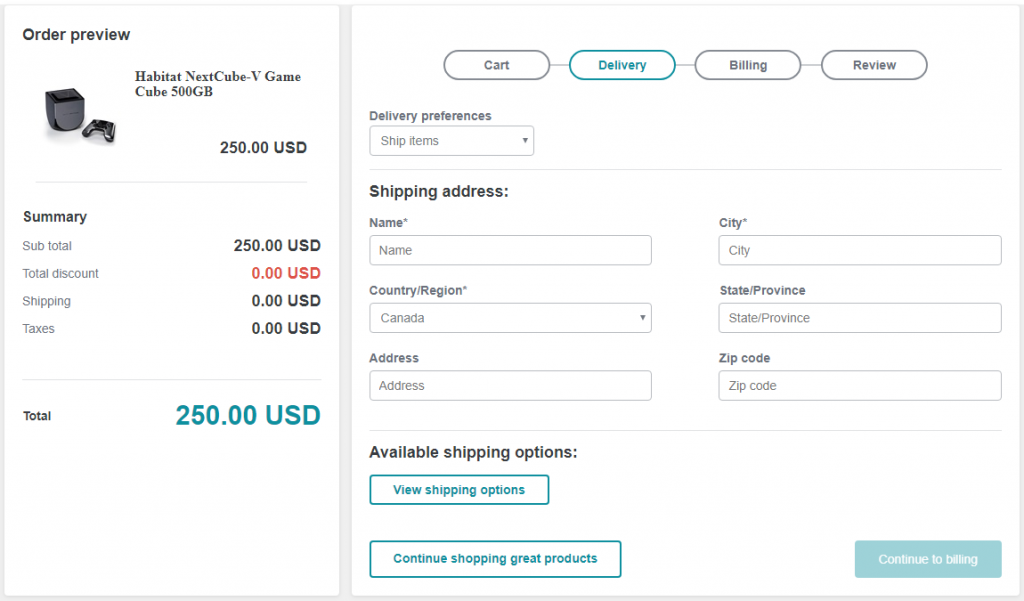
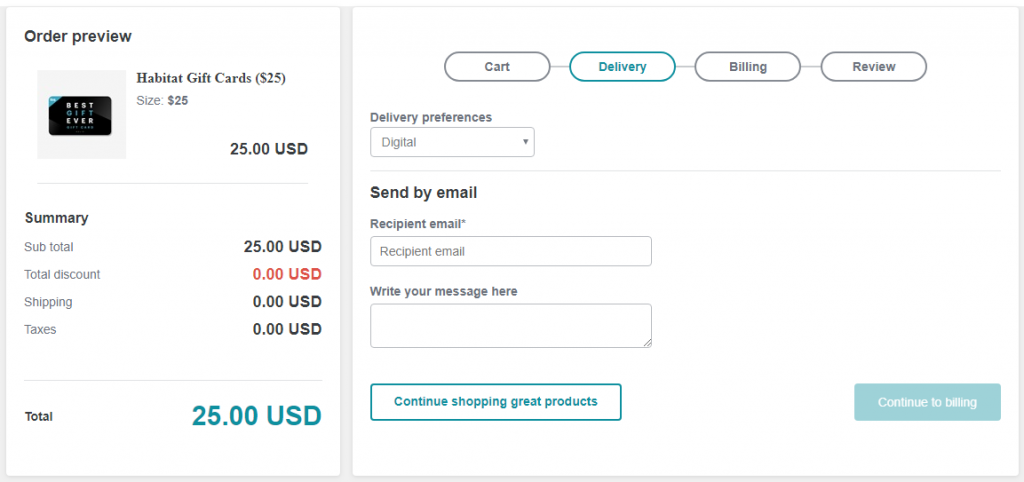
For digital sellable item purchases, the SXA Storefront provides a digital delivery sample implementation intended for digital gift card purchases, consisting of a recipient email and custom message, so the digital gift card can be personalised and delivered via email to the intended recipient.

Alternately, for other digital item fulfillment option types, custom implementations would be required to handle these scenarios, based on the client’s requirements. Some ideas of requirements are as follows:

  • Services: A custom form, potentially with a third party integration, to create a booking system.
  • Warranties: A custom form to register the sellable item that the warranty was purchased for.
  • Subscriptions: A custom form to register the subscription’s recipient details.
  • Digital Downloads: A custom form containing requesting the email address to send the digital download link to, or perhaps the user account functionality is customised to provide access to digital downloads.
  • Online access: Similar to digital downloads, the user may be given access to content via their logged in account, which may not require additional details to be taken during the Delivery step, however may require the user to make the purchase via a registered account.

Cart Lines

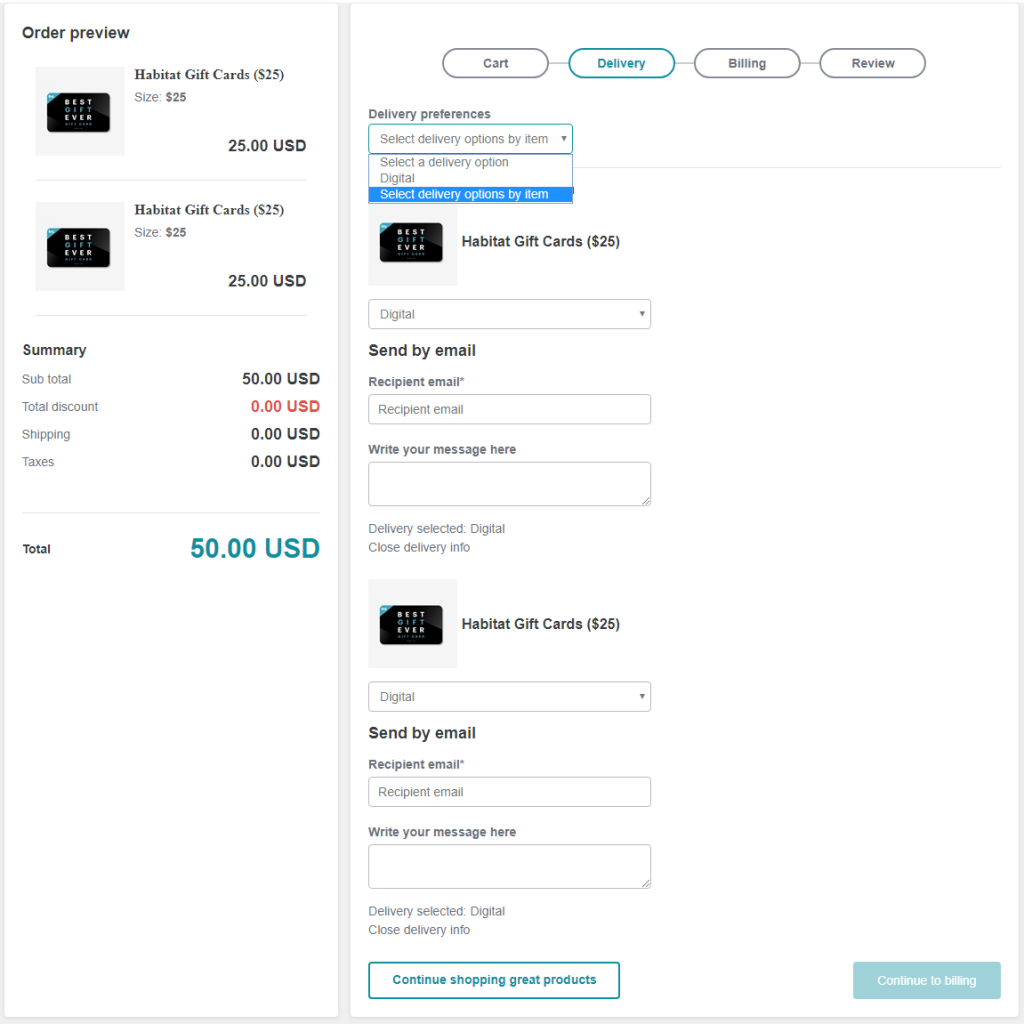
Digital sellable items are also separated into their own line items, e.g. when adding a digital sellable item with quantity of 2 this will create 2 cart lines with a quantity of 1, rather than 1 cart line with a quantity of 2. This provides the customer with the ability to input unique delivery information for each item during the checkout delivery step.

Entitlements

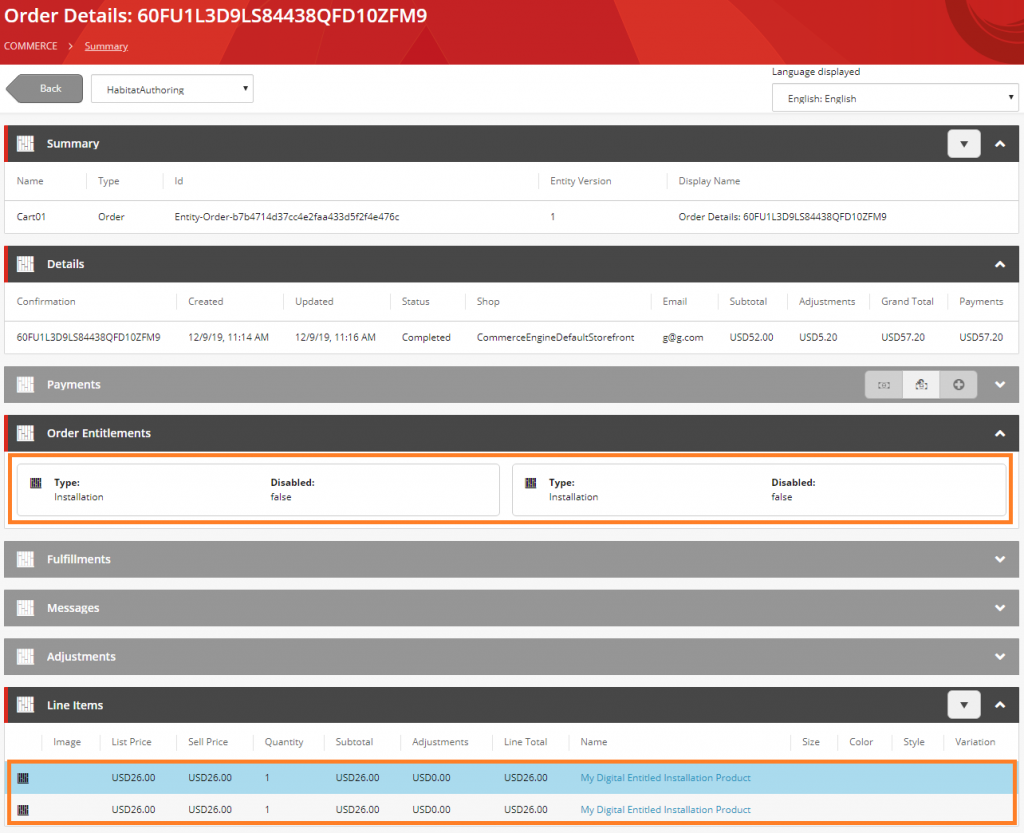
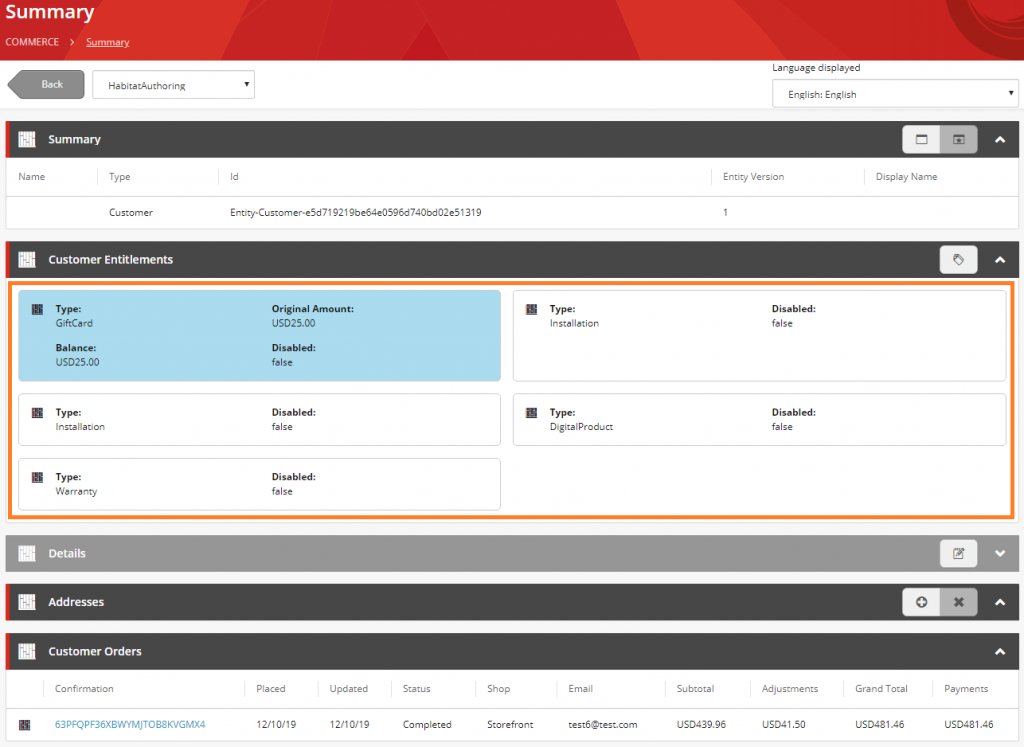
Another differentiating factor of digital sellable items are entitlements, which are registered to the order and customer account (where users are registered at the time of purchase), so that customer service representatives can view the current state of each entitlement.

Entitlements provides a basic implementation and a great starting point for customisation to meet business requirements.

Order Summary with entitlements
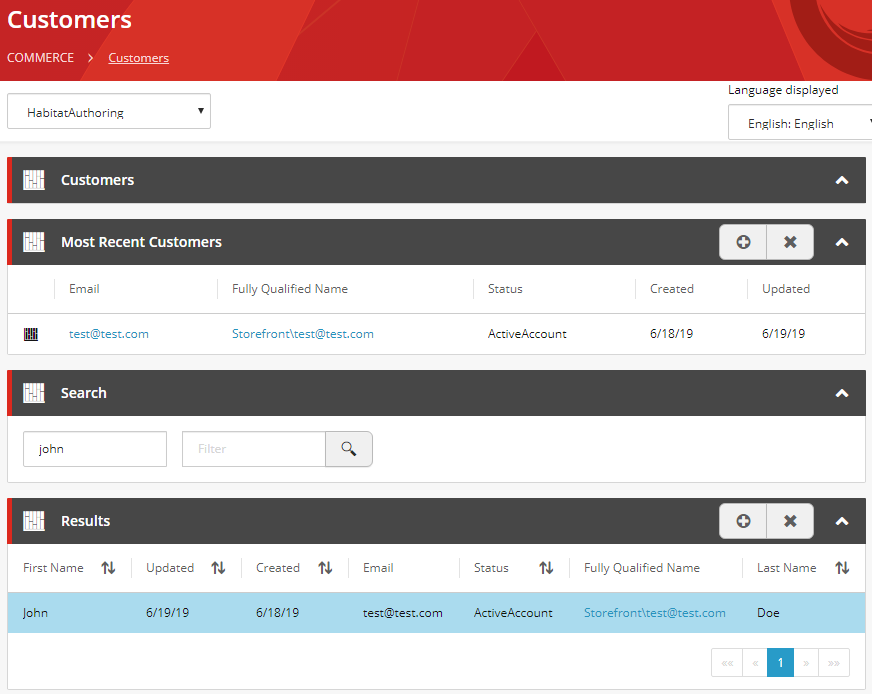
Customer Summary with entitements

Configuring Digital Sellable Items

Digital sellable items are determined by applying the appropriate Digital Sellable Item Tags on the sellable item and its variants. Let’s review this together.

In the Business Tools,

  1. Navigate to the Merchandising Manager
  2. Locate an existing new sellable item or create a new sellable item and navigate to the Sellable Item page view
  3. Follow either Configuring Standalone Sellable Items or Configuring Sellable Item With Variants
  4. Ensure the sellable item has a valid list price and/or price card with an active price snapshot, so that the sellable item is purchasable
  5. Publish the sellable item

Configuring Standalone Sellable Items

  1. Add the appropriate tag that represents a Digital Item.
  2. Add the appropriate tag that represents the desired type of Digital Item Type.
    This will likely be the same tag as the Digital Item, therefore not required, however it is good to validate that the tags match, especially if custom tags have been assigned to the digital item and digital item type tag policies.
  3. Add the tag “entitlement”.
Sellable item tags

Configuring Sellable Items With Variants

  1. On the sellable item, add the appropriate tag that represents a Digital Item.
  2. On each variant:
    1. Add the appropriate tag that represents the desired type of Digital Item Type.
    2. Add the tag “entitlement”.

Note: Technically, the variants inherit tags from the parent sellable item only if no tags have been specified on the variant. Configuring any tags on a variant will remove the inherited tags from the variant, therefore these instructions specify the fool-proof solution.

Sellable item tags
Variant tags

Digital Sellable Item Tags

The following tables contain the default tags that are used to classify sellable items as digital and their digital item types.

Note: Tags for digital sellable items are not treated as case-sensitive.

Digital Item Tags

ClassificationDefault Tags
Digital Itementitlement
service
installation
subscription
digitalsubscription
warranty
onlinetraining
onlinelearning
giftcards

Digital Item Type Tags

TypeDefault Tags
Virtual Gift Cardgiftcards
Digital ProductOnlineTraining
OnlineLearning
Subscription
DigitalSubscription
Warranty Warranty
InstallationInstallation
Service

Sitecore Experience Commerce: Accessing the GetRawEntity API

Reading Time: 2 minutes

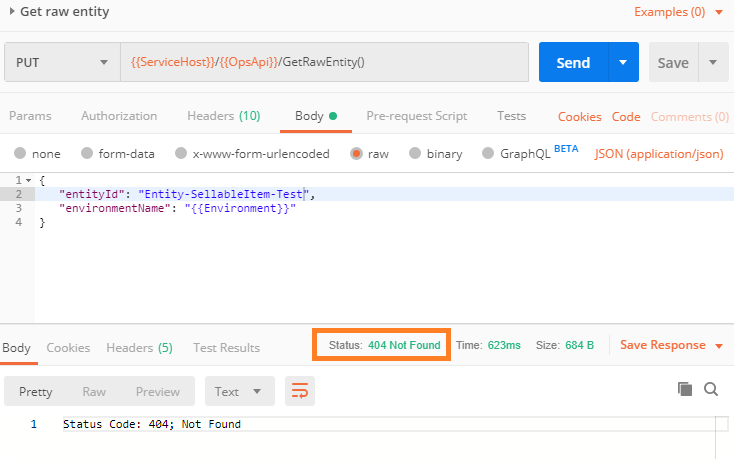
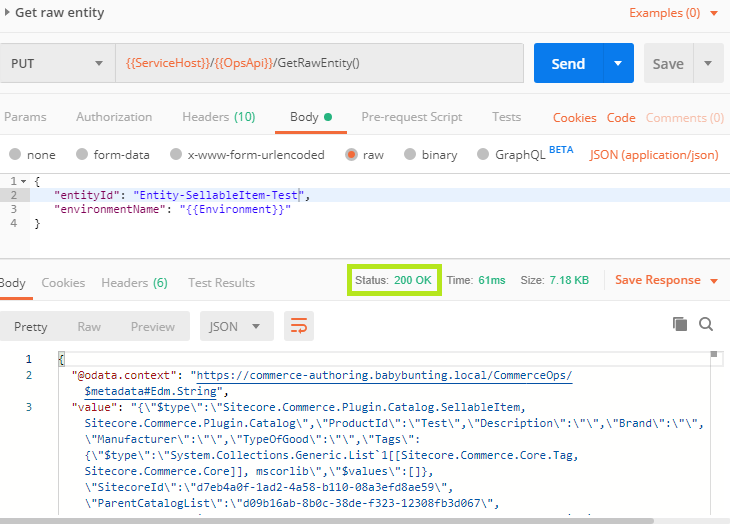
In this article, we will take a look at why the GetRawEntity api returns a 404 Not Found response for the default admin user in Sitecore Commerce.

Note: The GetRawEntity API is intended for troubleshooting and validation purposes and would be utilised by devops and developer users.

Reviewing the commerce logs we find that the QA role in not a role in the current request.

00064 22:41:06 ERROR CtxMsg.Error.QARoleNotFound: Text=QA is not a role in the current request.
00064 22:41:06 ERROR PipelineAbort:QA is not a role in the current request.

We can resolve this by updating the role memberships assigned the admin user, or any desired user.

  1. In Sitecore, go to the User Manager
  2. Select and edit the desired user
  3. In the Edit User modal,
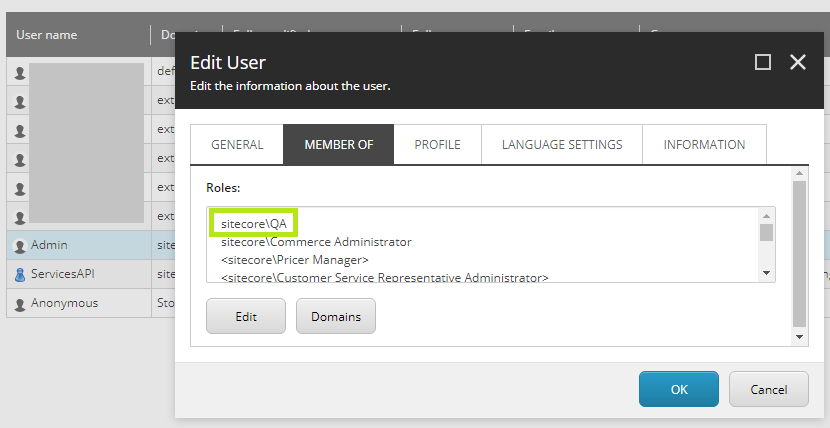
    1. Select the MEMBER OF tab and edit the roles.
    2. Locate the sitecore\QA role and add it to the selected roles.

Note: If the user has already has received a token from Identity Server, a new token will need to be issued to receive the new role.

Sitecore Experience Commerce: Enabling Disassociate, Edit, and Transfer Inventory Actions for Published Sellable Items and Variants

Reading Time: 2 minutes

In this article, we will look at how we can enable the Disassociate Sellable Item from Inventory Set, Edit Sellable Item Inventory and Transfer Inventory actions when viewing sellable item and variant entity views in BizFx.

For entities that have been configured to utilise entity versioning (catalogs, categories, and sellable items), via the VersioningPolicy in the VersioningPolicySet, all actions are disabled by default when the entity has been published.

The actions that are enabled are due to those actions being registered in the EntityVersionsActionsPolicy in the VersioningPolicySet, under the AllowedActions property.

There is no need to restrict the Inventory Sets actions in the Sellable Item and Variant entity views as they can be executed from within the Inventory Manager.

Note: Inventory association and disassociation actions apply to all entity versions of the sellable items as inventory records don’t have strong ties to specific entity versions as inventory is not content.

To enable the Inventory Sets actions, simply add their action names to the AllowedActions, and deploy and bootstrap.

{
    "$type": "Sitecore.Commerce.Plugin.EntityVersions.EntityVersionsActionsPolicy, Sitecore.Commerce.Plugin.EntityVersions",
    "AllowedActions": {
    "$type": "System.Collections.Generic.List`1[[System.String, mscorlib]], mscorlib",
    "$values": [
            "AddEntityVersion",
            "AddCatalog",
            "DeleteCatalog",
            "AddCategory",
            "DeleteCategory",
            "AddSellableItem",
            "DeleteSellableItem",
            "AddBundle",
            "AssociateCategoryToCategoryOrCatalog",
            "AssociateSellableItemToCatalog",
            "AssociateSellableItemToCategory",
            "DisassociateItem",
            "MakePurchasable",
            "DisassociateSellableItemFromInventorySet",
            "EditSellableItemInventory",
            "TransferInventory"
        ]
    }
}

These actions can now be performed, regardless of whether or not the entity has been published.

Sitecore Experience Commerce: Methods for Logging and Command Messaging

Reading Time: 2 minutes

In this article, we will look at the APIs available for logging to the logging framework and applying command messages to the CommerceContext.

The reason for grouping these two subjects together is due to seeing a lot of confusion around these areas when reviewing developers’ code in the field; there is some overlap between them, which is often overlooked.

In Sitecore Commerce, logging is based on Microsoft.Extensions.Logging, and the Sitecore Commerce Engine SDK is setup to utilise the SeriLog diagnostic library for logging.

The CommandMessages are flushed to calling CommerceCommands via the completion of the CommandActivity and are included in the response object of CommandsController APIs.

Logging and command messaging occurs within methods of the CommercePipelineExecutionContext and the CommerceContext.

CommercePipelineExecutionContext

LogInfoIf

public void LogInfoIf(bool conditionResult, string info);

Intuitive enough, the LogInfoIf method will log an Information level entry, info, if the conditionResult is met.

Abort

public override void Abort(string reason, object data);

The Abort method will abort the pipeline and will create an Error level log entry if the reason message doesn’t contain the magic string “Ok|”.

It’s also worth noting that this method is intended to abort the executing pipeline first and foremost, and the log entry is secondary. It is not intended solely for the purpose of logging.

Note: The data object would normally return the current CommercePipelineExecutionContext.

CommerceContext

AddDataMessage

public virtual void AddDataMessage(string messageType, string dataMessage);

The AddDataMessage will add the dataMessage to the command messages. It will also add the dataMessage to the logger at the Information level.

Tip: Avoid setting Debug level messages to avoid spamming your local development logs, which are defaulted to the Information level.

AddMessage

public virtual void AddMessage(CommandMessage message);

AddMessage will add a CommandMessage to the command messages.

The message will not invoke the logger.

AddMessage (Alternate)

public virtual Task<string> AddMessage(string code, string commerceTermKey, object[] args, string defaultMessage = null);

The overloaded AddMessage method’s logging behaviour is as follows:

  • Message codes of ValidationError or Warning will add a Warning message to the Logger.
  • All exception types will be logged using the LogException method. See LogException for more details.
  • An Error will also be logged as an Error.

For the CommandMessages, the localised message will attempted to be retrieved from Sitecore, using the commerce term key provided, and further formatted/interpolated with the args provided.

LogException

public virtual void LogException(string caller, Exception ex);

The LogException method will log an exception as an error with the exception message and stack trace details.

LogExceptionAndMessage

public virtual void LogExceptionAndMessage(string caller, Exception ex);

The LogExceptionAndMessage logs the exception as per the LogException method, however the exception message will be added to the CommandMessages at the Error level in addition.

Logger

public ILogger Logger { get; }

The Logger exposes the can be utilised to add the standard log-level entries to it, being:

  • LogDebug
  • LogInformation
  • LogWarning
  • LogError
  • LogCritical

Business Tools: The Autocomplete UI Type Control

Reading Time: 5 minutes

In this article, we will review the Autocomplete UI Type control in detail to understand what capabilities we have available to us with and without further customisation.

What Does the Autocomplete UI Type Control Do?

The Autocomplete control provides the user with a list of potentially search matches to identify the entity with only a partial match. This occurs only when 4 or more characters have been entered into the field.

Upon selection, the entity is converted from its user-friendly display name to the raw entity id value required by the system.

The Implementation Behind the Autocomplete Control?

Commerce Engine Configuration

The autocomplete control is configured by setting a ViewProperty’s UiType to “Autocomplete”. In addition to this there are two policies that need to be added to the ViewProperty, which are required to complete its configuration.

The first policy is the SearchScopePolicy, which is utilised to retrieve the index name from, which is set in the Plugin.Search.PolicySet-1.0.0.json in the Commerce Engine. Using the GetPolicyByType method, pass in the typeof entity that the is configured to the policy’s EntityTypeNames property.

Note: Only the Catalog Items Scope is supported by default.

var searchScopePolicy = SearchScopePolicy.GetPolicyByType(context.CommerceContext, context.CommerceContext.Environment, typeof(SellableItem));

The second policy is a generic policy that will be utilised by BizFx to apply some post-search filtering to the search results. This policy must have the PolicyId of “EntityType” and will contain a list of up to two models.

The first model’s name must be set as the name of the entity without the “Entity-“ prefix (“SellableItem”, “Category”, or “Catalog”). This is known as the policy scope in BizFx.

The second model’s name is only applicable for sellable items and can only be set as “SearchVariants” if you want the variants to be included in the search results for selection. All other values will be ignored and you cannot set multiple entities to be included in the autocomplete list.

var policy = new Policy(new List<Model>()
{
	new Model() { Name = "SellableItem" },
	new Model() { Name = "SearchVariants" }
})
{
	PolicyId = "EntityType"
};

BizFx Implementation

The sc-bizfx-autocomplete.component.ts file that is shipped with the BizFx SDK is where some of the magic happens. A couple of magic strings and magic indexes are the keys to processing the translating the ViewProperty configuration into search parameters and post-search filtering.

In short, when 4 or more characters are available in the text field, the text is added as the search term parameter, and the search index name, which is extracted from the SearchScopePolicy, is added as the scope parameter, passed into the Commerce Engine’s Search API, querying the top 100 results. The results are then processed by the BizFx component by filtering out entities that don’t match the entity type, specified in the policy scope model from the EntityType policy. The results are then added to the list of results that will populate the autocomplete dropdown, using the displayname as the display name and the entityid as the value.

Where SearchVariants have been configured for sellable item searches, the BizFx component iterates over the pipe separated variantdisplayname and variantid fields to create variant entries in the autocomplete list.

Note: As BizFx uses the displayname field to render the autocomplete item list, the order and customer indexes, which do not contain a displayname field cannot be configured with autocomplete functionality without customisation. Alternatively, the Search entity views in the Customers Manager and Orders Manager are available.

Search Configuration

In the Solr core’s managed-schema, copies fields over to the _text_ field, which is used to construct the search query in the Commerce Engine.

The catalog item scope index contains the Catalog, Category, and Sellable Item data, based on the SearchScopePolicy configuration of the Entity Type Names from the Commerce Engine SDK. Search queries will attempt to match fields copied into the _text_ field in the search provider’s index schema.

<copyField source="displayname" dest="_text_"/>
<copyField source="variantid" dest="_text_"/>
<copyField source="variantdisplayname" dest="_text_"/>
<copyField source="productid" dest="_text_"/>
<copyField source="name" dest="_text_"/>

Note: I have only looked into the Solr configuration, so for those using Azure Search there may be some investigation work required to identify its search configuration.

What Configurations are Available for the Autocomplete Control?

Catalog Search

The catalog search is not used by the business tools by default. Instead, due to the low catalog entity count, the underlying code logic for associating a catalog to a price book or promotion book utilises the IFindEntitiesInListPipeline to populate a dropdown list control.

Note: Only the displayname and name fields will be present in the catalog entity indexes.

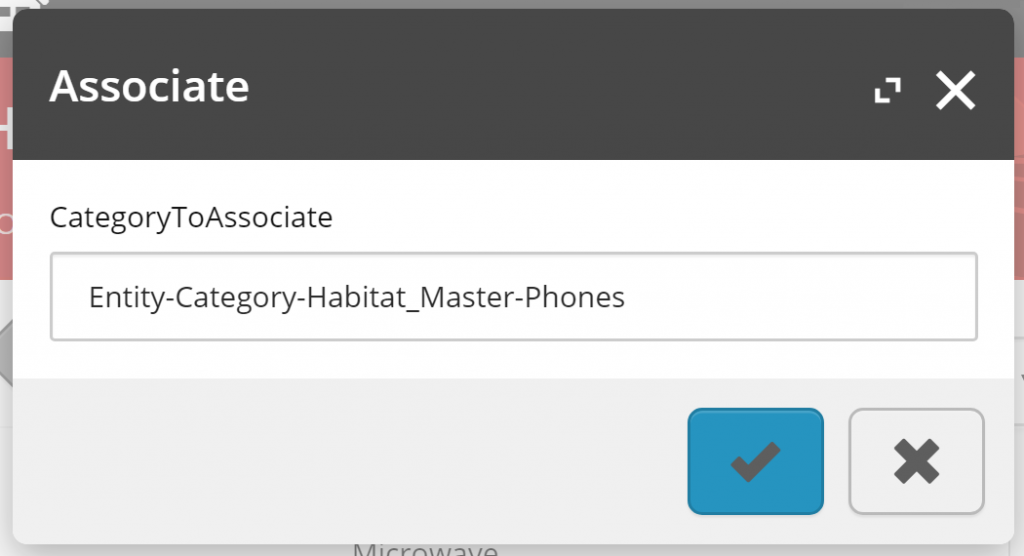
Category Search

The category search will return results for categories, regardless of the catalog it resides in.

Note: Only the displayname and name fields will be present in the category entity indexes.

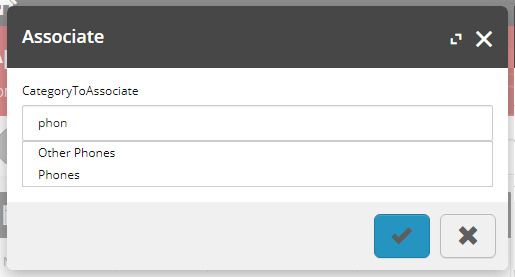
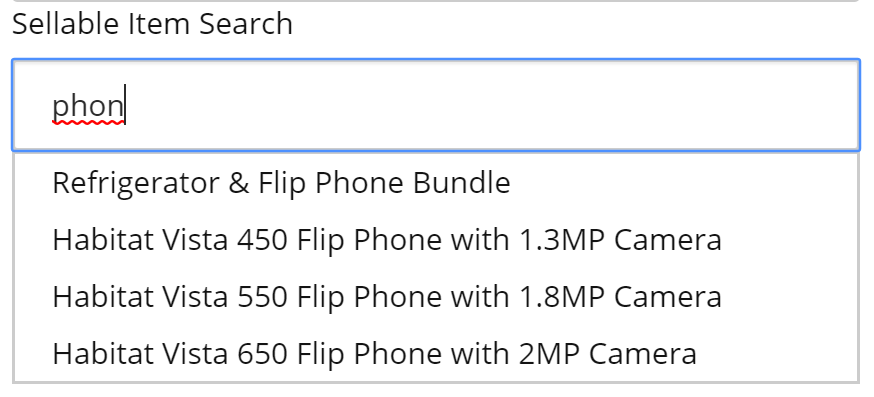
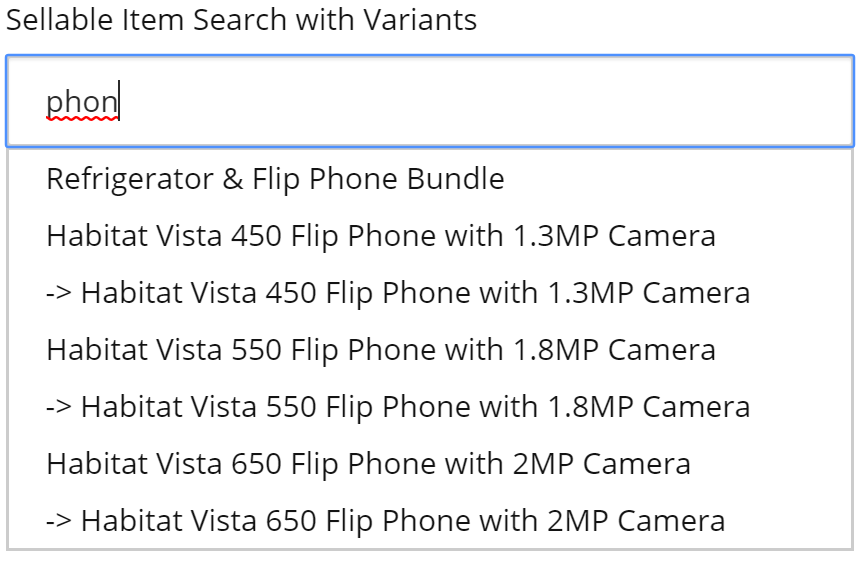
Sellable Item Search

The sellable item search has two configurations available. One without variants included in the search results, and one with variants.

Sellable Item without Variants Search

Sellable Item with Variants Search

Sitecore Experience Commerce: Promotion Evaluation and Application Logic

Reading Time: 4 minutesIn this article, we will review the default business logic that the Commerce Engine utilises to evaluate and apply promotions.

Note: References to date will indicate both date and time throughout this article.

Introduction

Before we get into the details around promotions, there are a few things we need to understand.

    • Promotions are separated into cart line level and cart level promotions, determined by the promotion benefits configured to each promotion. While multiple benefits can be added to promotions, additional benefits after the first can only be of the same benefit type.
    • Cart line calculations (subtotals, fulfillment fees, promotion discounts, taxes, totals) are evaluated and applied prior to the and cart calculations.
      Sitecore.Commerce.Plugin.Carts
      ICalculateCartLinesPipeline (Sitecore.Commerce.Plugin.Carts.Cart => Sitecore.Commerce.Plugin.Carts.Cart)
           ------------------------------------------------------------
           Plugin.Carts.ClearCartLinesBlock (Sitecore.Commerce.Plugin.Carts.Cart => Sitecore.Commerce.Plugin.Carts.Cart)
           ------------------------------------------------------------
           Plugin.Carts.ClearCartBlock (Sitecore.Commerce.Plugin.Carts.Cart => Sitecore.Commerce.Plugin.Carts.Cart)
           ------------------------------------------------------------
           Plugin.Carts.CalculateCartLinesSubTotalsBlock (Sitecore.Commerce.Plugin.Carts.Cart => Sitecore.Commerce.Plugin.Carts.Cart)
           ------------------------------------------------------------
           Plugin.Fulfillment.CalculateCartLinesFulfillmentBlock (Sitecore.Commerce.Plugin.Carts.Cart => Sitecore.Commerce.Plugin.Carts.Cart)
           ------------------------------------------------------------
           Plugin.Promotions.CalculateCartLinesPromotionsBlock (Sitecore.Commerce.Plugin.Carts.Cart => Sitecore.Commerce.Plugin.Carts.Cart)
           ------------------------------------------------------------
           Plugin.Tax.CalculateCartLinesTaxBlock (Sitecore.Commerce.Plugin.Carts.Cart => Sitecore.Commerce.Plugin.Carts.Cart)
           ------------------------------------------------------------
           Plugin.Carts.CalculateCartLinesTotalsBlock (Sitecore.Commerce.Plugin.Carts.Cart => Sitecore.Commerce.Plugin.Carts.Cart)
      -----------------------------------------------------------------
      Sitecore.Commerce.Plugin.Carts
      ICalculateCartPipeline (Sitecore.Commerce.Plugin.Carts.Cart => Sitecore.Commerce.Plugin.Carts.Cart)
           ------------------------------------------------------------
           Plugin.Carts.CalculateCartSubTotalsBlock (Sitecore.Commerce.Plugin.Carts.Cart => Sitecore.Commerce.Plugin.Carts.Cart)
           ------------------------------------------------------------
           Plugin.Fulfillment.CalculateCartFulfillmentBlock (Sitecore.Commerce.Plugin.Carts.Cart => Sitecore.Commerce.Plugin.Carts.Cart)
           ------------------------------------------------------------
           Plugin.Promotions.CalculateCartPromotionsBlock (Sitecore.Commerce.Plugin.Carts.Cart => Sitecore.Commerce.Plugin.Carts.Cart)
           ------------------------------------------------------------
           Plugin.Tax.CalculateCartTaxBlock (Sitecore.Commerce.Plugin.Carts.Cart => Sitecore.Commerce.Plugin.Carts.Cart)
           ------------------------------------------------------------
           Plugin.Carts.CalculateCartTotalsBlock (Sitecore.Commerce.Plugin.Carts.Cart => Sitecore.Commerce.Plugin.Carts.Cart)
           ------------------------------------------------------------
           Plugin.Payments.CalculateCartPaymentsBlock (Sitecore.Commerce.Plugin.Carts.Cart => Sitecore.Commerce.Plugin.Carts.Cart)
           ------------------------------------------------------------
           Plugin.Carts.WriteCartTotalsToContextBlock (Sitecore.Commerce.Plugin.Carts.Cart => Sitecore.Commerce.Plugin.Carts.Cart)
      
    • Exclusive promotions apply against the benefit type only, therefore it is possible to apply a cart line level exclusive promotion and a cart level exclusive promotion at the same time.

Evaluating Promotions

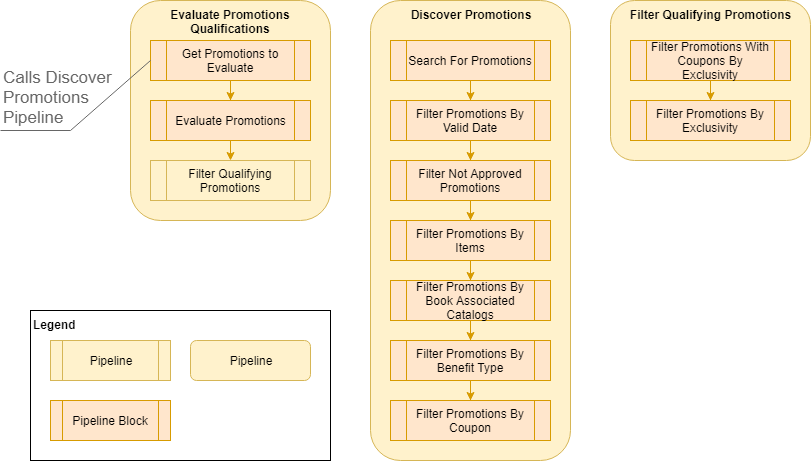
The following diagram shows the pipelines and pipeline blocks that are called during the process of evaluating the applicable promotions and additional filtering for exclusive promotion evaluation.

There are essentially 10 steps that make up the evaluation process:

  1. Search For Promotions: Retrieves all promotions.
  2. Filter Promotions By Valid Date: Removes promotions that do not fall within the Valid From/To dates based on effective date.
  3. Filter Not Approved Promotions: Removes promotions that are not approved and, if the promotion is disabled, where the effective date is prior to the updated date (the date the promotion was disabled). The latter rule is to allow the promotion to be active when reviewed the storefront at a previous point in time.
    Note: From 9.0.1, the GlobalPromotionsPolicy was introduced to allow promotions to be previewed in the storefront prior to submitting a promotion for approval.
  4. Filter Promotions By Items: Removes promotions where the cart contains no sellable items marked as included in the ItemsCollection qualification or where the cart contains any of the sellable items marked as excluded in the ItemsCollection qualification.
  5. Filter Promotions By Book Associated Catalogs: Removes promotions where the catalog, associated to its promotion book, does not match any of the catalogs associated to the sellable items of the cart lines.
  6. Filter Promotions By Benefit Type: Removes promotions where the type of benefits configured to the promotion does not match the benefit type being evaluated. i.e. Cart line level benefits (CartLineActions) and cart level benefits (CartActions) for CalculateCartLinesPipeline and CalculateCartLinesPipeline respectively.
  7. Filter Promotions By Coupon: Removes promotions that require a coupon that has not been applied to the cart.
  8. Evaluate Promotions: Filters out promotions where promotion qualifications and benefit rules do are not applicable to the current cart.
  9. Filter Promotions With Coupons By Exclusivity: If exclusive coupon promotions are present in the promotions list, the list will be filtered down to a single exclusive coupon promotion. The promotion will be determined by the Added date that their corresponding coupons were applied to the cart.
  10. Filter Promotions By Exclusivity: If exclusive automatic promotions are present in the promotions list, the list will be filtered down to a single exclusive automatic promotion. The promotion will be determined by the earliest (oldest) Valid From date, and in the event of multiple promotions sharing the same earliest Valid From date the promotion that was created earliest will take win.

Promotion Priorisation Rules

While the previous section covered how promotions are evaluated, and also provided some insight into promotion priorisation, we will now cover the prioritisation rules.

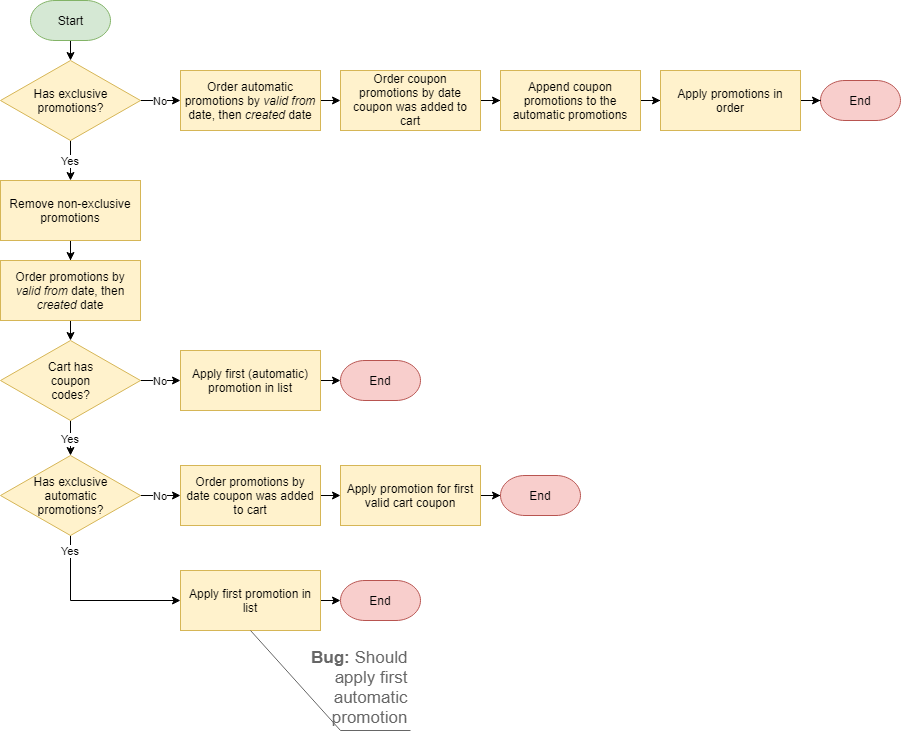
The following diagram shows the logic used to determine which promotion(s) to apply to the cart.

There are essentially 3 steps that make up the application process:

  1. Apply a single exclusive automatic promotion.
    • The promotion will be determined by the earliest (oldest) Valid From date, and in the event of multiple promotions sharing the same earliest Valid From date the promotion that was created earliest will take win.
    • If a promotion is applied here no further promotions are applied.
  2. Apply a single exclusive coupon promotion.
    • The promotion will be determined by the Added date that their corresponding coupons were applied to the cart.
    • If a promotion is applied here no further promotions are applied.
  3. Apply all non-exclusive promotions.
    • The promotion order will be determined by:
      1. Automatic promotions ordered by earliest (oldest) Valid From date, and in the event of multiple promotions sharing the same earliest Valid From date the promotion that was created earliest will take win.
      2. Coupon Promotions ordered by earliest Added date that their corresponding coupons were applied to the cart.

References

Sitecore Experience Commerce: Exposing Variation Properties in the Variants Entity View

Reading Time: 2 minutesIn this article, we review another small plugin created, which exposes the variation properties in the Variants entity view within the Merchandising Manager.

The Habitat catalog data has been created in such a way in which the variation properties are exposed via adding the variation property value to the variant display name, e.g. Habitat Dwell Bagless Upright Vacuum (Red). While this approach works to an extent, it will get more ugly as the variation properties grow, e.g. My Test Jeans (Blue, 32, slim).

The custom plugin will traverse over the variation’s components to find the the properties that match the names provided in the VariationPropertiesPolicy and render them to the Variants entity view.

In the example above, I have specified the following property names, Color, Size, Style, and Length, which works well when all properties have been specified (see below).

A couple of things to note about the platform implementation:

  • Variation Properties apply to all Sellable Items globally. If a product contains a value against a property that is specified in the Variation Properties Policy it will render as a variant selection in the Storefront.
  • There is no validation to ensure that variation properties are mandatory for variants. This is because not all products will utilise these variation properties. I didn’t think it was necessary to add more overhead to remove columns that contained no values.
  • You’ll notice above that the first 2 variants of my Test Pants have matching variation properties. This is again due to having no validation in place, which I believe will break the storefront. So whether you have implemented a catalog import or are entering product data manually be careful not to double up.

Source Code: Ajsuth.Feature.Catalog.VariantProperties.Engine

Sitecore Experience Commerce: Configuring Variation Properties for the Storefront

Reading Time: 2 minutesIn this article, we will review the process of configuring product variations properties so that the Product Variants SXA component will render them as dropdown selection controls. This controls allows the user to select the variant property combinations, where each combination represents individual product variants of a product family.

Configure the Variation Properties

In the Commerce Engine solution:

  1. Define all variation property names in the VariationPropertyPolicy of the environment configuration files.
    1. In this sample, we will add the Style property to the VariationPropertyPolicy.
      Note: The property names are the names of properties that exist on child components of the ItemVariationComponent. The fully qualified namespace for the property is not required as the SXA Storefront logic will use a property name match against the field names produced by the Catalog Generated templates.

      {
        "$type": "Sitecore.Commerce.Plugin.Catalog.VariationPropertyPolicy, Sitecore.Commerce.Plugin.Catalog",
        "PropertyNames": {
          "$type": "System.Collections.Generic.List`1[[System.String, mscorlib]], mscorlib",
          "$values": [
            "Color",
            "Size",
            "Style"
          ]
        }
      }
      
  2. Publish the solution and Bootstrap the Commerce Engine.
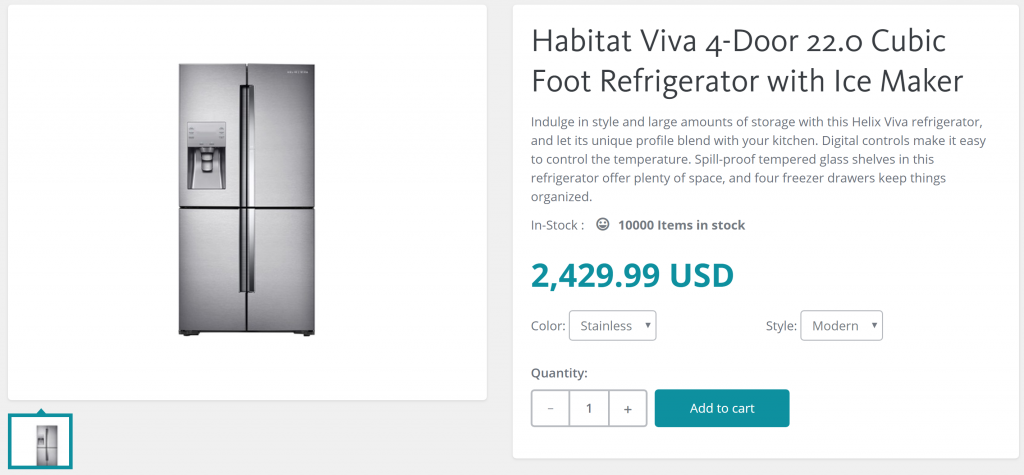
  3. Verify the variation property in the Storefront.
    Note: In the sample below I updated the sellable item’s Style property with the value “Modern” for demo purposes.

Add Variant Specification Label

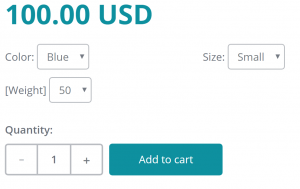
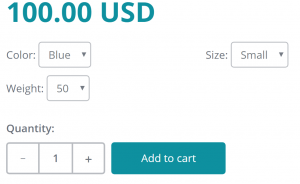
If you create add new properties that does not have corresponding label configured the variation property label will display as “[YourProperty]“.

To resolve this, go to the Sitecore Content Editor:

  1. Add user friendly label value to /sitecore/Commerce/Commerce Control Panel/Storefront Settings/Commerce Terms/Variant Specification Labels.
  2. Publish the Sitecore Item and Reindex.