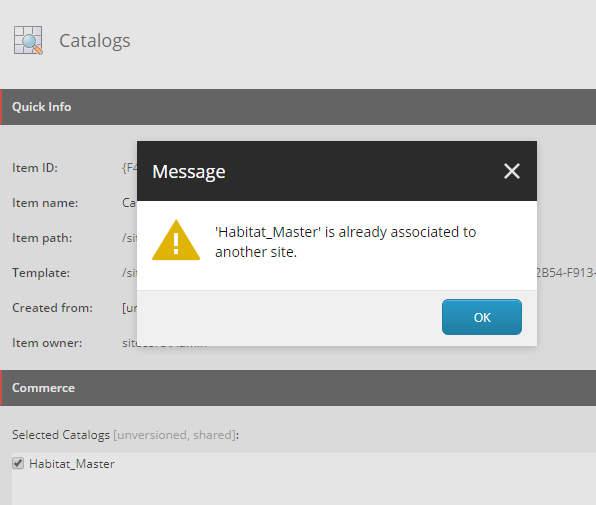
In this article, we look at how to fix the “‘<catalog>’ is already associated to another site.” error message that can occur when attempting to save the catalog association to a site, although no other sites have an association to this catalog at the time.
Note: This solution is only intended for local development and not recommended for production instances.
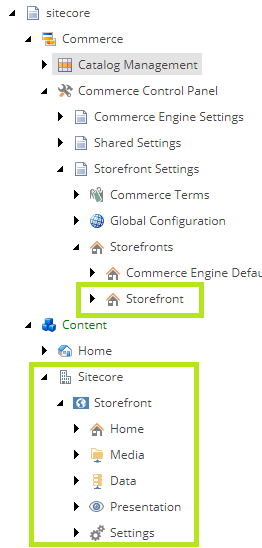
Background
Over in Sitecore Commerce, the category and sellable item entities contain a ParentCatalogList property that houses the Sitecore ids of the associated catalog entities. For catalog entities however, the ParentCatalogList is being repurposed for the site association Sitecore id and acts as a lock, preventing the catalog from being associated to other sites.
If you happen to have deleted a site that had a existing catalog association, the catalog commerce entity will not be updated to release the lock. Similar scenarios may also be seen if the commerce shared database is restored to an environment that has conflicting sitecore ids with existing sites, as often can be seen during development across teams that do not sync their Sitecore and Commerce data.
Solution
Removing the lock can be achieved by executing the following script against the commerce shared database.
Update the database name and catalog friendly id values, in the highlighted lines, as appropriate.
USE SitecoreCommerce9_SharedEnvironments
GO

DECLARE @catalogEntityId VARCHAR(MAX) = 'Habitat_Master';
DECLARE @uniqueId VARCHAR(MAX);
DECLARE @entity VARCHAR(MAX);
DECLARE @modifiedEntity VARCHAR(MAX);

SELECT @entity = Entity,
       @uniqueId = Entities.UniqueId
FROM   sitecore_commerce_storage.CatalogEntities AS Entities
       INNER JOIN sitecore_commerce_storage.CatalogEntity AS Entity
               ON Entities.UniqueId = Entity.UniqueId
WHERE  Id = 'Entity-Catalog-' + @catalogEntityId

UPDATE sitecore_commerce_storage.CatalogEntity
SET    Entity = JSON_MODIFY(@entity, '$.ParentCatalogList', '')
WHERE  UniqueId = @uniqueId
Now that we have released the lock, we can associate the catalog to our site, however we may still encounter issues navigating through the catalog structure in the content editor and attempting to publish the site may throw null reference exceptions.
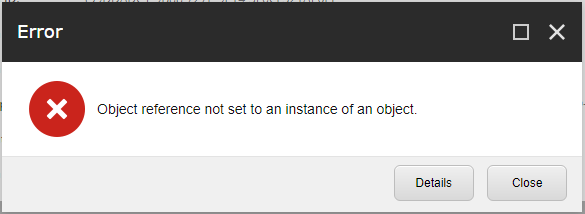
Site Publish Error Message
Job started: Publish to ‘web’|#Exception: System.Reflection.TargetInvocationException: Exception has been thrown by the target of an invocation. —> System.NullReferenceException: Object reference not set to an instance of an object.
at Sitecore.Commerce.Engine.Connect.DataProvider.ReadOnlyCatalogDataProvider.GetChildIDs(ItemDefinition parentItem, CallContext context)
…
These issues are caused by the catalog’s Template Overrides, which are configured to templates that don’t exist in this Sitecore instance.
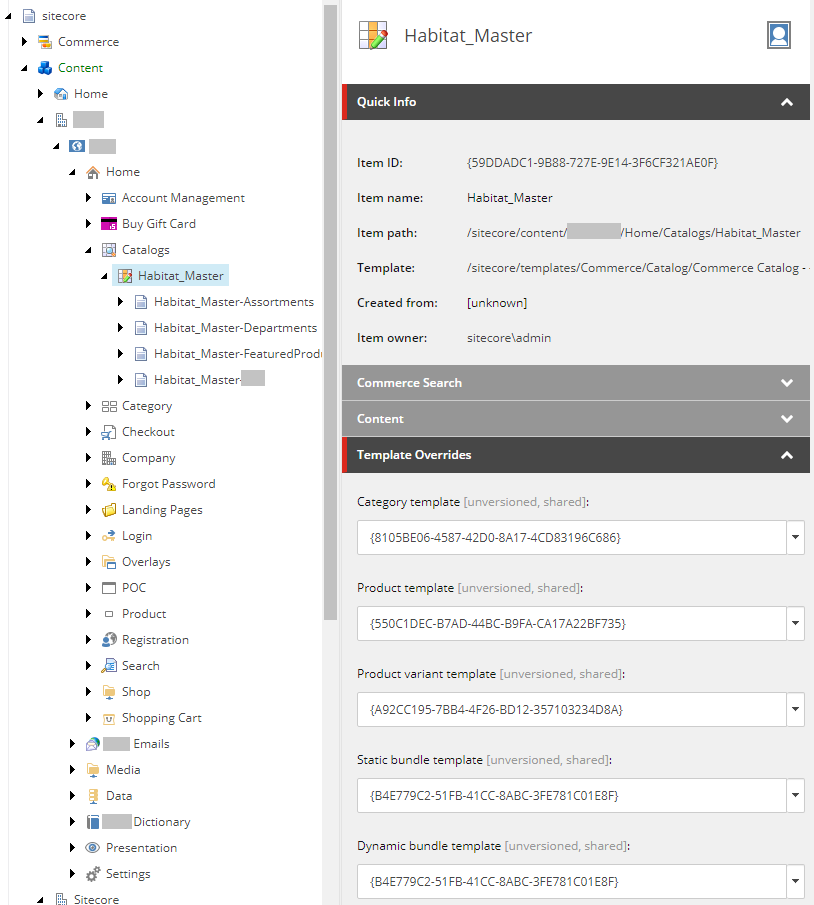
Updating the Template Overrides to valid templates for the site will resolve these issues and you should be up and running again.