In this article, we will review the difference between physical and digital sellable items, while focusing on the lesser documented digital sellable items. We will also review how to configure digital sellable items in the business manager.
For a more technical details behind the implementation of digital sellable items, see Working with Digital Sellable Items – Part 2.
Sellable Item Classifications
Sellable items can either represent physical or digital items. The following high-level overviews detail some of the discerning factors between the two classifications of sellable items.
Physical Sellable Items
Physical sellable items are any tangible product that a customer can purchase and have delivered. This is the default product type when creating sellable items via the Merchandising Manager in Sitecore Commerce.
Inventory
With physical items, inventory is required to track stock levels and prevent overselling.
Fulfillment Option Types
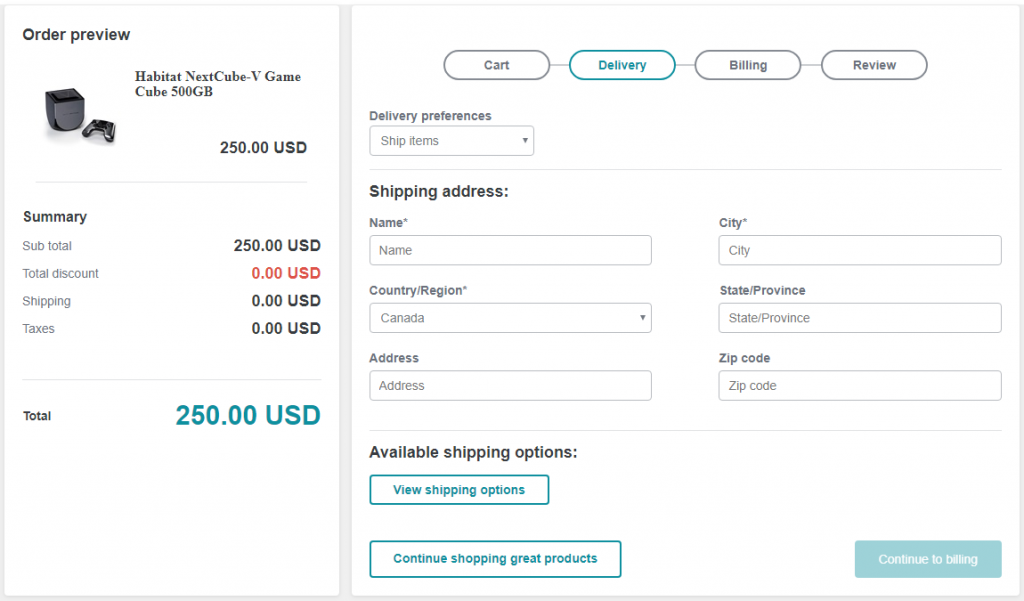
When purchasing physical items, during the checkout delivery step, a customer typically enters a delivery address of where the items will be delivered to, or selects a ‘click and collect’ style fulfillment option type where they can pick up the items from.
The SXA Storefront provides the common ‘deliver to address’ (physical) fulfillment option type.
Digital Sellable Items
Digital sellable items represent non-tangible products that a customer can purchase that entitle the customer to a form of product or service. Examples of digital sellable items include services, such as installation, warranties, subscriptions, digital downloads, online access, and digital currency (gift cards).
Inventory
As digital sellable items are non-tangible, they do not require inventory information to be associated to them. This can also be thought of as having perpetual inventory, therefore always being available for purchase.
Fulfillment Option Types
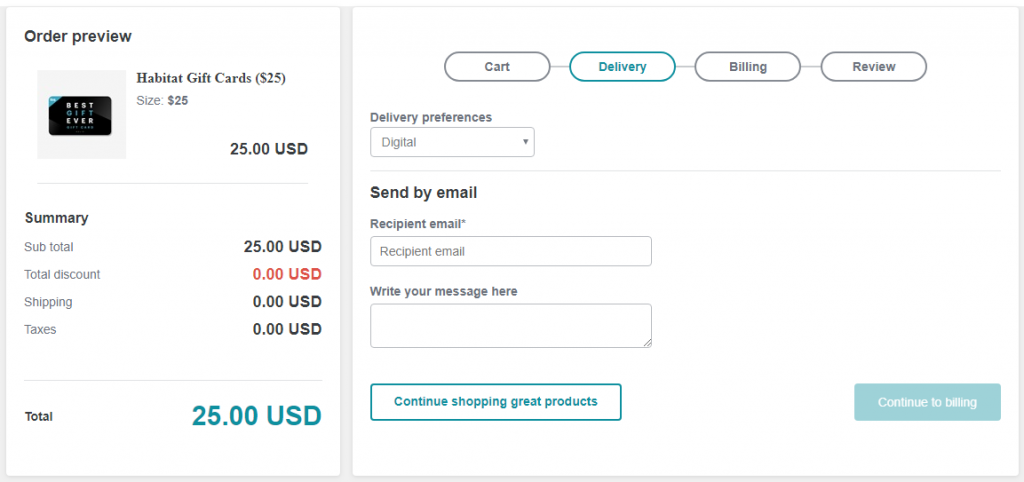
For digital sellable item purchases, the SXA Storefront provides a digital delivery sample implementation intended for digital gift card purchases, consisting of a recipient email and custom message, so the digital gift card can be personalised and delivered via email to the intended recipient.
Alternately, for other digital item fulfillment option types, custom implementations would be required to handle these scenarios, based on the client’s requirements. Some ideas of requirements are as follows:
- Services: A custom form, potentially with a third party integration, to create a booking system.
- Warranties: A custom form to register the sellable item that the warranty was purchased for.
- Subscriptions: A custom form to register the subscription’s recipient details.
- Digital Downloads: A custom form containing requesting the email address to send the digital download link to, or perhaps the user account functionality is customised to provide access to digital downloads.
- Online access: Similar to digital downloads, the user may be given access to content via their logged in account, which may not require additional details to be taken during the Delivery step, however may require the user to make the purchase via a registered account.
Cart Lines
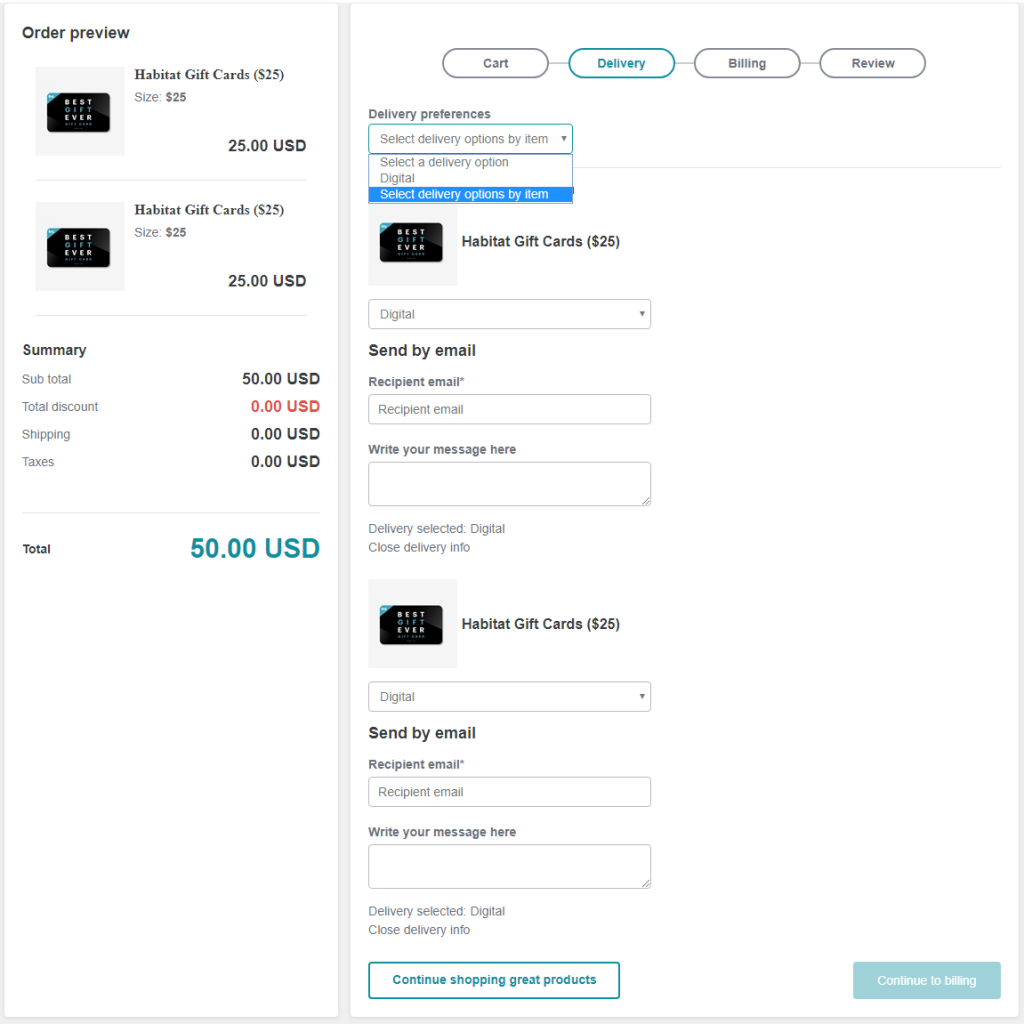
Digital sellable items are also separated into their own line items, e.g. when adding a digital sellable item with quantity of 2 this will create 2 cart lines with a quantity of 1, rather than 1 cart line with a quantity of 2. This provides the customer with the ability to input unique delivery information for each item during the checkout delivery step.
Entitlements
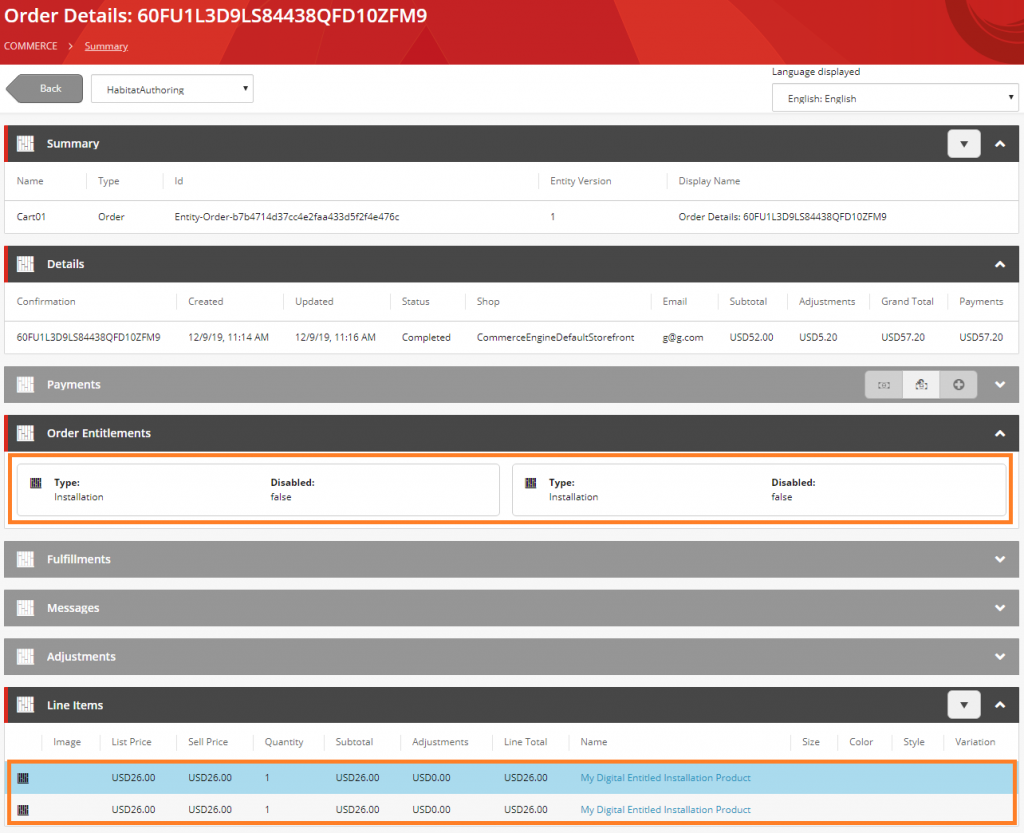
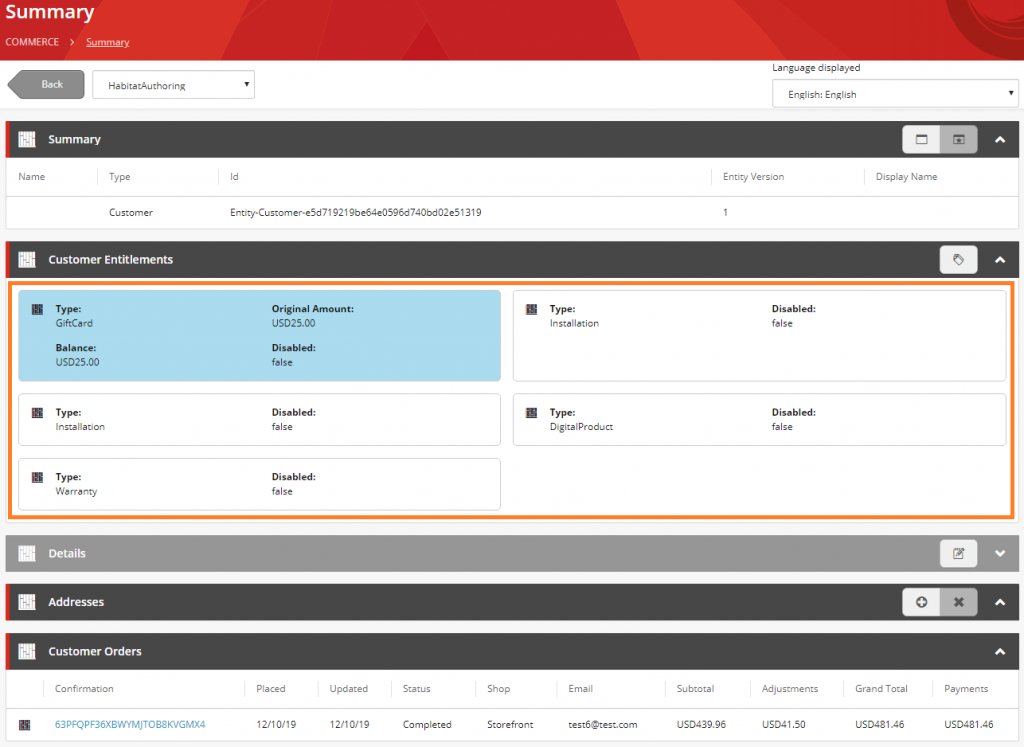
Another differentiating factor of digital sellable items are entitlements, which are registered to the order and customer account (where users are registered at the time of purchase), so that customer service representatives can view the current state of each entitlement.
Entitlements provides a basic implementation and a great starting point for customisation to meet business requirements.
Configuring Digital Sellable Items
Digital sellable items are determined by applying the appropriate Digital Sellable Item Tags on the sellable item and its variants. Let’s review this together.
In the Business Tools,
- Navigate to the Merchandising Manager
- Locate an existing new sellable item or create a new sellable item and navigate to the Sellable Item page view
- Follow either Configuring Standalone Sellable Items or Configuring Sellable Item With Variants
- Ensure the sellable item has a valid list price and/or price card with an active price snapshot, so that the sellable item is purchasable
- Publish the sellable item
Configuring Standalone Sellable Items
- Add the appropriate tag that represents a Digital Item.
- Add the appropriate tag that represents the desired type of Digital Item Type.
This will likely be the same tag as the Digital Item, therefore not required, however it is good to validate that the tags match, especially if custom tags have been assigned to the digital item and digital item type tag policies. - Add the tag “entitlement”.

Configuring Sellable Items With Variants
- On the sellable item, add the appropriate tag that represents a Digital Item.
- On each variant:
- Add the appropriate tag that represents the desired type of Digital Item Type.
- Add the tag “entitlement”.
Note: Technically, the variants inherit tags from the parent sellable item only if no tags have been specified on the variant. Configuring any tags on a variant will remove the inherited tags from the variant, therefore these instructions specify the fool-proof solution.


Digital Sellable Item Tags
The following tables contain the default tags that are used to classify sellable items as digital and their digital item types.
Note: Tags for digital sellable items are not treated as case-sensitive.
Digital Item Tags
| Classification | Default Tags |
| Digital Item | entitlement service installation subscription digitalsubscription warranty onlinetraining onlinelearning giftcards |
Digital Item Type Tags
| Type | Default Tags |
| Virtual Gift Card | giftcards |
| Digital Product | OnlineTraining OnlineLearning Subscription DigitalSubscription |
| Warranty | Warranty |
| Installation | Installation Service |


