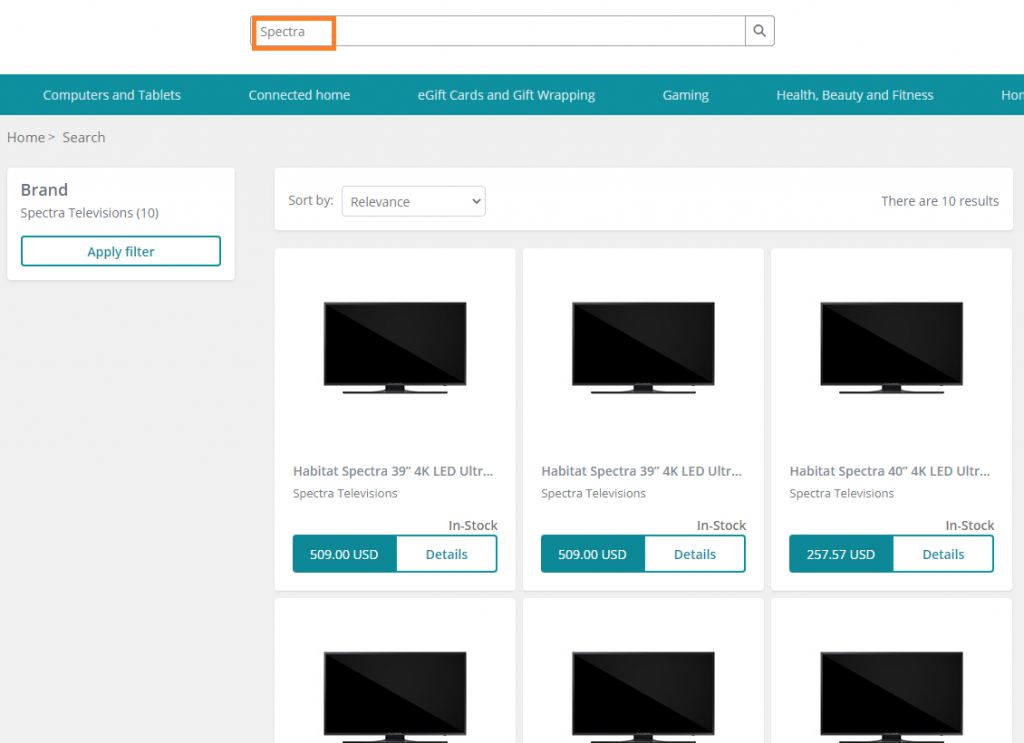
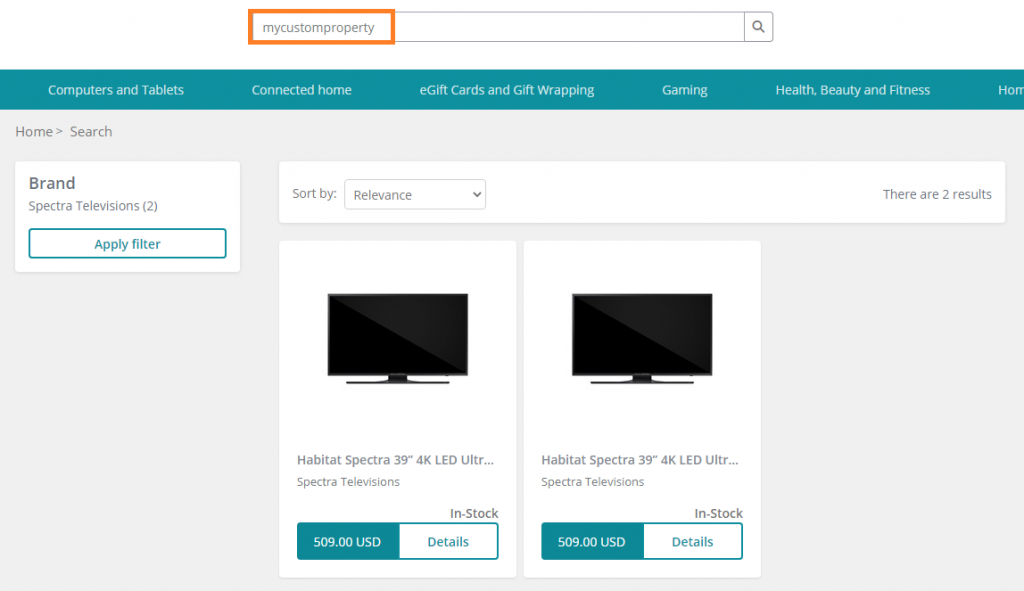
In this article, we will review how we can extend the search components in Business Tools (BizFx) to support search functionality using custom properties for its results.
This article will not consider locale-support.
Introduction
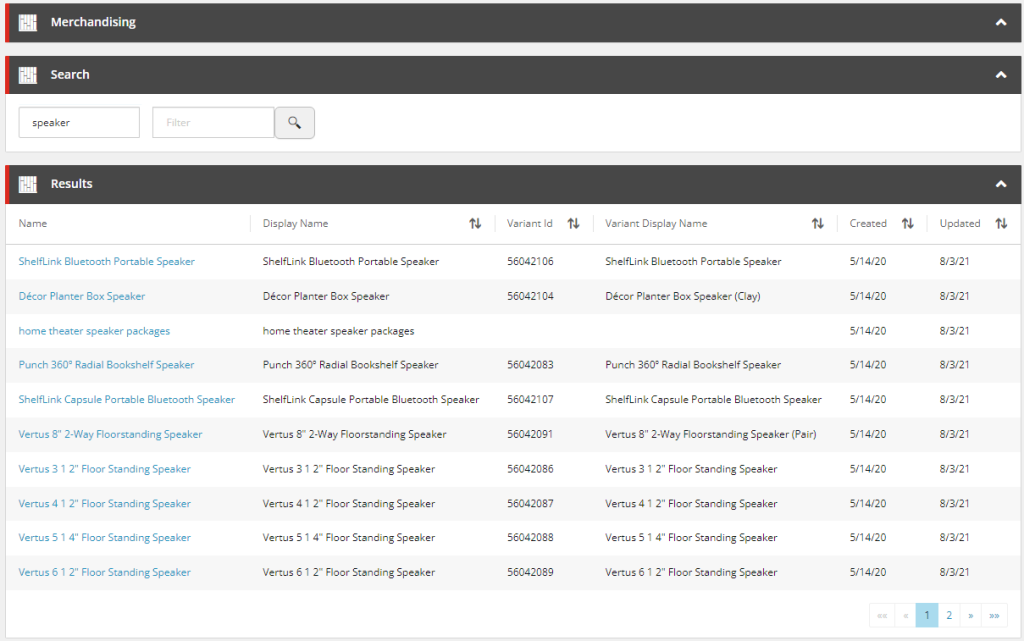
As the search functionality in BizFx is fairly primitive, from a business user perspective, and a common request is to provide customisation guidance for the search functionality in the Business Tools, we will use the Search component from the Merchandising dashboard for our example in extending the search functionality.
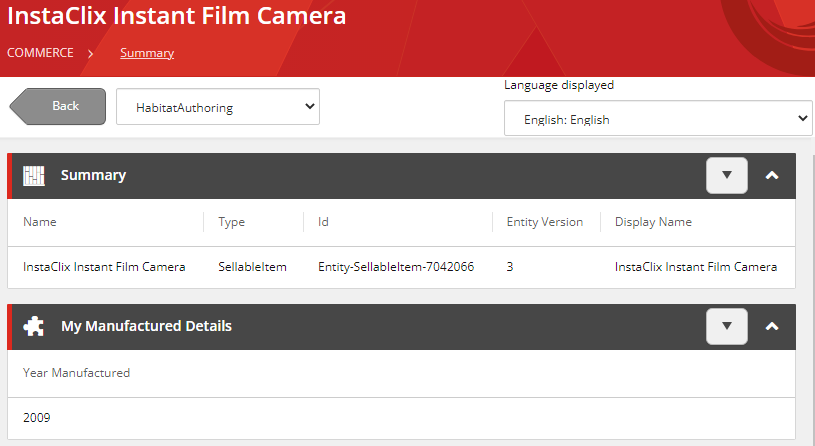
This implementation will assume the sellable items that have custom properties added via composer templates, however you will be able to adapt the solution where properties have been added programatically with components or policies.
Implementation and Configuration
Updating the Solr Schema
We first need to add our custom property to the managed schema of our Solr cores related to our search scopes. These schemas are found in the file system where Solr is deployed, under server/solr/<search scope>/conf/managed-schema.
The commerce engine uses switch on rebuild so we need to update the managed schema for both CatalogItemsScope and CatalogItemsScope-Rebuild for this instance.
    <!-- CommerceEngine Catalog -->
    <field name="displayname" type="string" indexed="true" stored="true"/>
    <field name="datecreated" type="pdate" indexed="true" stored="true"/>
    <field name="dateupdated" type="pdate" indexed="true" stored="true"/>
    <field name="artifactstoreid" type="string" indexed="true" stored="true"/>
    <field name="parentcataloglist" type="string" indexed="true" stored="true" multivalued="true"/>
    <field name="variantid" type="string" indexed="true" stored="true"/>
    <field name="variantdisplayname" type="string" indexed="true" stored="true"/>
    <field name="inventorysetids" type="string" indexed="true" stored="true"/>
    <field name="productid" type="string" indexed="true" stored="true"/>
    <field name="name" type="string" indexed="true" stored="true"/>
    <field name="yearmanufactured" type="string" indexed="true" stored="true"/>
The managed-schema that would be created with the XC instance will be organised to easily identify the commerce entity fields. While fields can be added via Solr, the managed-schema will be regenerated in a less XC friendly manner and make long-term mainentance more difficult.
With our Solr schema updated, if we are working locally, we will need to restart the Solr service, otherwise you will need to manage the deployment of the schema to your deployment environments.
Populating the Index’ Custom Fields
The commerce indexes are created and updated by both the FullIndexMinion and the IncrementalIndexMinion. It is within these minions that we can inject our custom code to populate the new custom fields with our commerce entity properties.
We’ll create a new pipeline block, called InitializeExtendedSellableItemIndexingViewBlock, which we can see the Run() method in the following snippet. We perform the necessary validation and copy our entity properties to custom index fields.
public override EntityView Run(EntityView arg, CommercePipelineExecutionContext context)
{
    // 1. Validation
    Condition.Requires(arg, nameof(arg)).IsNotNull();
    Condition.Requires(context, nameof(context)).IsNotNull();

    var argument = context.CommerceContext.GetObjects<SearchIndexMinionArgument>().FirstOrDefault();
    if (string.IsNullOrEmpty(argument?.Policy?.Name))
    {
        return arg;
    }

    // 2. Prepare Entities
    var entityItems = argument.Entities?.OfType<SellableItem>().ToList();
    if (entityItems == null || !entityItems.Any())
    {
        return arg;
    }

    // 3. Prepare custom properties
    var scopeIndexablePropertiesPolicy = IndexablePropertiesPolicy.GetPolicyByScope(context.CommerceContext, context.CommerceContext.Environment, argument.Policy.Name);
    if (scopeIndexablePropertiesPolicy?.ComposerProperties == null || !scopeIndexablePropertiesPolicy.ComposerProperties.Any())
    {
        return arg;
    }

    var searchViewNames = context.GetPolicy<KnownSearchViewsPolicy>();
    var childViews = arg.ChildViews.OfType<EntityView>().ToList();

    // 4. Iterate over each entity
    foreach (var si in argument.Entities.OfType<SellableItem>())
    {
        // 5. Get existing document entity view
        var documentView = childViews.First(v => v.EntityId.EqualsOrdinalIgnoreCase(si.Id)
            && v.Name.EqualsOrdinalIgnoreCase(searchViewNames.Document));

        // 6. Add custom fields
        AddComposerFields(si, documentView, scopeIndexablePropertiesPolicy);
    }

    return arg;
}
The highlighted section, 3. Prepare custom properties, is used for our AddComposerFields() method.
To add properties to the Solr document, we only need to register the field name and value to a new ViewProperty of the document EntityView and the platform will later translate and push this data into Solr. This would typically look like the following.
documentView.Properties.Add(new ViewProperty
{
    Name = "<Insert Field Name Here>",
    RawValue = "<Insert Field Value Here>"
});
In our AddComposerFields() implementation, we leverage our custom policy to identify and process fields from the composer templates.
protected void AddComposerFields(
    SellableItem si,
    EntityView documentView,
    IndexablePropertiesPolicy scopeIndexablePropertiesPolicy)
{
    // 1. Iterate over each composer template configuration
    foreach (var composerView in scopeIndexablePropertiesPolicy.ComposerProperties)
    {
        // 2. Get property value
        var composerEntityView = si.GetComposerViewFromName(composerView.Key);

        if (composerEntityView == null)
        {
            continue;
        }

        // 3. Iterate over each custom property to index
        foreach (var property in composerView.Value)
        {
            var value = composerEntityView.GetPropertyValue(property.PropertyName);

            if (value == null)
            {
                continue;
            }

            // 4. Add property to index document
            documentView.Properties.Add(new ViewProperty
            {
                Name = property.IndexFieldName,
                RawValue = value
            });
        }
    }
}
The implementation is made flexible by avoiding hard-coding any composer template or property names and instead using the custom IndexablePropertiesPolicy, which we append our configured policy to the SolrSearchPolicySet. In ComposerProperties we add our composer template name, e.g. "ManufacturedDetails", and then an array of composer property models, where the PropertyName represents the composer template property name and the IndexFieldName represents the Solr core field name.
{
  "$type": "Ajsuth.Sample.Catalog.Search.Engine.Policies.IndexablePropertiesPolicy, Ajsuth.Sample.Catalog.Search.Engine",
  "SearchScopeName": "CatalogItemsScope",
  "ComposerProperties": {
    "ManufacturedDetails": [
      {
        "PropertyName": "YearManfactured",
        "IndexFieldName": "yearmanufactured"
      }
    ]
  }
}
We register our pipeline block to both the full and incremental index minion pipelines.
.ConfigurePipeline<IIncrementalIndexMinionPipeline>(pipeline => pipeline
    .Add<Pipelines.Blocks.InitializeExtendedSellableItemIndexingViewBlock>()
        .After<InitializeSellableItemIndexingViewBlock>()
)

.ConfigurePipeline<IFullIndexMinionPipeline>(pipeline =>pipeline
    .Add<Pipelines.Blocks.InitializeExtendedSellableItemIndexingViewBlock>()
        .After<InitializeSellableItemIndexingViewBlock>()
)
By adding our InitializeExtendedSellableItemIndexingViewBlock after the InitializeSellableItemIndexingViewBlock rather than directly replacing and overriding the initial platform pipeline block, we may suffer a minor performance impact as we will need to interate over our entities another time, however we won’t have to copy platform code into our pipeline block, which will ultimately keep our code as clean as possible while preventing complexity for during upgrades.
We then follow our deployment process for our changes:
- Deploy our Solr managed-schemas and restart the Solr service to ingest the updated schemas.
- Deploying our Commerce Engine code to all instances.
- Bootstrap the Commerce Engine to ingest our IndexablePropertiesPolicy configuration.
- Restart the minions Commerce Engine instance to consume the updated policy set.
- Executing the Run FullIndex Minion – Catalog Items request from postman.
- Verify our Solr core now how our custom field indexed.
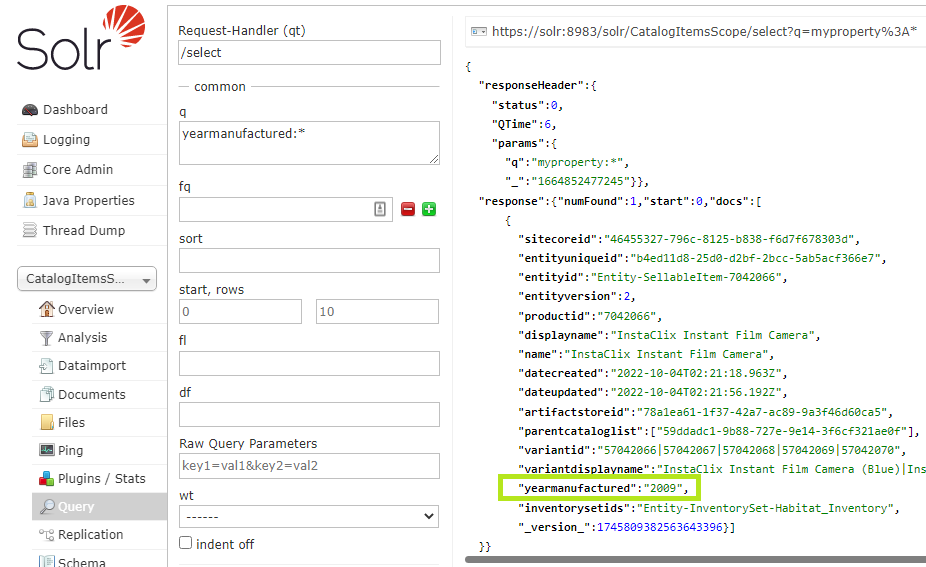
If you aren’t seeing the custom field for any indexed document check the *-Rebuild core as that may the current active core.
Searching Against Custom Fields in the Search Component
With the custom properties added to the indexes, we finally need to update the search component to include the new property as part of the search query.
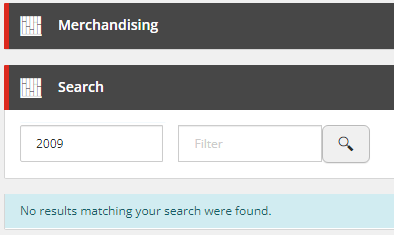
Using Solr Query Syntax
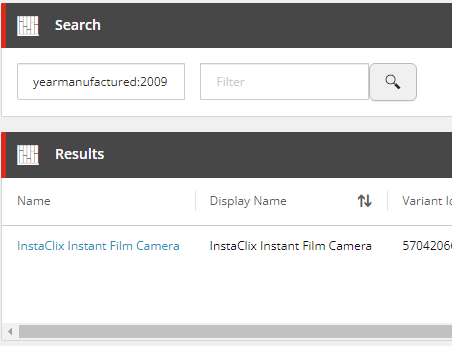
With no further customisation or configuration, we could use the Solr query syntax to apply to set the Search Term with the specific field query, e.g. yearmanufactured:2009, as the search component will process this as a raw query.
Including the Custom Field for SearchScope Queries
The search component queries against the Search Term properties appended to the _text_ field in Solr. If we wanted to add a custom field to default search query, then we can update the managed-schema of the Solr cores to include it. Below lists all of the fields that are used for the search queries as well as our custom field.
<copyField source="displayname" dest="_text_"/>
<copyField source="variantid" dest="_text_"/>
<copyField source="variantdisplayname" dest="_text_"/>
<copyField source="productid" dest="_text_"/>
<copyField  source="name" dest="_text_"/>
<copyField source="yearmanufactured" dest="_text_"/>
After deploying and restarting the Solr service, search component queries from the Business Tools will now query the custom fields as well in the default search.

Customising the Search Results
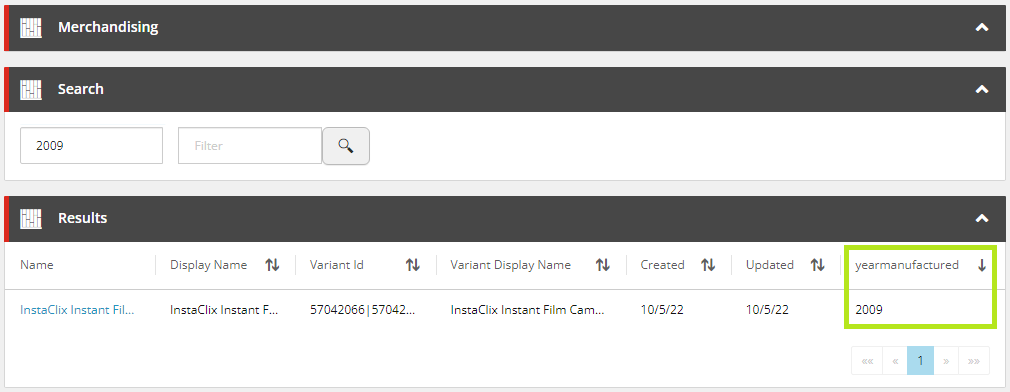
The last piece of the puzzle is to add our custom indexed fields to the Results entity view as seen below.
The Results entity view is populated with indexed commerce entity data and not raw commerce entity data.
First, we want to update the IndexablePolicy in the SearchPolicySet for our given search scope, with our custom field.
{
"$type": "Sitecore.Commerce.Plugin.Search.IndexablePolicy, Sitecore.Commerce.Plugin.Search",
"SearchScopeName": "CatalogItemsScope",
"Properties": {
  ...,
  "YearManufactured": {
    "TypeName": "System.String",
    "IsKey": false,
    "IsSearchable": true,
    "IsFilterable": true,
    "IsSortable": true,
    "IsFacetable": false,
    "IsRetrievable": true
  }
}
For our implementation purposes, we only need to be concerned about the IsRetrievable and IsSortable properties of the IndexableSettings object. The IsRetrievable property will allow us to provide a fallback property with an empty value, while the IsSortable property will configured the column to be sortable. Both follow the platform implementation pattern.
Next, I would like to tell you that we could extend the Results entity view simply by extending pipelines with additional pipeline blocks, but we will need to copy and replace the original pipeline blocks for the most consistent approach across commerce indexes. There is a ProcessDocumentSearchResultsBlock within the commerce plugins that will relate to the search scope, which we would copy into our solution. In this instance, we copy the pipeline block from the Sitecore.Commerce.Plugin.Catalog.dll.
Without re-writing the platform code, we will have to face a bit more rigid manual coding over a more automated, iterative approach to the IndexableSettings of our IndexablePolicy. The key area of the pipeline block we need to focus on is shown on line 5, where the results view properties are cleared. We need to copy our custom field from the properties before hand (1. Copy the field view property) and then repopulate the results view afterwards (3. Add desired indexed fields back into results view), which effectively strips the results view or the other indexed fields that we don’t want to render.
// 1. Copy the field view property
var yearmanufactured = child.Properties.FirstOrDefault(p => p.Name.EqualsOrdinalIgnoreCase("YearManufactured"));

// 2. Clear the results view properties
child.Properties.Clear();

if (name != null)
{
    name.UiType = ViewsConstants.EntityLinkUiType;
}

// 3. Add desired indexed fields back into results view
child.AddViewPropertyToEntityViewOrDefault(name, retrievableProperties, CoreConstants.Name, typeof(string).FullName);
child.AddViewPropertyToEntityViewOrDefault(displayName, retrievableProperties, CoreConstants.DisplayName, typeof(string).FullName);
child.AddViewPropertyToEntityViewOrDefault(variantId, retrievableProperties, CatalogConstants.VariantId, typeof(string).FullName);
child.AddViewPropertyToEntityViewOrDefault(variantDisplayName, retrievableProperties, CatalogConstants.VariantDisplayName, typeof(string).FullName);
child.AddViewPropertyToEntityViewOrDefault(createdDate, retrievableProperties, CoreConstants.DateCreated, typeof(DateTimeOffset).FullName);
child.AddViewPropertyToEntityViewOrDefault(updatedDate, retrievableProperties, CoreConstants.DateUpdated, typeof(DateTimeOffset).FullName);
child.AddViewPropertyToEntityViewOrDefault(yearmanufactured, retrievableProperties, "YearManufactured", typeof(string).FullName);
We replace the platform pipeline block in SearchPipeline in our pipeline registrations.
.ConfigurePipeline<ISearchPipeline>(pipeline => pipeline
    .Replace<Sitecore.Commerce.Plugin.Catalog.ProcessDocumentSearchResultBlock, Pipelines.Blocks.ProcessDocumentSearchResultBlock>()
)
The platform pipeline block we are overriding is fully qualified here to to explicitly replace the correct pipeline block.
All that is left is to deploy the code, which is short looks requires:
- Deploying our Commerce Engine code to all instances.
- Bootstrap the Commerce Engine to ingest our updated IndexablePolicy configuration.
- Restart the authoring Commerce Engine instance to consume the updated policy set.
Performing our search now, we will see that we have our custom field appended to the end of the Results entity view, which can be used to sort the results.
Summary
While the search component of BizFx was not developed with the intention of being configurable, we have identified a few ways to customise the search component, which will hopefully cover most business user scenarios and saves us from having to implement our own search component from scratch.


