Sitecore Experience Commerce: Debugging the Commerce Engine from Visual Studio in XC 10

Reading Time: 2 minutes

In this article, we will review how to attach a running Commerce Engine instance to the Visual Studio Debugger for local debugging.

Introduction

In Sitecore Experience Commerce 9.X.Y, the Commerce Engine was built on .NET Core 2.2 or lower, which either only supported the out-of-process hosting or is the default configuration. This meant that IIS was essentially being used as a proxy to forward requests to the Commerce Engine application, which is why you are probably familiar with attaching the debugger to a process named Sitecore.Commerce.Engine.exe. By hovering over the process, the source Commerce Engine could easily be identified when attaching the process to Visual Studio.

Sitecore Experience Commerce 10 now leverages .Net Core 3.1, which uses in-process hosting, meaning the Commerce Engine instance run in the same process as its IIS worker process. Overall, the in-process hosting provides improved performanced as requests aren’t being proxied over the loopback adapter.

Now that we have a better understanding of the switch from out-of-process to in-process hosting in XC 10, it should be apparent as to why we need to amend how we attach the Commerce Engine to Visual Studio’s debugger.

Attaching the Commerce Engine instance to the Visual Studio Debugger

First thing we will need to do is to retrieve the process Id to verfiy that we are attaching the correct process in Visual Studio. To do this, open IIS and navigate to the Worker Processes view.
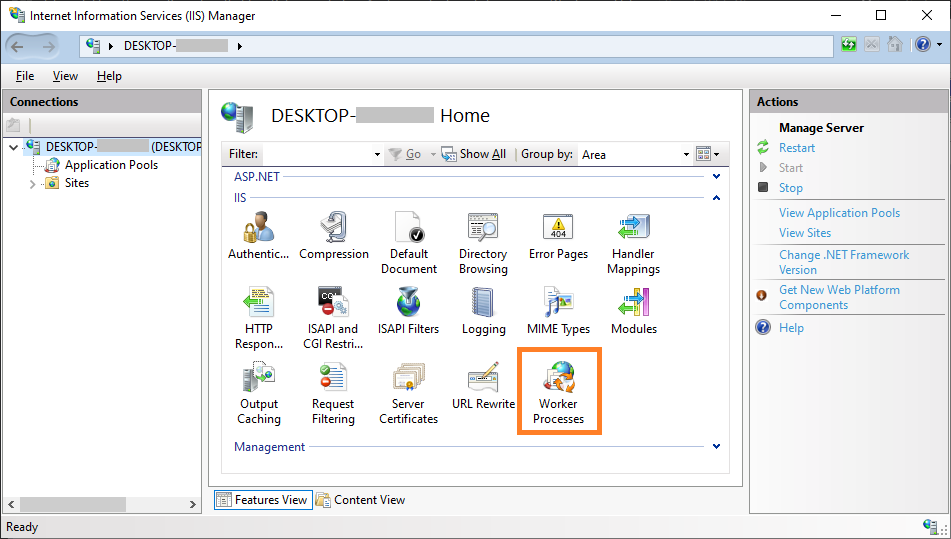
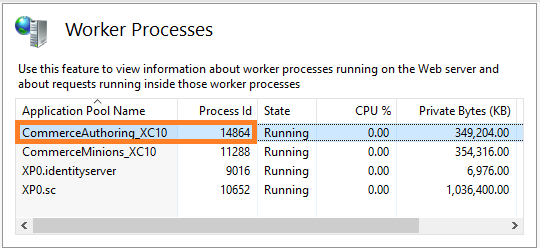
In the Worker Processes view, look for the application pool name containing the name of the application pool configured for the Commerce Engine instance and note the Process Id.

If the application pool does not show the Commerce Engine instance, it has likely not started, or shut down due to inactivity. Execute a request to the Commerce Engine instance and refresh the Worker Processes view in IIS.
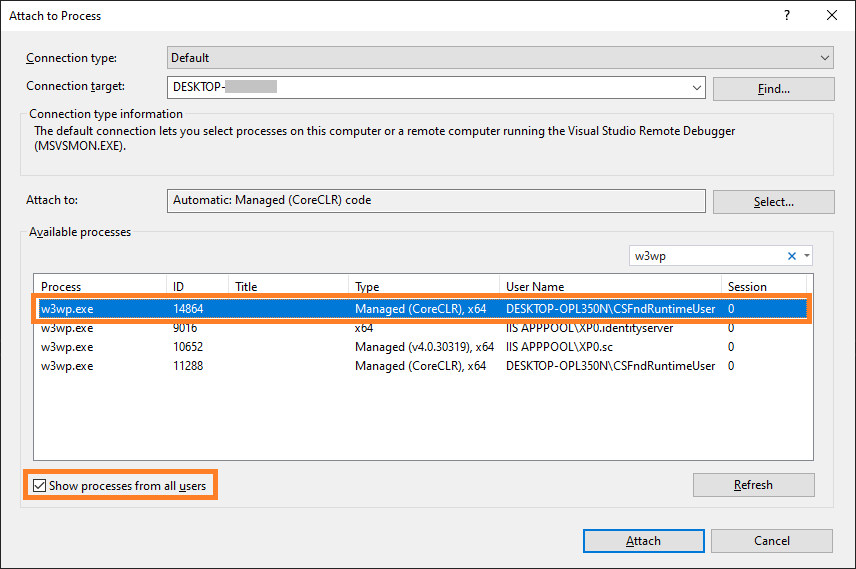
Over in Visual Studio, open the Attach to Process dialog, select the Show processes from all users as you will likely be running the Commerce Engine under a dedicated user profile, and locate the ID that we identified from the Worker Proccesses view in IIS. The ‘w3wp’ can also be applied to the process filters to more easily locate the process.
References

Microsoft: Host ASP.Net Core on Windows with IIS > Hosting models

Sitecore Experience Commerce: Resolving Site-Catalog Association Lock

Reading Time: 2 minutes

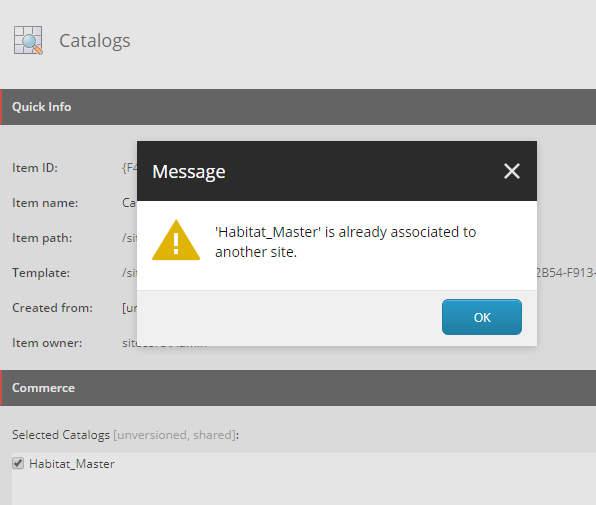
In this article, we look at how to fix the “‘<catalog>’ is already associated to another site.” error message that can occur when attempting to save the catalog association to a site, although no other sites have an association to this catalog at the time.

Note: This solution is only intended for local development and not recommended for production instances.

Background

Over in Sitecore Commerce, the category and sellable item entities contain a ParentCatalogList property that houses the Sitecore ids of the associated catalog entities. For catalog entities however, the ParentCatalogList is being repurposed for the site association Sitecore id and acts as a lock, preventing the catalog from being associated to other sites.

If you happen to have deleted a site that had a existing catalog association, the catalog commerce entity will not be updated to release the lock. Similar scenarios may also be seen if the commerce shared database is restored to an environment that has conflicting sitecore ids with existing sites, as often can be seen during development across teams that do not sync their Sitecore and Commerce data.

Solution

Removing the lock can be achieved by executing the following script against the commerce shared database.

Update the database name and catalog friendly id values, in the highlighted lines, as appropriate.

USE SitecoreCommerce9_SharedEnvironments
GO

DECLARE @catalogEntityId VARCHAR(MAX) = 'Habitat_Master';
DECLARE @uniqueId VARCHAR(MAX);
DECLARE @entity VARCHAR(MAX);
DECLARE @modifiedEntity VARCHAR(MAX);

SELECT @entity = Entity,
       @uniqueId = Entities.UniqueId
FROM   sitecore_commerce_storage.CatalogEntities AS Entities
       INNER JOIN sitecore_commerce_storage.CatalogEntity AS Entity
               ON Entities.UniqueId = Entity.UniqueId
WHERE  Id = 'Entity-Catalog-' + @catalogEntityId

UPDATE sitecore_commerce_storage.CatalogEntity
SET    Entity = JSON_MODIFY(@entity, '$.ParentCatalogList', '')
WHERE  UniqueId = @uniqueId

Now that we have released the lock, we can associate the catalog to our site, however we may still encounter issues navigating through the catalog structure in the content editor and attempting to publish the site may throw null reference exceptions.

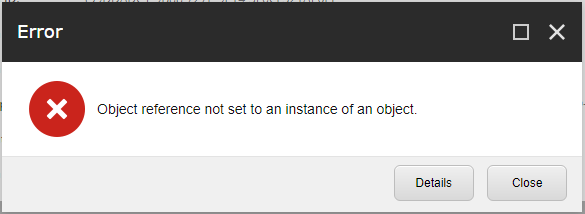
Error message when trying to navigate to category under catalog in the Content Editor.

Site Publish Error Message
Job started: Publish to ‘web’|#Exception: System.Reflection.TargetInvocationException: Exception has been thrown by the target of an invocation. —> System.NullReferenceException: Object reference not set to an instance of an object.
at Sitecore.Commerce.Engine.Connect.DataProvider.ReadOnlyCatalogDataProvider.GetChildIDs(ItemDefinition parentItem, CallContext context)

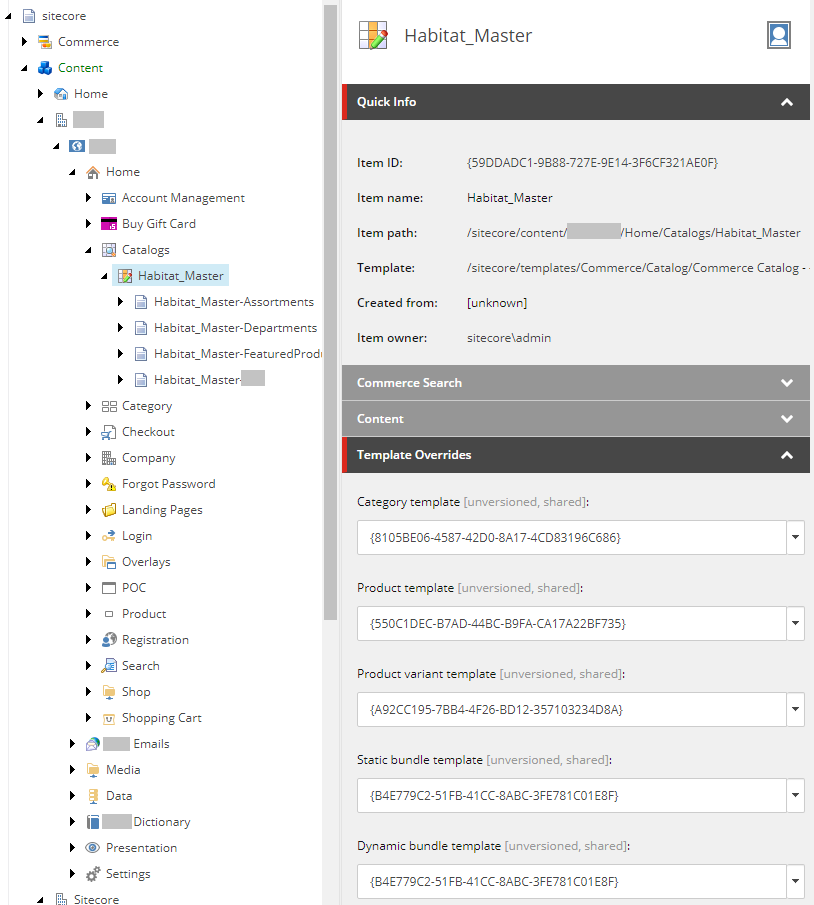
These issues are caused by the catalog’s Template Overrides, which are configured to templates that don’t exist in this Sitecore instance.

Updating the Template Overrides to valid templates for the site will resolve these issues and you should be up and running again.

Sitecore Experience Commerce: Accessing the GetRawEntity API

Reading Time: 2 minutes

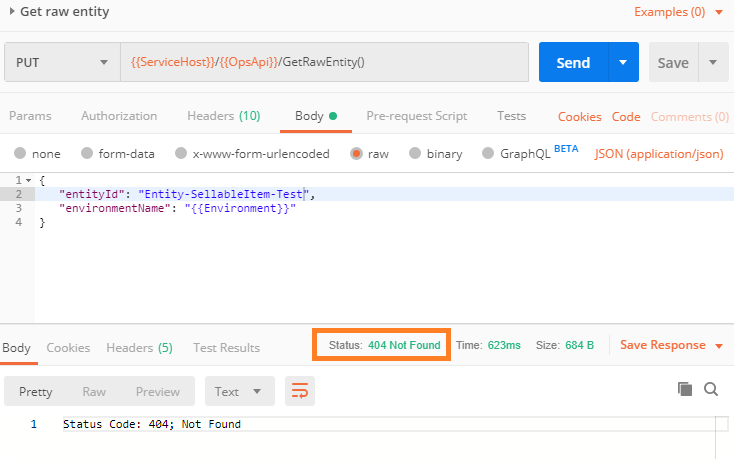
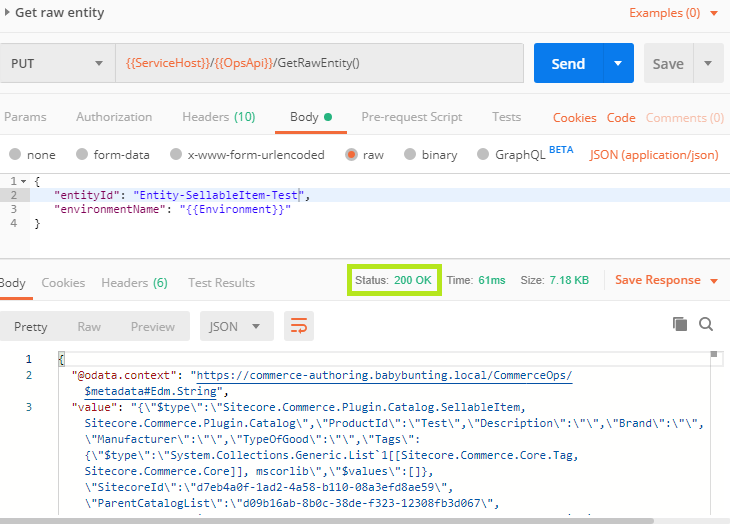
In this article, we will take a look at why the GetRawEntity api returns a 404 Not Found response for the default admin user in Sitecore Commerce.

Note: The GetRawEntity API is intended for troubleshooting and validation purposes and would be utilised by devops and developer users.

Reviewing the commerce logs we find that the QA role in not a role in the current request.

00064 22:41:06 ERROR CtxMsg.Error.QARoleNotFound: Text=QA is not a role in the current request.
00064 22:41:06 ERROR PipelineAbort:QA is not a role in the current request.

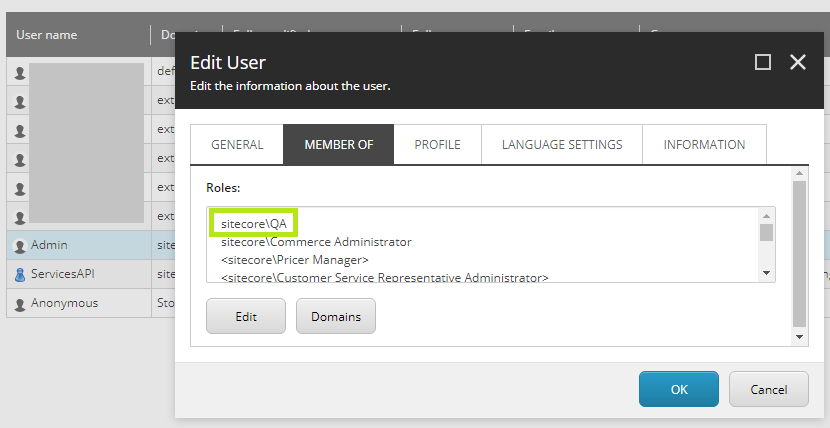
We can resolve this by updating the role memberships assigned the admin user, or any desired user.

  1. In Sitecore, go to the User Manager
  2. Select and edit the desired user
  3. In the Edit User modal,
    1. Select the MEMBER OF tab and edit the roles.
    2. Locate the sitecore\QA role and add it to the selected roles.

Note: If the user has already has received a token from Identity Server, a new token will need to be issued to receive the new role.