

843 views
In this article, we will look at how to manage catalog images that are associated to sellable items in the Business Tools‘ Merchandising Manager.

With the Habitat Master catalog and SXA Storefront site that is setup during the installation of Sitecore Experience Commerce, we have a great reference point for implementing custom sites. However, one of the not so obvious configurations is how to configure catalog images for new catalogs.
Commerce Media Items OData API Key
In Sitecore’s Core database (pre XC 9.1) or Master database (from XC 9.1), the Commerce Media Items OData API Key contains the Search Filter property, which is responsible for applying the filter of media items that are restricted in the search results.
(Fields/any(f: (f/Name eq 'Extension' and (f/Value eq 'png' or f/Value eq 'jpg'))) and Language eq 'en' and (contains(Path, '/images/adventure') or contains(Path, '/images/habitat')))
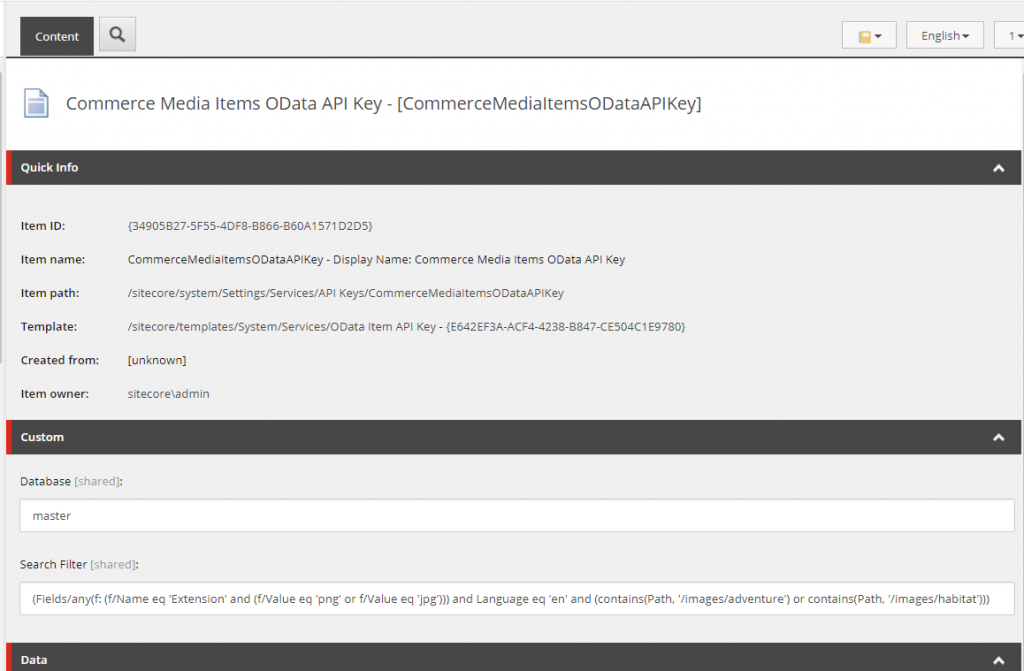
The Search Filter value itself is performing 3 levels of filtering:-
- Extension Type: The supported media extension types.
- Language: The language is utilised to prevent duplicate media items from being returned, i.e. per language version.
- Location: The media library folder where the catalog images are stored.
Note: This is a global configuration that will apply to all media search controls in Sitecore Commerce. This means that although we can segregate catalog images to different Media Library folders in Sitecore, the Image search results in the Business Tools will return results for all configured catalog image folder locations and extension types. This makes sense considering sellable items can be associated across catalogs.
Configuring Image Extension Types
The default configured image types include jpg and png formats. To modify the extension types, we look at the extension part of the filter where we can add or remove the Value comparisons as desired.
(f: (f/Name eq 'Extension' and (f/Value eq 'png' or f/Value eq 'jpg')))
Configure the Value comparison in the format f/Value eq ‘<extension type>’. Don’t modify the wrapping logic. When specifying multiple extensions use the ‘or’ clause as per the initial configuration.
Adding Extension Type Example
In this example, I will add the gif extension type and sample image to validate the change.
Configure the Extension Type
In the Sitecore Content Editor using the Core database (pre XC 9.1) or Master database (from XC 9.1) :-
- Go to /sitecore/system/Settings/Services/API Keys/CommerceMediaItemsODataAPIKey
- Update the extension part of the Search Filter value to include the ‘gif’ comparison.
(f: (f/Name eq 'Extension' and (f/Value eq 'png' or f/Value eq 'jpg' or f/Value eq 'gif')))
Add Images of the New Extension Type
In the Sitecore Content Editor using the Master database:-
- Go to /sitecore/media library/Images/<catalog image folder>
- Upload the media file to the folder.

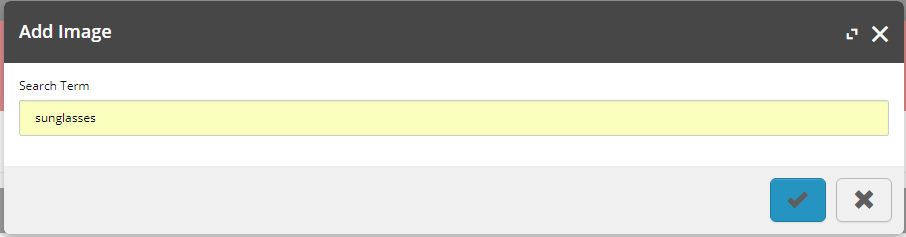
e.g. sunglasses.gif - Publish the item.
- Re-index the master/web databases.
Add the Image to a Sellable Item
In the Business Tools’ Merchandising Manager:-
- Navigation to the desired Sellable Item or create a new Sellable Item.
- Ensure the Sellable Item‘s Entity Version has not been published, otherwise a new version will need to be created.
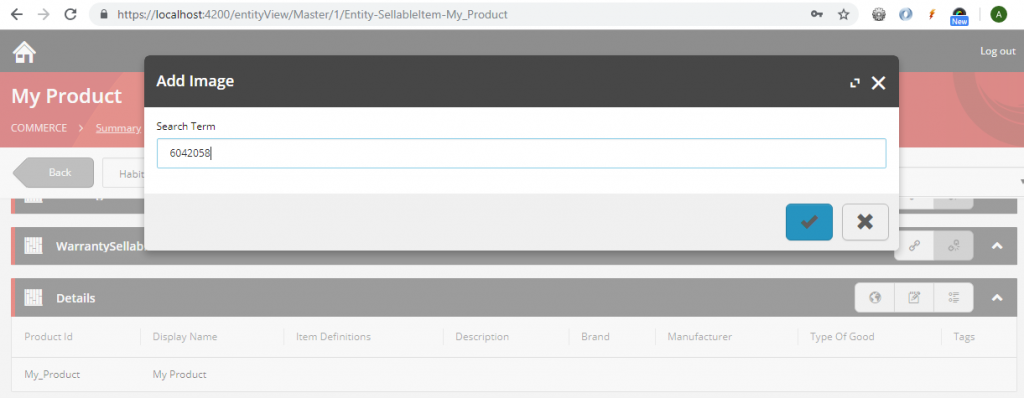
- Under the Images section, click the Add an Image button.
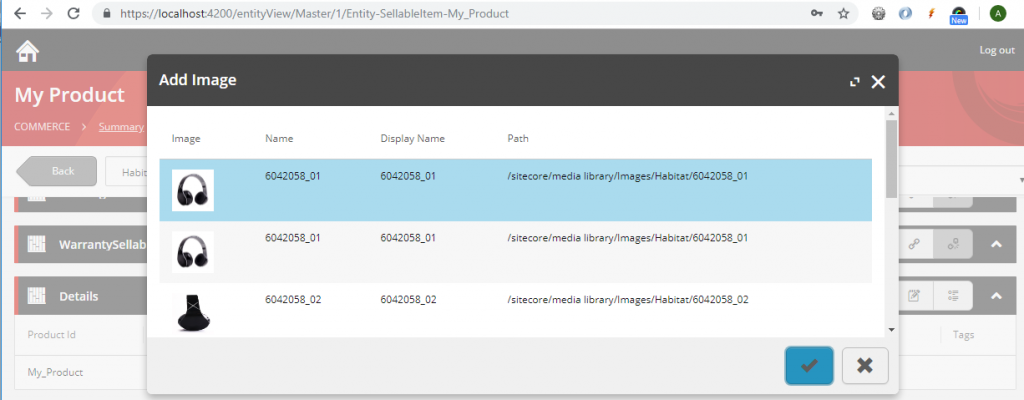
- Search for the image name.
- Select the image name and click the tick (accept) button.

- Promote the sellable item through the workflow states until it’s published.
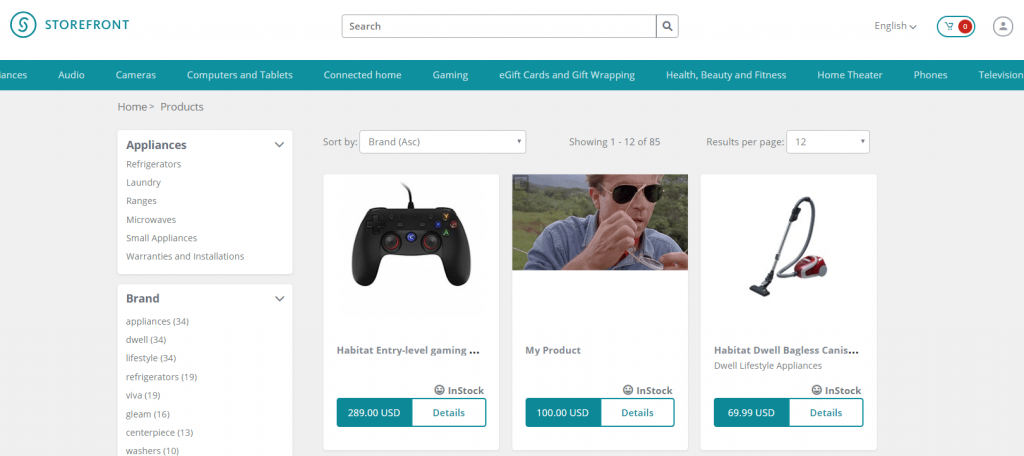
View the Image on the Sellable Item in the Storefront
In the Storefront’s website:-
- Either navigate to the Category or Search Results Page, containing the product, navigate to any page that contains any component that displays the Sellable Item, e.g. Promoted Products component, or navigate directly to the Product Details Page.
Configuring Image Source Location
For media image location, we need to configure the location part of the filter where we can add or remove the Path comparisons as desired.
By default, we see that the locations have been configured for the folders that have been utilised for the Adventure Works and Habitat catalogs.
(contains(Path, '/images/adventure') or contains(Path, '/images/habitat'))
Configure the Path to the location of the catalog images folder in the format contains(Path, ‘/<catalog image folder location>’) where <catalog image folder location> is under the Media Library Sitecore item tree. When using multiple folder locations (usually one folder per catalog), use the ‘or’ clause as per the initial configuration.
Update: I found that the contains function had some issues with parsing the Path value where spaces are used in the item names, hence ‘/images/adventure’ rather than ‘/images/adventure works’. Another issue I found was that using the contains function also meant that any folder structure, outside the Media Library item, in the Sitecore tree that matched the path would also be included for the media search results causing undesired entries.
To resolve this, I found a more performant an accurate solution using the startswith function, which appears to resolve the Path value relative to the Media Library item and accepts spaces in the item names.
(startswith(Path, '/images/adventure works/')
Please note that I haven’t updated the remainder of this article with this change, but keep it in mind when making updating the filter yourself.
Adding Catalog Image Folder Example
In this example, I will add the HelloWorld catalog image folder type and sample image to validate the change.
Configure the Location Folders
In the Sitecore Content Editor using the Core database (pre XC 9.1) or Master database (from XC 9.1) :-
- Go to /sitecore/system/Settings/Services/API Keys/CommerceMediaItemsODataAPIKey
- Update the location part of the Search Filter value to include the ‘helloworld’ comparison.
(contains(Path, '/images/adventure') or contains(Path, '/images/habitat') or contains(Path, '/images/helloworld'))
Add Images of the Catalog Image Folder
In the Sitecore Content Editor using the Master database:-
- Go to /sitecore/media library/Images/HelloWorld
- Upload the media file to the folder.
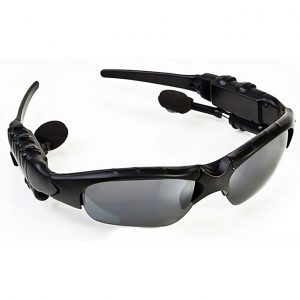
e.g. sunglasses.jpg - Publish the item.
- Re-index the master/web databases.
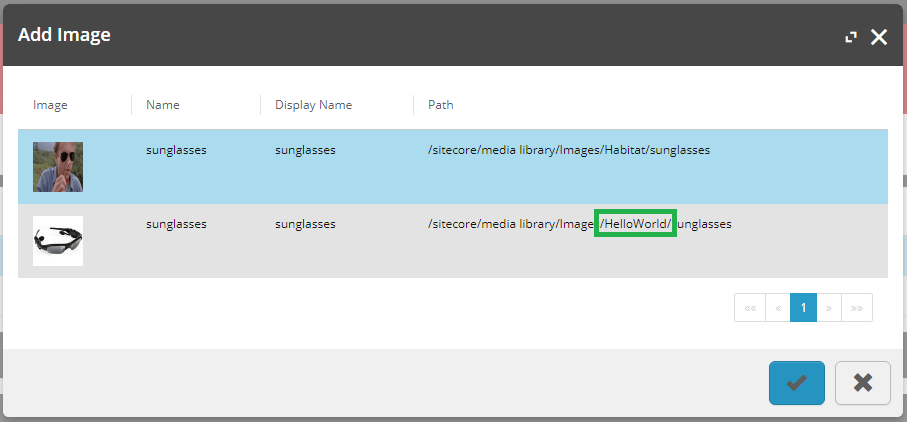
Search for the Image in the Merchandising Manager
In the Business Tools’ Merchandising Manager:-
- Navigation to the desired Sellable Item or create a new Sellable Item.
- Ensure the Sellable Item‘s Entity Version has not been published, otherwise a new version will need to be created.
- Under the Images section, click the Add an Image button.
- Search for the image name.
- Ensure the image shows in the search results
Summary
We learnt that the configurations of image folder location and filtered media extension types for catalog images are set in the Search Filter field of the Commerce Media Items OData API Key Sitecore item in the Core database (pre XC 9.1) or Master database (from XC 9.1) . We also learnt that the configurations are global and will apply to all media search controls in the Business Tools.