

1,830 views
In this article, we will look at how the locale can be changed in BizFx to support a desired locale type and the steps required to add support for locales that haven’t been configured in the BizFx solution.
Working in Australia, a common customisation required is to add the ‘en-AU’ locale, primarily to support date/time formatting in BizFx.
Adding Support for a Locale
To add support for a locale that has not been registered to BizFx, the process is quite simple.
If you are looking to configure BizFx with any of the following locales, then this step will not be required. Default Locales: ‘en’ (‘en-US’), ‘fr-FR’, ‘de-DE’, and ‘Ja-JP’.
In the BizFx solution, open src\app\app.module.ts , import the locale and advanced formatting options from the extra dataset and register the locale via the registerLocaleData function.
The locales are already provided with the BizFx SDK, under src\locales.
/* Locales */
import localeFr from '../locales/fr';
import localeFrExtra from '../locales/extra/fr';
import localeJa from '../locales/ja';
import localeJaExtra from '../locales/extra/ja';
import localeDe from '../locales/de';
import localeDeExtra from '../locales/extra/de';
import localeEnAu from '../locales/en-AU';
import localeEnAuExtra from '../locales/extra/en-AU';

registerLocaleData(localeFr, 'fr-FR', localeFrExtra);
registerLocaleData(localeDe, 'de-DE', localeDeExtra);
registerLocaleData(localeJa, 'Ja-JP', localeJaExtra);
registerLocaleData(localeEnAu, 'en-AU', localeEnAuExtra);
Once we have registered the locale, if we were to configure the locale at this point we would find that there is some messaging in that is not rendered quite right. This is because there are also a handful of text overrides that are stored in the internationalisation folder of BizFx (‘src\assets\i18n\’) that also need to be added to override the default messaging in BizFx.
Copy an existing locale file fom the internationalisation folder and update the messaging accordingly.
{
"ValidationErrors": {
"IsRequired": "{{DisplayName}} is required.",
"IncorrectDecimalValue": "{{DisplayName}} has an incorrect decimal value.",
"IncorrectDateValue": "{{DisplayName}} has an incorrect date value."
},
"ActionExecuted": "{{DisplayName}} executed.",
"Back": "Back",
"Logout": "Log out",
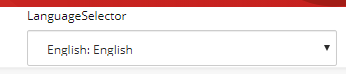
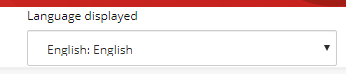
"LanguageSelector": "Language displayed",
"NoSearchResults": "No results matching your search were found.",
"Searching": "Searching..."
}
Configuring the Locale for BizFx
Now that the locale has been registered to the BizFx solution, the next step is to update the BizFx configuration to use it.
Open src\assets\config.json and set the Language to the newly registered locale.
{
  "EnvironmentName": "HabitatAuthoring",
  "EngineUri": "https://commerceauthoring.XC92.local",
  "IdentityServerUri": "https://XP0.IdentityServer",
  "BizFxUri": "https://bizfx.XC92.local",
  "Language": "en-AU",
  "Currency": "USD",
  "ShopName": "CommerceEngineDefaultStorefront",
  "LanguageCookieName": "selectedLanguage",
  "EnvironmentCookieName": "selectedEnvironment",
  "AutoCompleteTimeout_ms": 300
}
Deploy the BizFx solution as per your preferred deployment method and the locale will now be utilised throughout the BizFx tooling.
Source Code
The source code for this example of adding the ‘en-AU’ locale and other BizFx customisations can be found at Ajsuth.BizFx.