Business Tools UI Hints and UI Types

Reading Time: 8 minutes

In this article, we will look at what UI Hints and UI Types are and show samples is each being used within the Business Tools.

Note: This article is a work in progress.

UI Hints

The UI Hints property sets the rendering type for the properties of the entity views and entity action views.

EntityActionView

RelatedList

The RelatedList UI Hint is used to redirect the user to an entity view page instead of opening up a modal for user interaction. The entity view page URL is constructed from the EntityView property in the following format <domain>/entityView/<entity view>.

e.g. https://localhost:4200/entityView/OrdersList-CompletedOrders

var actions = entityView.GetPolicy<ActionsPolicy>().Actions;
var entityActionView = new EntityActionView()
{
	Name = "CompletedOrders",
	IsEnabled = true,
	UiHint = "RelatedList",
	EntityView = "OrdersList-CompletedOrders",
	Icon = "signal_flag_checkered"
}
actions.Add(entityActionView);

EntityView

The following list of UI Hints can be utilised for entity views.

Flat (default)

The default UI Hint for entity views is Flat. The hint is used for rendering a single set of properties as plain text.

Entity View UsageSupportedApplicable UI Types
PageYesN/A (All types will render as raw string values)
ModalYes
  • Empty (string) Text
  • Empty (bool) Checkbox
  • Empty (DateTimeOffset)
  • AutoComplete
  • DownloadCsv
  • Multiline
  • RichText
  • SelectList
  • Tags

Grid

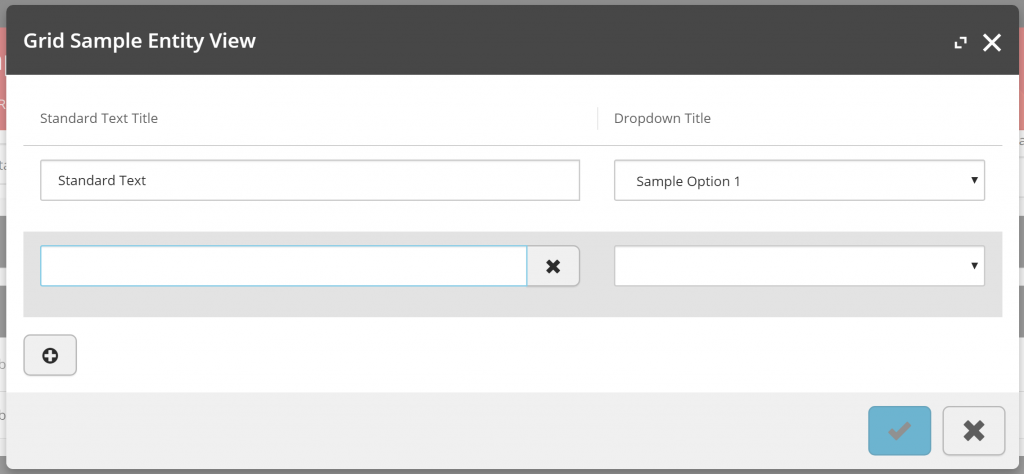
The Grid UI Hint supports the rendering of child entity views in a table-row layout in the modal window, allowing additional rows to be added and removed.

Notes:

  • The Dropdown UI Type does not apply the remove row control, therefore if all view properties of the row are set to Dropdown the row will not be able to be removed.
  • Only a single child entity view is supported as the UI renders a single Add Row button, which applies to the first child entity view.
  • Omitting the “AllowAdd” ViewProperty will exclude the Add Row button from the Grid.
entityView.UiHint = UiHints.Grid;
entityView.Properties.Add(new ViewProperty { Name = "AllowAdd", RawValue = false, IsRequired = false, IsReadOnly = true, IsHidden = true });
Entity View UsageSupportedApplicable UI Types
PageNoN/A
ModalYes
  • Empty (string) Text
  • SelectList

List

The List UI Hint creates a card-like layout, each list item represented by a child entity view containing properties of supported UI Types.

Entity View UsageSupportedApplicable UI Types
PageYes
  • Empty (String)
  • Empty (DateTimeOffset)
  • Empty (Decimal)
  • Empty (Sitecore.Commerce.Core.Money)
  • DownloadCsv
  • EntityLink
  • FullDateTime
  • Html
  • ItemLink
  • List
  • Multiline
  • SubItemLink
ModalNoN/A

MediaPicker

Details to come.

Entity View UsageSupportedApplicable UI Types
PageNoN/A
ModalYes???

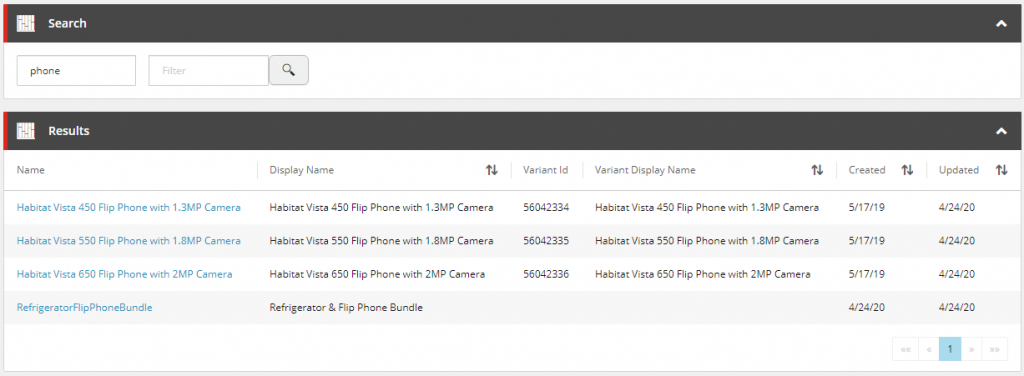
The Search UI Hint is an implicit implementation driven by the GetSearchViewBlock, based on the SearchViewPolicies configured for the environment.

The current request’s view name is used to retrieved the corresponding SearchViewPolicy by its ViewName property and will use the SearchScopeName to resolve the SearchScopePolicy for the search queries of the control. Where a SearchScopePolicy has been resolved, the Search entity view will be added to the page, and upon execution of the search control the Results entity view will be added without any additional configuration or implementation.

Notes:

  • An EntityType is also specified in the SearchViewPolicy for the InventorySet as additional validation for the generic ‘Master’ entity view name that is utilised by all entity types.
{
  "$type": "Sitecore.Commerce.Plugin.Search.SearchViewPolicy, Sitecore.Commerce.Plugin.Search",
  "SearchScopeName": "XC93_CatalogItemsScope",
  "ViewName": "MerchandisingDashboard"
}
Entity View UsageSupportedApplicable UI Types
PageYesN/A
ModalNoN/A

Table

Similar to the List UI Hint, the Table UI Hint creates a table-row layout, each list item represented by a child entity view containing properties of supported UI Types.

Entity View UsageSupportedApplicable UI Types
PageYes
  • Empty (String)
  • Empty (DateTimeOffset)
  • Empty (Decimal)
  • Empty (Sitecore.Commerce.Core.Money)
  • DownloadCsv
  • EntityLink
  • FullDateTime
  • Html
  • ItemLink
  • List
  • Multiline
  • SubItemLink
ModalNoN/A

BraintreePayment

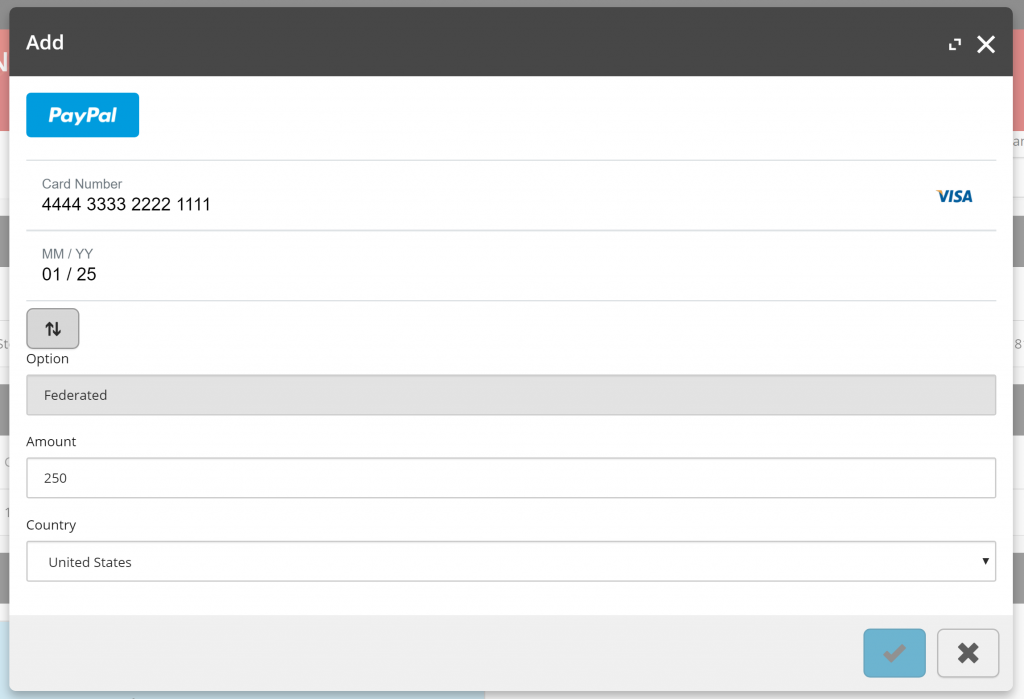
The BraintreePayment UI Hint is utilised to handle adding braintree payments. It injects an iframe to manage payment information via the Braintree gateway, but otherwise provides similar support as the default Flat UI Hint for view property rendering.

Notes:

  • This UI Hint is intended for sole use with the Braintree payment integration and not for general use.
Entity View UsageSupportedApplicable UI Types
PageNoN/A
ModalYes
  • Empty (string) Text
  • Empty (bool) Checkbox
  • Empty (DateTimeOffset) Date Time picker
  • AutoComplete
  • DownloadCsv
  • Dropdown
  • Multiline
  • RichText
  • Tags

UI Types

The UI Types property sets the control type that will be rendered against entity views.

View Property

The following list of UI Types can be utilised for view properties.

Empty

When no UI Type is provided, the UI control rendered is based off of the data type that is set against the RawValue property of the ViewProperty. The data types that influence the controls rendered are as follows:-

String

The default data type is the String value, which will render a text field. Most data types will fallback to their raw string value when evaluated.

var viewProperty = new ViewProperty()
{
	Name = "Standard Text Title",
	RawValue = "Standard Text"
};

entityView.Add(viewProperty);
Boolean (Checkbox)

Boolean values will be rendered as checkboxes for supported UI Hints, otherwise rendering as a string value.

var viewProperty = new ViewProperty()
{
	Name = "Boolean Field Title",
	RawValue = false
};

entityView.Add(viewProperty);
<!-- /wp:html -->

<!-- wp:heading {"level":5} -->
<h5 id="datetimeoffset">DateTimeOffset (Date Time Picker)</h5>
<!-- /wp:heading -->

<!-- wp:paragraph -->
<p><strong>DateTimeOffset</strong> values will be rendered as jQuery Date Time pickers for supported&nbsp;<em>UI Hints</em>, otherwise rendering as a string value.</p>
<!-- /wp:paragraph -->

<!-- wp:paragraph -->
<p><strong>Note:</strong> <em>ReadOnly</em> mode is not supported for this control. <em>(Confirmed up to XC 9.1)</em></p>
<!-- /wp:paragraph -->

<!-- wp:image {"id":327} -->
<figure class="wp-block-image"><img src="/wp-content/uploads/2018/10/uitype-datetimepicker-1-300x71.png" alt="" class="wp-image-327"/></figure>
<!-- /wp:image -->

<!-- wp:html -->

var viewProperty = new ViewProperty()
{
	Name = "Date Time Offset Field Title",
	RawValue = DateTimeOffset.Now
};

entityView.Add(viewProperty);
Decimal

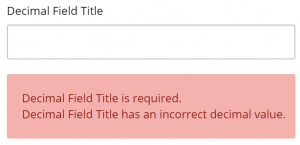
Decimal values will render an input field with appropriate validation.
var viewProperty = new ViewProperty()
{
	Name = "Decimal Field Title",
	RawValue = (decimal)0.0
};
entityView.Add(viewProperty);

Autocomplete

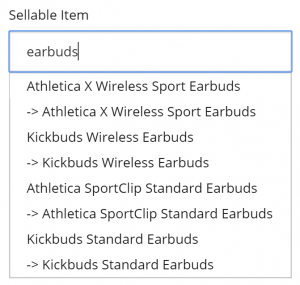
Search control that auto-completes after 4 characters. Can be combined with a policy to configure what it searches for.

See Business Tools: The Autocomplete UI Type Control for a more in depth look into this control.
var searchScopePolicy = SearchScopePolicy.GetPolicyByType(context.CommerceContext, context.CommerceContext.Environment, typeof(SellableItem));
var policy = new Policy()
{
	PolicyId = "EntityType",
	Models = new List<Model>()
	{
		new Model() { Name = "SellableItem" }
	}
};
var policyList = new List<Policy>() { searchScopePolicy, policy };

var viewProperty = new ViewProperty()
{
	Name = "Autocomplete Title",
	UiType = UiTypes.Autocomplete,
	Policies = policyList
};

DownloadCsv

Used for the coupon CSV download control.
var items = new List<string>() { "item1", "item2" };
var viewProperty = new ViewProperty()
{
	Name = "DownloadCsv Title",
	UiType = UiTypes.DownloadCsv,
	RawValue = new JArray(items.Select(item => new JObject()
	{
		{
			"Code",
			item
		}
	})).ToString()
};

entityView.Add(viewProperty);

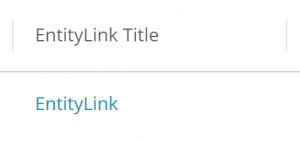
Allows linking directly to an entity. It will render a HTML link and build a URL to the Entity using the entity view’s ItemId property in the following format <domain>/entityView/Master/<entity version>/<item id>.

e.g. https://localhost:4200/entityView/Master/1/Entity-Catalog-Habitat_Master
FullDateTime

Renders date and time in short format.
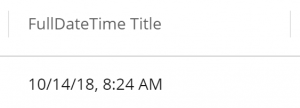
var viewProperty = new ViewProperty()
{
	Name = "FullDateTime Title",
	UiType = "FullDateTime",
	RawValue = DateTimeOffset.Now
};

entityView.Add(viewProperty);

Html

Renders value as html.
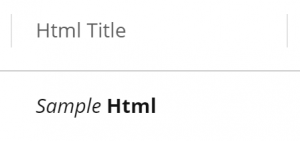
var viewProperty = new ViewProperty()
{
	Name = "Html Title",
	UiType = "Html",
	RawValue = "<i>Sample</i> <b>Html</b>"
};

entityView.Add(viewProperty);

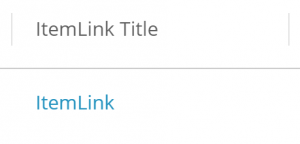
Creates a URL link in the format <domain>/entityView/<entity view name>/<Entity Version>/<entity id>/<item id>.

e.g. https://localhost:4200/entityView/Variant/1/Entity-SellableItem-6042567/56042567
List

Typically used to render a combobox. If it has an AvailableOptionsPolicy it well render as a combo with those as options.
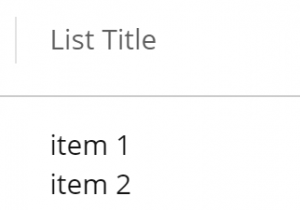
var viewProperty = new ViewProperty()
{
	Name = "List Title",
	UiType = "List",
	RawValue = new String[] { "item 1", "item 2" }
};

entityView.Add(viewProperty);

MultiLine

Multiline text editor.
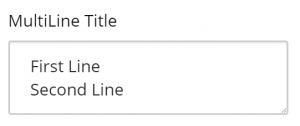
var viewProperty = new ViewProperty()
{
	Name = "MultiLine Title",
	UiType = "MultiLine",
	RawValue = "First Line\nSecond Line"
};

entityView.Add(viewProperty);

RichText

WYSISWYG Rich text editor.
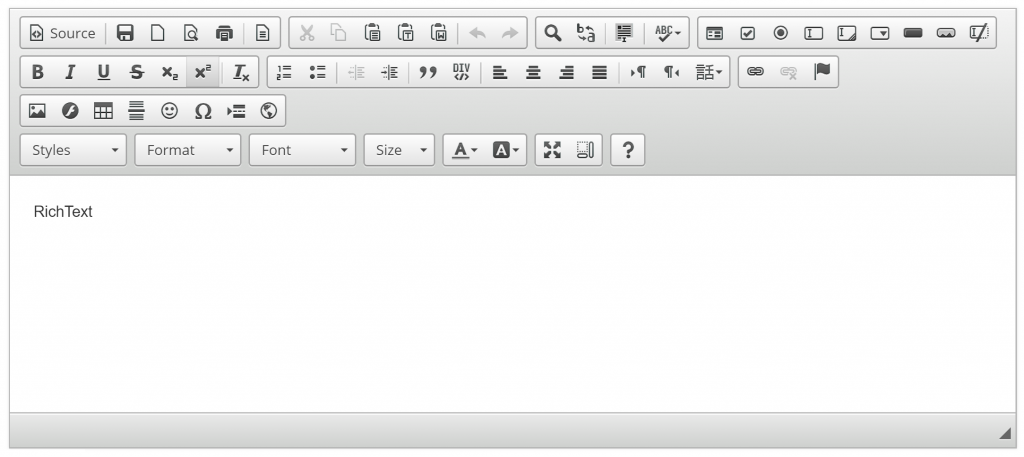
var viewProperty = new ViewProperty()
{
	Name = "RichText Title",
	UiType = "RichText"
};

entityView.Add(viewProperty);

SelectList

Renders a dropdown control. The list of options must be defined via the AvailableSelectionsPolicy. This behaves the save as Dropdown and Options UI Types.
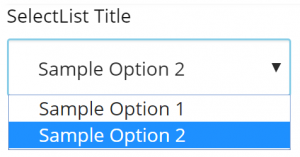
var viewProperty = new ViewProperty()
{
	Name = "SelectList Title",
	UiType = "SelectList"
};

var availableSelectionsPolicy = new AvailableSelectionsPolicy();
availableSelectionsPolicy.List.Add(new Selection() { DisplayName = "Sample Option 1", Name = "Option 1" });
var selection = new Selection() { DisplayName = "Sample Option 2", Name = "Option 2", IsDefault = true };
availableSelectionsPolicy.List.Add(selection);
viewProperty.Policies = new List<Policy>() { availableSelectionsPolicy };
viewProperty.RawValue = viewProperty.GetPolicy<AvailableSelectionsPolicy>().List.Where(s => s.IsDefault).FirstOrDefault()?.Name ?? string.Empty

entityView.Add(viewProperty);

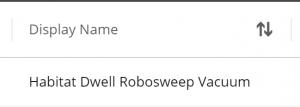
Sortable

Used when rendering table headers to signify that they’re sortable.
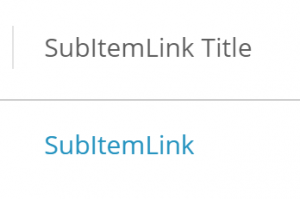
Similar to the ItemLink, the SubItemLink creates a URL link in the format <domain>/entityView/<entity view name>/<entity version>/<item id [0]>/<item id [1]>, splitting the ItemId by the pipe separator. This UI Type is used when referencing entities differing from the current entity view.

e.g. https://localhost:4200/entityView/Variant/1/Entity-SellableItem-6042567/56042567
Tags

Renders jQuery tag control.

var viewProperty = new ViewProperty()
{
	Name = "Tags Title",
	UiType = UiTypes.Tags,
	RawValue = new String[] { "item1", "item2" },
	OriginalType = UiTypes.List
};

entityView.Add(viewProperty);

Summary

We have reviewed the various UI Hints and UI Types that are available to us for customising the Business Tools and the instances where they are applicable.

Commerce Controller Types in Sitecore Commerce

Reading Time: 2 minutes

In this article, we review the Commerce Controller types to identify the purpose behind each controller type and assist with solution design in order to implement Commerce Controllers correctly in your Commerce Engine Plugin projects.

Commerce Controller Types

Entity Controllers

Entity Controllers, e.g. CartsController, implement Get methods and should only retrieve data, returning specific entitieslists of entities, or managed lists of entities. They should not manipulate data in the commerce databases or trigger behaviour within the Commerce Engine.

The following code snippet shows the Get Carts endpoint in the CartsController from the Carts Plugin.

public async Task<IEnumerable<Cart>> Get()
{
	CommerceList<Cart> commerceList = await Command<FindEntitiesInListCommand>()?.Process<Cart>(CurrentContext, CommerceEntity.ListName<Cart>(), 0, int.MaxValue);

	return (commerceList?.Items.ToList()) ?? new List<Cart>();
}

Api and CommerceOps Controllers

Api and CommerceOps Controllers implement methods that return non-OData entities only. The methods/endpoints of these controllers are routed via the ‘/api’ and ‘/commerceops’ URL segments, where the api routing is intended for website consumption while the commerceops routing is intended for DevOps consumption.

The following code snippet shows the GetBulkPrices endpoint in the ApiController from the Catalog plugin.

public async Task<IActionResult> GetBulkPrices([FromBody] ODataActionParameters value)
{
	if (!ModelState.IsValid)
		return new BadRequestObjectResult(ModelState);
	if (!value.ContainsKey("itemIds") || !(value["itemIds"] is JArray))
		return new BadRequestObjectResult(value);

	var jarray = (JArray)value["itemIds"];
	IEnumerable<SellableItemPricing> bulkPrices = await Command<GetBulkPricesCommand>().Process(CurrentContext, jarray?.ToObject<IEnumerable<string>>());

	return new ObjectResult(bulkPrices);
}

Commands Controllers

Commands Controllers implement OData actions for manipulating data through Commands. They should only return Command OData entities, not commerce entities like carts. 

The command object contains information about the execution of the command, i.e. ResponseCodeStatusisCancelledisCompleted, etc.

Some APIs do not wait for the command to complete and will return the command with the Status property as WaitingForActivation. These long running commands can be followed up on using the CheckCommandStatus() API with taskId parameter. See the Check Long Running Command Status API in the Sitecore DevOps postman collection.

The following code snippet shows the AddFederatedPayment endpoint in the CommandsController from the Payments plugin.

public async Task<IActionResult> AddFederatedPayment([FromBody] ODataActionParameters value)
{
	if (!ModelState.IsValid || value == null)
		return new BadRequestObjectResult(ModelState);
	if (!value.ContainsKey("cartId") || (string.IsNullOrEmpty(value["cartId"]?.ToString()) || !value.ContainsKey("payment")) || string.IsNullOrEmpty(value["payment"]?.ToString()))
		return new BadRequestObjectResult(value);
	
	var cartId = value["cartId"].ToString();
	var paymentComponent = JsonConvert.DeserializeObject<FederatedPaymentComponent>(value["payment"].ToString());
	var command = Command<AddPaymentsCommand>();
	
	await command.Process(CurrentContext, cartId, new List<PaymentComponent>() { paymentComponent });
	
	return new ObjectResult(command);
}

FAQ

How do I update an existing controller endpoint from any of the Commerce platform plugins?

The short answer is, you can’t modify or unregister a controller endpoint.

Whether you are looking to change the signature, the OData parameters from the request body, or any of the underlying code logic of an existing controller endpoint, you will need to create a new controller endpoint and ensure that you swap out any code that is calling the original endpoint for your custom endpoint.

Why can I call my endpoint via Postman, but it’s not available in the Service Proxy?

There are two possible reasons for this.

The first reason may be that the Service Proxy has not been regenerated since implementing the endpoint.

The second possible reason is that the endpoint has not been registered via the ConfigureServiceApiBlock or ConfigureOpsServiceApiBlock, depending on whether the endpoint should be exposed to the api or commerceops segments respectively.

Summary

While there’s nothing preventing developers from incorrectly using the Commerce Controllers, these coding standards are effectively the recommended practices that will contribute to the long term maintainability of your Sitecore Commerce solutions.

How to Create a Commerce Engine Plugin – Part 1 – Creating a Dashboard Item in the Business Tools

Reading Time: 3 minutesIn this series of articles, we will go through the process of creating a new Sitecore Commerce Engine plugin from scratch that will eventuate into a complete end-to-end solution. We will touch most of the areas of Sitecore Experience Commerce, demonstrating the flexibility and extensibility of the platform. Our plugin will be the Sitecore Commerce Stores Plugin.

Note: This is intended to be a walk-through guide rather than production-ready, deployable code.

Each article in this series will try to isolate implementation aspects to avoid information overload. We will cover:-

Creating a New Dashboard Item in the Business Tools

Creating the Navigation View

The Business Tools navigation is created from navigation blocks registered to the IBizFxNavigationPipeline. The naming convention used for navigation blocks is Get<Concept>NavigationViewBlock.

So first up, we create our GetStoresNavigationViewBlock. The structure of the Run method for these blocks is as follows:-

  1. Ensure mandatory parameters have been provided
  2. Create the navigation entity view to navigate to the concept dashboard
  3. Add the navigation view as a child view of the Business Tools Navigation view
  4. Return the updated Business Tools Navigation view
public override Task<EntityView> Run(EntityView entityView, CommercePipelineExecutionContext context)
{
	// 1. Ensure mandatory parameters have been provided
	Condition.Requires(entityView).IsNotNull($"{Name}: The argument cannot be null.");
	
	// 2. Create the navigation entity view to navigate to the concept dashboard
	var dashboardName = context.GetPolicy<KnownStoresViewsPolicy>().StoresDashboard;
	var storesDashboardView = new EntityView()
	{
		Name = dashboardName,
		ItemId = dashboardName,
		Icon = Views.Constants.Icons.MarketStand,
		DisplayRank = 6
	};

	// 3. Add the navigation view as a child view of the Business Tools Navigation view
	entityView.ChildViews.Add(storesDashboardView);

	// 4. Return the updated Business Tools Navigation view
	return Task.FromResult(entityView);
}

Referencing the code snippet above, the EntityView‘s Icon property can be set to any of the values for the icon font utilised. See my previous post, EntityView Icons in Sitecore Commerce Business Tools, for reviewing available icons.

The DisplayRank is also a self-explanatory property setting its position amongst the other ChildViews of the Business Tools navigation view.

Next, we register the navigation block in ConfigureSitecore.cs, in the BizFx Navigation Pipeline.

.ConfigurePipeline<IBizFxNavigationPipeline>(pipeline => pipeline
	.Add<Pipelines.Blocks.GetStoresNavigationViewBlock>().After<GetNavigationViewBlock>()
)

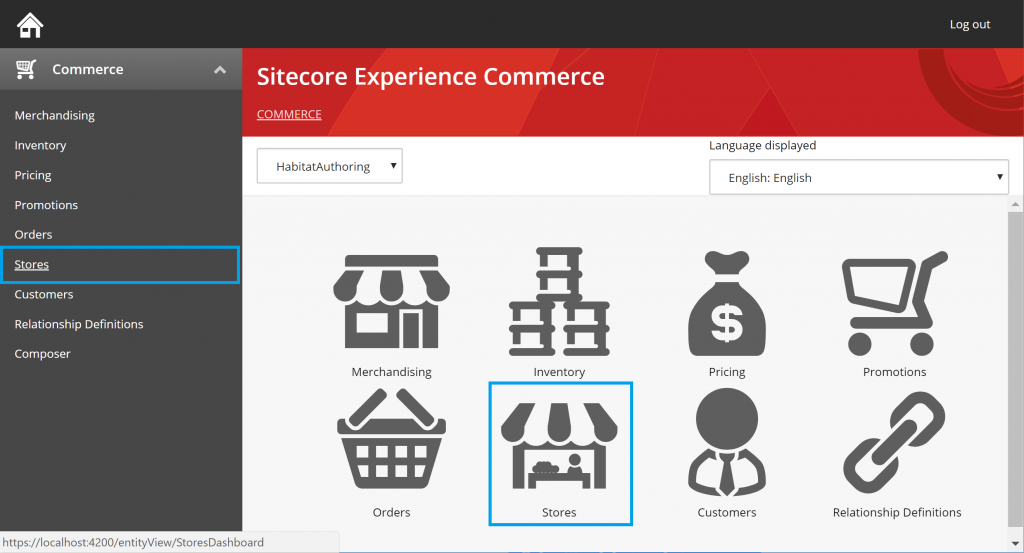
Commerce Dashboard

Navigation with Stores

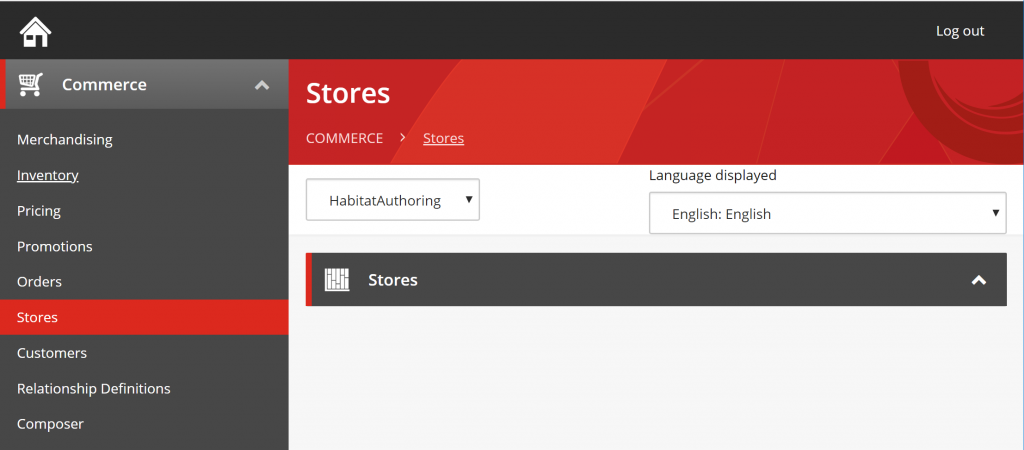
Stores Dashboard

Stores Dashboard

Adding Commerce Terms

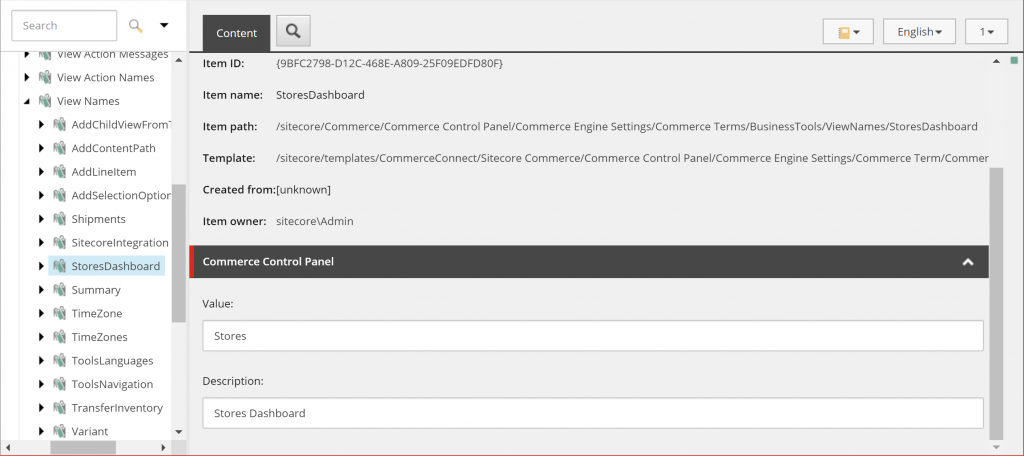
Now the Stores navigation item will actually read “StoresDashboard” at this point. We will need to add a commerce term to override the text.

In the Sitecore Content Editor, navigate to /sitecore/Commerce/Commerce Control Panel/Commerce Engine Settings/Commerce Terms/BusinessTools/ViewNames and create a new item StoresDashboard.

Commerce Terms - Stores Dashboard

In order to propagate this new data through to the Business Tools we need to run the Ensure/Sync default content paths request from Postman. This will sync the Sitecore content data into the Commerce Engine’s Shared Environments ContentEntities table.

Summary

So we added a new empty dashboard into the Business Tools. There’s nothing really to show but an icon and an empty dashboard view. Not to worry. Continue on to Part 2 – Creating EntityViews, Actions, and Entities (coming soon)

Source Code: Sitecore Commerce Stores Plugin release tag for this article

EntityView Icons in Sitecore Commerce Business Tools

Reading Time: < 1 minuteThere are 1311 icons available in the custom font used by the Business Tools.

Rather than listing out all of the icons here, I have created a simple plugin that creates a new dashboard item per item for reference purposes only.

When you are creating your entity view, you can simply assign the Icon property to any of the icons provided. For example:-

var myEntityView = new EntityView()
{
    Name = "MyEntityView",
    ItemId = "MyEntityView",
    Icon = "antenna",
    DisplayRank = 6
};

Source Code: The Business Tools plugin project repository

Valid Certificate Thumbprint not Matching in Sitecore Experience Commerce 9

Reading Time: < 1 minuteThe certificate thumbprint is configured in the website’s configuration file, located at <Website Root>/App_Config/Y.Commerce.Engine/Sitecore.Commerce.Engine.Connect.config (or in a custom patch file created for your solution) and in the Commerce Engine environments under <Commerce Engine Root>/wwwroot/config.json.

If you have configured a valid thumbprint that contains lowercase letters, for example 2700da6ab17c56a01f6d0762b76b3ca77933a68a, this will trigger the following errors in the Commerce Engine logs.

[20:13:57 ERR] ClientCertificateValidationMiddleware: Certificate with thumbprint 2700DA6AB17C56A01F6D0762B76B3CA77933A68A does not have a matching Thumbprint.
[20:13:57 INF] ClientCertificateValidationMiddleware: Certificate with thumbprint 2700DA6AB17C56A01F6D0762B76B3CA77933A68A is not valid.

This is caused by the logic used to compare the thumbprint values. The thumbprint in the Sitecore configuration file is transformed to uppercase while the thumbprint from the Commerce Engine configuration is not, so when the case-sensitive comparison is performed the result is a mismatch.

As the thumbprint is not case-sensitive, you can safely update the thumbprint values to be uppercase to resolve these errors.

Managing Commerce Configuration to Align with Helix Principles

Reading Time: 3 minutes

In this article, we will review a sample configuration of the layers.config file to better manage your solution’s configuration files when working with Sitecore Experience Commerce 9 (XC9).

Deprecated Article: See Sitecore: Using a Dedicated Custom Include Folder for Actual Custom Configuration Files for a more streamline approach to this problem.

If you take a look at an XC9 website’s /App_Config/Include folder, you would have noticed that there’s still some chaos happening with folder and file prefixes of ‘Y’ and ‘Z’ to assign priority order to the patch configuration files. On top of this, you may have even previous worked on projects where there have been crazy levels of prefixing ‘z’, ‘zz’, ‘zzzzz’, etc. to folders and files (I know I have seen some crazy levels of this), leading to developers pulling their hair out trying to locate the file’s origin. As chaotic as this is, we will look at how we can bring back order for our solution.

Configuring layers.config

Our intention is to ensure that our solution’s patch config files are always in a position to override the platform’s patch files, while adhering to the Helix layers principle.

With the following approach, the only additional consideration introduced is to review the platform’s custom config folders and files during any future upgrades to update the layers.config file to ensure the intended load order remains in tact.

Note: The following way is just one of many that can be implemented to achieve the same outcome. There is no one right way, so if you manage your solution’s configuration files differently there is no need to align to this.

  1. Backup the layers.config. Always important when you plan on modifying any files that are not part of your project solution (as infrequent as this should be).
  2. Copy the layers.config file out of the App_Config folder into a core project in the same location. This is because the layers.config file itself cannot be patched and we would want this file version controlled so that the file can be deployed to all environments, and modified (if required) by our colleagues.
  3. The layers.config file is then updated to specify the load order for all current folders. While this step is a bit of a pain, as any omissions will mean that any folder/files unspecified will be applied after the loadOrder , it allows us to ensure that all of our solution configuration files will be applied last, having the highest level of priority.
    <layer name="Custom" includeFolder="/App_Config/Include/">
      <loadOrder>
        <add path="Cognifide.PowerShell.config" type="File" />
        <add path="Sitecore.Commerce.Carts.config" type="File" />
        <add path="Sitecore.Commerce.Catalogs.config" type="File" />
        <add path="Sitecore.Commerce.config" type="File" />
        <add path="Sitecore.Commerce.Customers.config" type="File" />
        <add path="Sitecore.Commerce.GiftCards.config" type="File" />
        <add path="Sitecore.Commerce.Globalization.config" type="File" />
        <add path="Sitecore.Commerce.Inventory.config" type="File" />
        <add path="Sitecore.Commerce.LoyaltyPrograms.config" type="File" />
        <add path="Sitecore.Commerce.Orders.config" type="File" />
        <add path="Sitecore.Commerce.Payments.config" type="File" />
        <add path="Sitecore.Commerce.Prices.config" type="File" />
        <add path="Sitecore.Commerce.Shipping.config" type="File" />
        <add path="Sitecore.Commerce.WishLists.config" type="File" />
        <add path="z.Cognifide.PowerShell.config" type="File" />
        <add path="ContentTesting" type="Folder" />
        <add path="Examples" type="Folder" />
        <add path="Feature" type="Folder" />
        <add path="Foundation" type="Folder" />
        <add path="Foundation.Overrides" type="Folder" />
        <add path="Project" type="Folder" />
        <add path="Y.Commerce.Engine" type="Folder" />
        <add path="Z.Commerce.Engine" type="Folder" />
        <add path="z.Feature.Overrides" type="Folder" />
        <add path="Z.Foundation" type="Folder" />
        <add path="Z.Foundation.Overrides" type="Folder" />
        <add path="Z.LayoutService" type="Folder" />
      </loadOrder>
    </layer>
  4. We then create three folders, following the Helix principles for our project solution. I just chose to use ‘Helix’ as a prefix to drill the point in.
    1. Helix.Feature
    2. Helix.Foundation
    3. Helix.Project
  5. Add the new folders to the <loadOrder>.
    <layer name="Custom" includeFolder="/App_Config/Include/">
      <loadOrder>
        ...
        <add path="Z.LayoutService" type="Folder" />
        <add path="Helix.Foundation" type="Folder" />
        <add path="Helix.Feature" type="Folder" />
        <add path="Helix.Project" type="Folder" />
      </loadOrder>
    </layer>
  6. As you are developing your solution you may find that you need to set the load order for the individual configuration files within a certain layer. In this case, you can list out the file order required. In the sample below, we have Feature A, Feature B, and Feature C. Feature A has a configuration conflict with Feature B and needs higher priority. Feature C has no conflicts. We only need to specify the config for Feature A after the folder to ensure the correct patch order.
  7. <layer name="Custom" includeFolder="/App_Config/Include/">
      <loadOrder>
        ...
        <add path="Helix.Feature" type="Folder" />
        <add path="Helix.Feature/Feature.A.config" type="File" />
        <add path="Helix.Project" type="Folder" />
      </loadOrder>
    </layer>
  8. Deploy your solution.

Summary

While you could continue down the path of having project with ‘z’, ‘zz’, ‘zzzzz’, etc. prefixes, by taking the initial steps to isolate and manage your solution’s patch files under managed folder and file load order, we bring the chaos back to order with meaningfully named patch files that can be found exactly where you expect them to be located.

An Introduction to Sharding and Custom Sharding in Sitecore Experience Commerce 9

Reading Time: 3 minutesIn this article, we will look at list and entity sharding that has been introduced in Sitecore Experience Commerce 9 (XC9), when we would create a custom shard, and how we can implement our own custom shard.

Sharding – What is it?

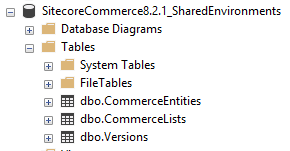
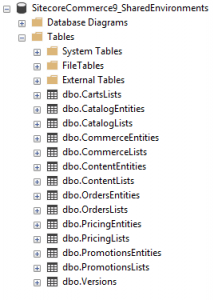
Let’s take a quick step back and review the Shared Environment database from Sitecore Commerce 8.2.1. All commerce entities and lists were found under tables named CommerceEntities and CommerceLists respectively. These tables consisted of data pertaining to carts, orders, pricing and promotions.

With the introduction of XC9, additional entities and lists have been added to cater for the catalog and customer data, as part of the final phase out process of the Commerce Server.

Now it’s a known fact that with any database that continues to accumulate data that inevitably there will be increasing performance degradation. This isn’t the end of the world as databases can be tuned for performance, but there is a simple and logical way of managing data for optimal performance. This is where sharding comes into play.

Sharding, in XC9, is the logical partitioning of entities and lists into separate tables, to isolate and manage data growth for improved performance and data maintenance.

Sharding is managed via the ListShardingPolicy and EntityShardingPolicy policies in the Plugin.SQL.Sharding.PolicySet-x.y.z.json.
Each policy specifies the properties, RegularExpression and (database) TableName, which the Commerce Engine utilises to identify where the entity/list should be read from and stored to. When a list/entity is not matched to one of these policies regular expressions, it defaults to the CommerceEntities/CommerceLists tables.

When is Sharding  Required?

Just because a new entity is introduced in your project, this doesn’t automatically mean that a new shard has to be implemented. Instead consider how this new entity will be utilised over time. If there is an expectation that over time this data will grow considerably where it should be housed separately, then sharding would be a good idea. However, if the data stored for this new entity is expected to be kept to a low volume, leaving the data in the default tables would be fine.

What is the Purpose of Sharding in the Commerce Global Database?

Simple answer. There is no purpose at this time. The script to create the databases was reusable and created the same structure. Only the CommerceEntities and CommerceLists tables are utilised for the Global database and I suspect this may be cleaned up in a future release.

How to Implement Custom Sharding

Creating Policies in the Commerce Engine

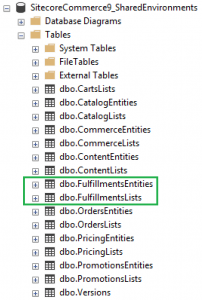
The following code snippet is a sample of a shard I am creating for a side-project for fulfillments.

{
    "$type": "Sitecore.Commerce.Plugin.SQL.ListShardingPolicy, Sitecore.Commerce.Plugin.SQL",
    "RegularExpression": "^List-Fulfillment.*?$",
    "TableName": "FulfillmentsLists"
},
{
    "$type": "Sitecore.Commerce.Plugin.SQL.ListShardingPolicy, Sitecore.Commerce.Plugin.SQL",
    "RegularExpression": "^List-DeletedFulfillmentsIndex-.*?$",
    "TableName": "FulfillmentsLists"
},
{
    "$type": "Sitecore.Commerce.Plugin.SQL.EntityShardingPolicy, Sitecore.Commerce.Plugin.SQL",
    "RegularExpression": "Entity-Fulfillment.*?$",
    "TableName": "FulfillmentsEntities"
},
{
    "$type": "Sitecore.Commerce.Plugin.SQL.EntityShardingPolicy, Sitecore.Commerce.Plugin.SQL",
    "RegularExpression": "Fulfillment-.*?$",
    "TableName": "FulfillmentsEntities"
}

Important note: Where sharding will be altered for a project, it is best to identify and implement it prior to development to avoid having to migrate data from its existing database table.

Creating a Database Table Shard

Database tables are based on either the entity table, or the list table definition. To create a new table shard, follow the process below for both table types.

In SQL Server Management Studio:-

  1. Right-clicking an existing table
  2. Selecting Script Table as > CREATE To > New Query Editor Window
  3. Updating the table name as appropriate, e.g.  [dbo].[<MyEntityType>Entities]
  4. For entity tables, update the constraint name as well, e.g. [PK_<MyEntityType>Entities]
  5. Execute the script


Safely Removing the Commerce Engine Default Storefront

Reading Time: 2 minutesIn this article, we will go through the few configuration updates required to remove the Commerce Engine Default Storefront completely. Without these updates the website and Business Tools will throw errors, such as “InvalidShop” – “Shop ‘CommerceEngineDefaultStorefront’ does not exist.”

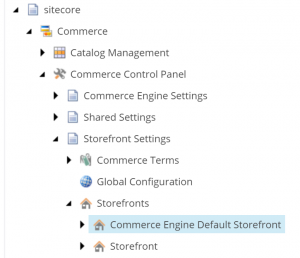
Once we have created our replacement storefront, e.g. Storefront (above), we take the Item Name and update the configurations in the following places:-

  1. <Website Root>\App_Config\Include\Y.Commerce.Engine\Sitecore.Commerce.Engine.Connect.config at configuration > sitecore > commerceEngineConfiguration > defaultShopName
    In following development best practices, we don’t want to modify this configuration file directly. Instead, we create a patch file in our project.
  2. <Sitecore BixFx Root>\assets\config.json under ShopName
  3. In Postman’s environment configuration under ShopName

Once the above configurations have been updated to the desired storefront, the Commerce Engine Default Storefront storefront can be deleted.

Troubleshooting Changes to BixFx config.json in Chrome

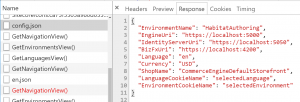
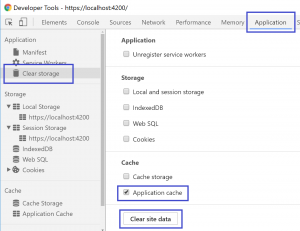
In making changes to the BizFx configuration, if the Business Tools gets hung with loader displaying, check the Networking tab of the Developer Tools for the config.json to see if the request is coming from disk cache.

To resolve this:-

  1. Go to Application > Clear Storage
  2. Only the Cache > Application cache needs to be checked
  3. Clear site data
  4. Reload the page

We can now see the response for config.json has our updated ShopName.

Setting Currency Set for Catalog Product List Prices

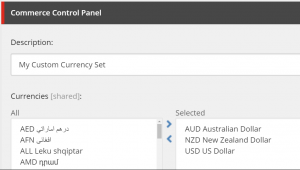
Reading Time: < 1 minuteIn this article we go through the process of configuring the Currency Set that will be utilised when adding and editing the List Pricing properties of Sellable Items in the Merchandising Manager.

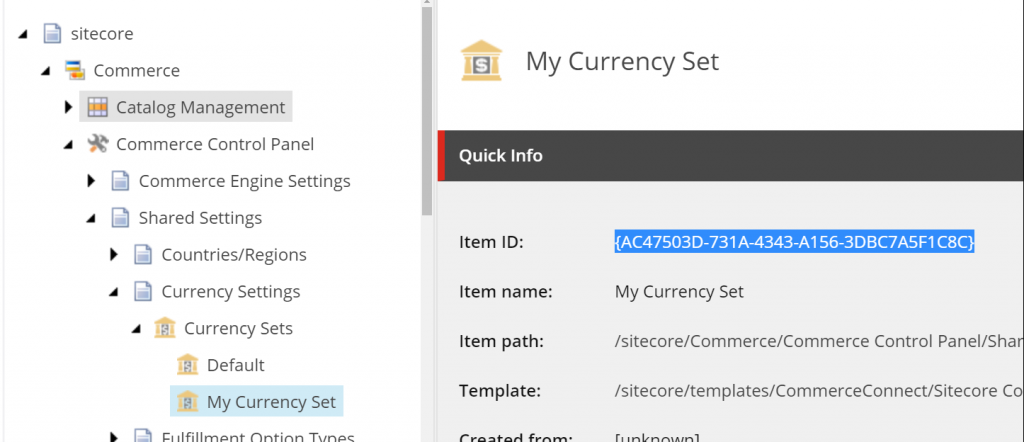
  1. In the Sitecore Content Editor, Go to /sitecore/Commerce/Commerce Control Panel/Shared Settings/Currency Settings/Currency Sets/.
  2. Copy the Item ID of the desired currency set. In the example below, I have created My Currency Set, which I will be using for this example.

  3. In the Commerce Authoring Environment configuration file (e.g. Habitat.CommerceAuthoring.json), locate the GlobalCurrencyPolicy and update the DefaultCurrencySet to the currency set’s Item ID.
    {
        "$type": "Sitecore.Commerce.Core.GlobalCurrencyPolicy, Sitecore.Commerce.Core",
        "DefaultCurrencySet": "AC47503D-731A-4343-A156-3DBC7A5F1C8C"
    }
  4. Run the Bootstrap() command of the Commerce Engine.
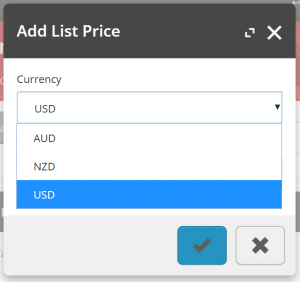
  5. Confirm against any Sellable Item in the Merchandising Manager by clicking on the Add or Edit List Price actions.